Urban Boat Project
The “UB1000”
|
Date of last update: Oct, 2023.
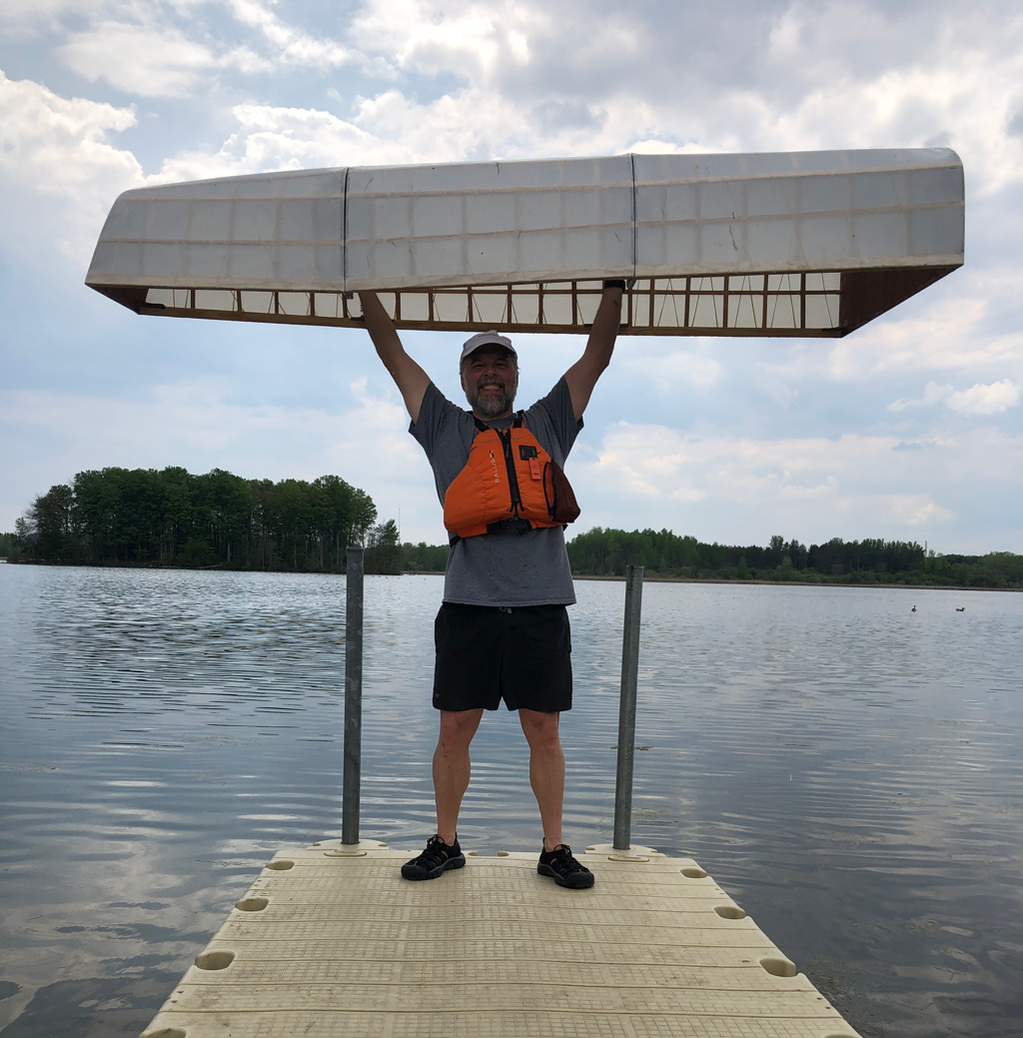
Please slide to bottom for new updates or click the menu above to jump to my canoe page. Hi there! My name is Matt Morris in Waterloo, Ontario. Welcome to my one page website that takes you on a journey of discovery as I design and build a unique 36lb Skin-on-frame (SOF) rowboat. I believe it to be the world's first three part, nesting, skin-on-frame boat. I call it the UB1000 as it's the first version of my Urban Boat. It was a very challenging and fun project and I'm excited to share it with you. I'll show you what inspired the project, how I made key choices, the entire build process and final evaluation/next steps. I've also included some important safety information at the end of this page. Make sure you review it. I invite you to review my other social media sites:
Instagram: Snowbankproductions Twitter: Matthew_morris YouTube: mattdjmorris |

|
|
|
|
1. The Spark
|
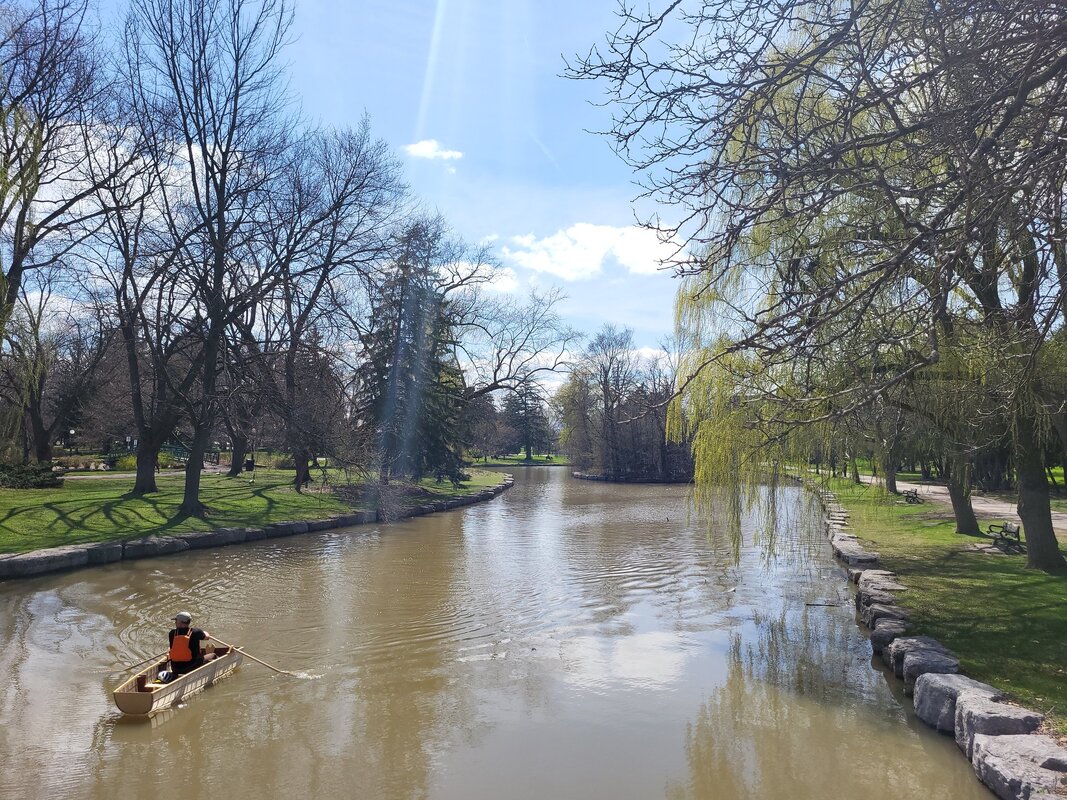
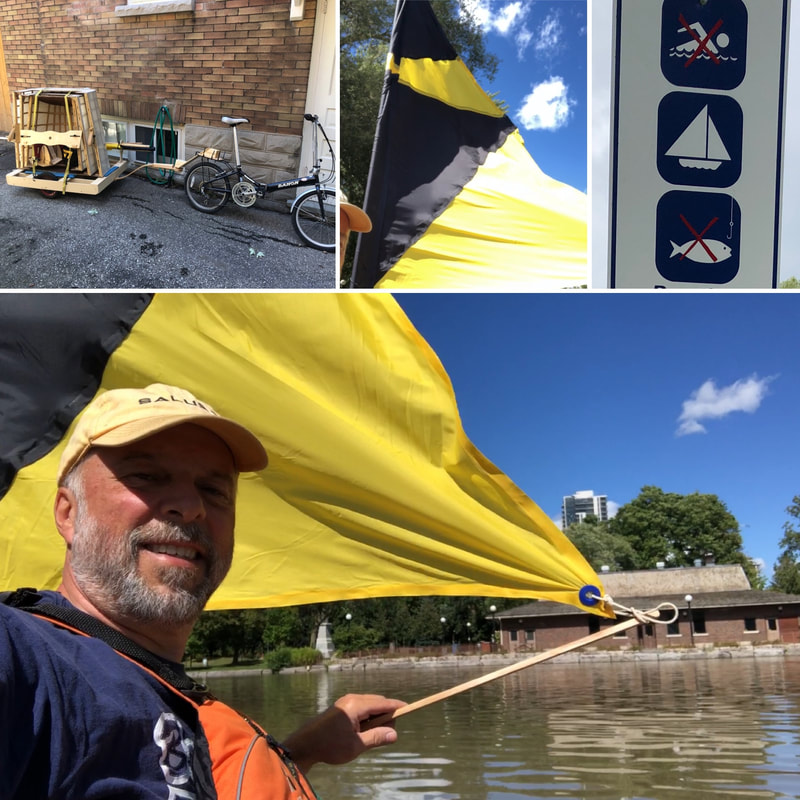
The spark for my urban boat project was a little sign I happened to see beside a little lake in the middle of Victoria Park in the city of Kitchener, Ontario.
It seemed to be telling me that boating was allowed in this urban body of water. So I checked with the city and confirmed that yes, boating was supported. I was mildly intrigued by the opportunity but filed the idea away. But each time I was in the area, this little sign kept proudly showing itself and I started to dream of building a boat that I could transport behind my bicycle down an urban bike trail (called the Iron Horse Trail) from my home in Waterloo. But still, I did not act. |

|
My urban boat idea became a real project when the City of Waterloo made an announcement. Like Kitchener, Waterloo also has an urban lake—in their Uptown core. And it was determined that the small lake, called Silver Lake, was silted up and in need of remediation. The final plan presented to the public included a boat launch! As I live a few blocks from this lake, I was intrigued at the possibility of using this new and improved lake as a place for a little paddle or sail. So now I had two urban lakes calling me to action!
2. Options
|
I started to look at options. My wife and I had been enjoying the use of 17’ sea kayaks for years but I deemed these too heavy and not appropriate for this project. I then began a careful review of every small boat on the market. I quickly realised that the skin-on-frame (SOF) approach would produce a very lightweight boat. As my plan progressed, I started to study SOF technique and what boats could meet my goals. I also thought about Silver Lake in particular. It is small and would not have waves of any size. The plan called for deepening the lake and ringing it in armour rock—just like Kitchener had done a few years previously. I also communicated with the lead engineer for the Waterloo lake remediation and confirmed that boating would be allowed--but the boat launch would be a later addition. But she supported me enjoying the lake if I could find a place to launch the boat safely once construction was completed. But first I needed a boat!
|
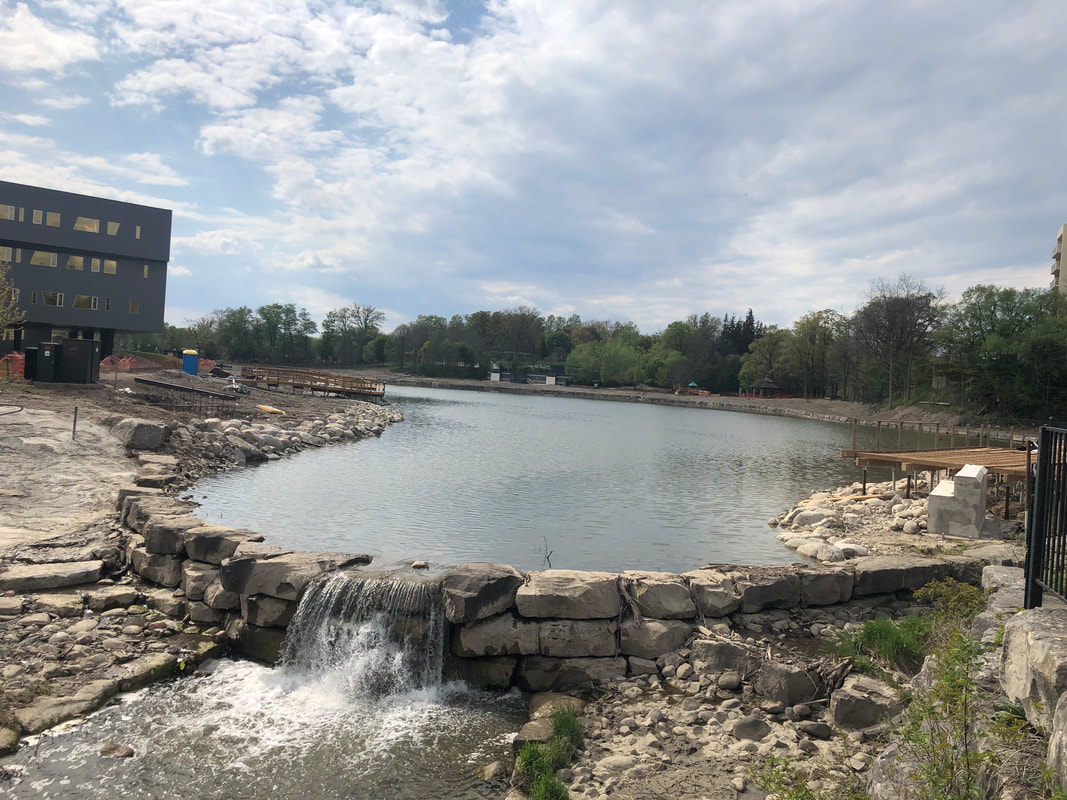
Soon a bridge would be built across the waterfall as part of the remediation.
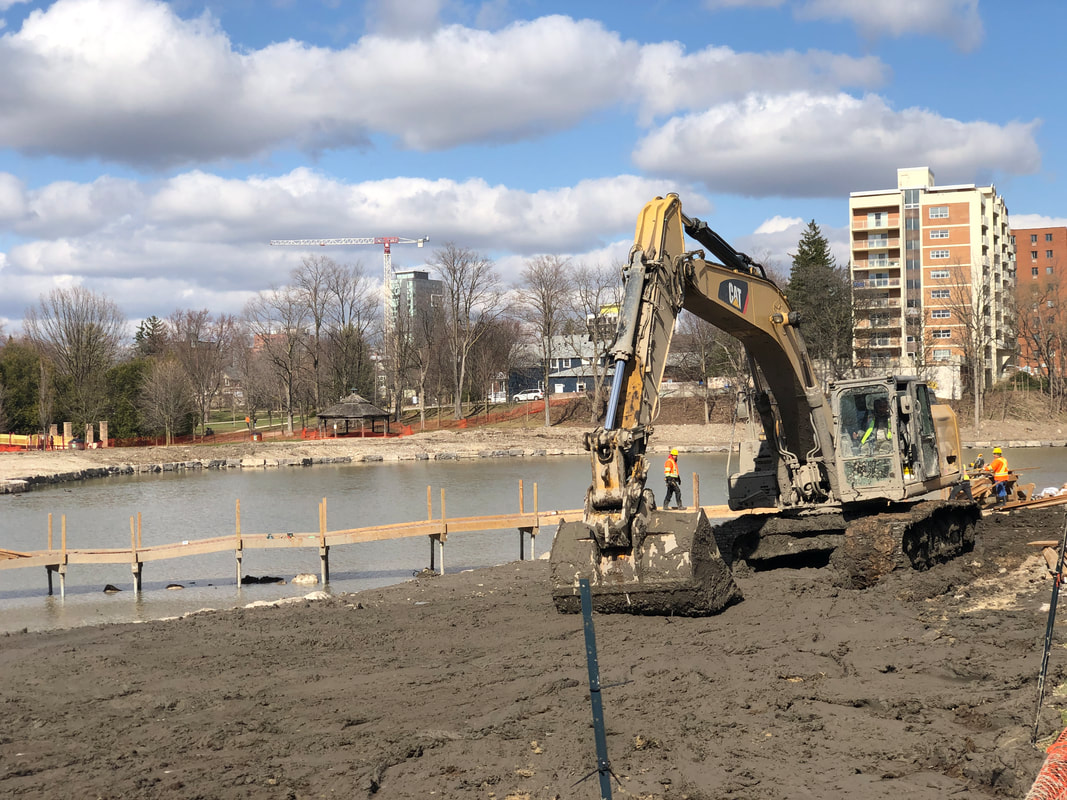
Work was progressing on Silver Lake in Waterloo, Ontario.
|
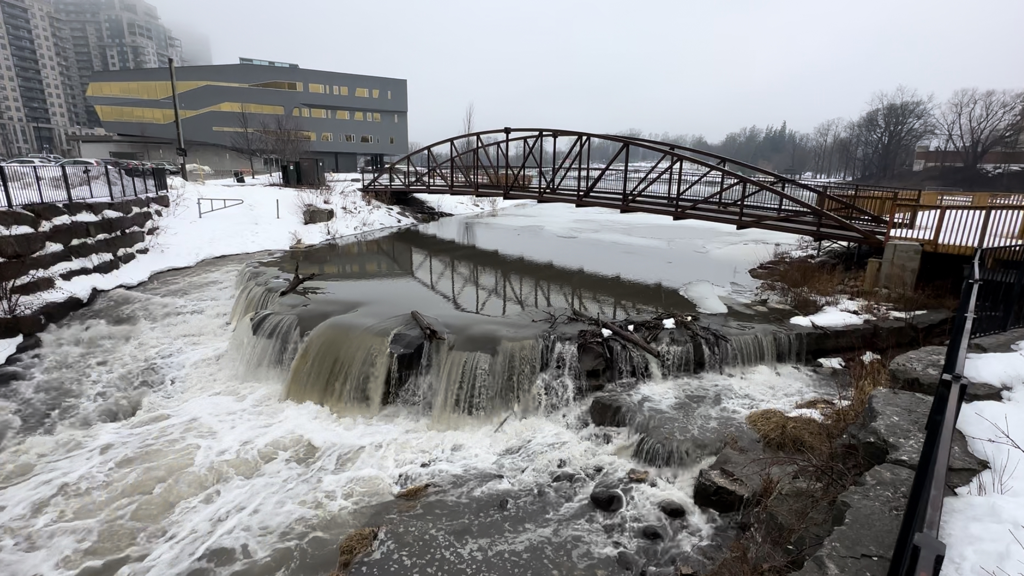
March, 2023 and the bridge awaits opening for the first time.
3. The Plan
|
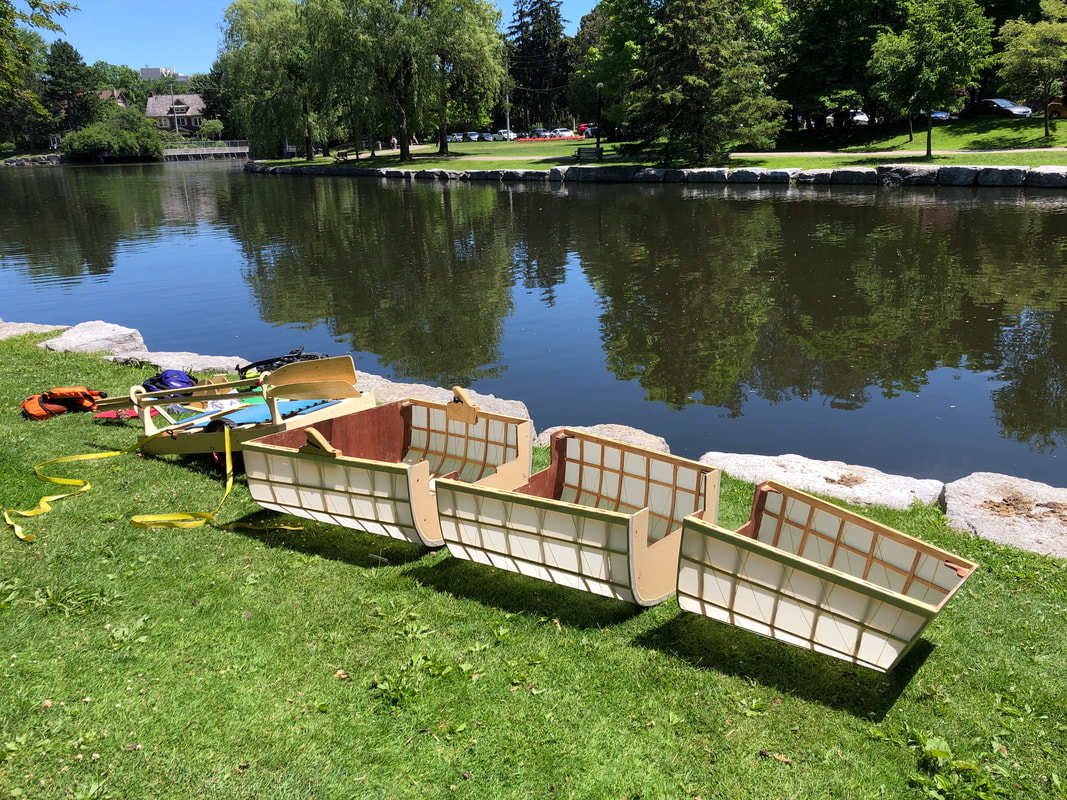
My research led me to the consideration of a kit for making a two part rowboat. In the end though I thought it would be more fun to make a three part original design that would nest together beautifully. I wanted it to be towable behind my folding bicycle but also fit in our vehicle. The nesting requirement, given three pieces, became a challenge but a breakthrough came after I saw a very old asian river boat design used to transport people and products on a river. I started roughing out designs on paper and eventually used graph paper to ensure the nesting would work. I also learned about important design concepts including: sheer, rocker, primary and secondary stability. I even had to study oar lock design. In the end I decided to keep it simple with zero sheer meaning the top edge of the boat would be a straight line with no curve up at the front. The rocker equated to the bottom edge (keel) of the boat. I put a bit of rocker towards the back and a bit more at the front hoping to avoid the front edge plowing through the water.
|
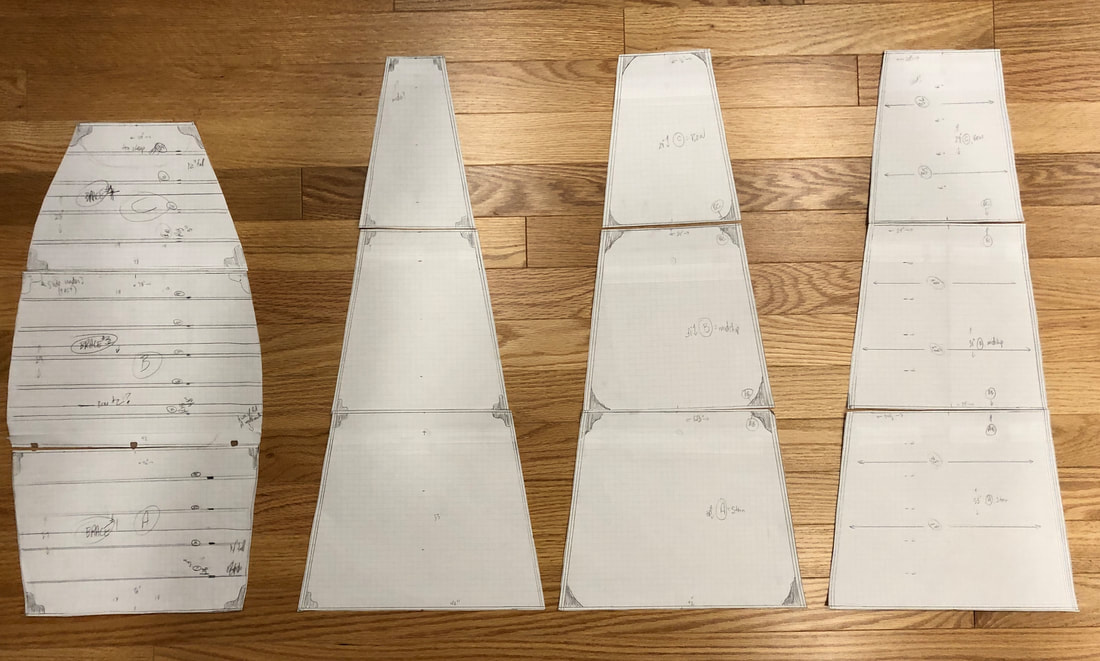
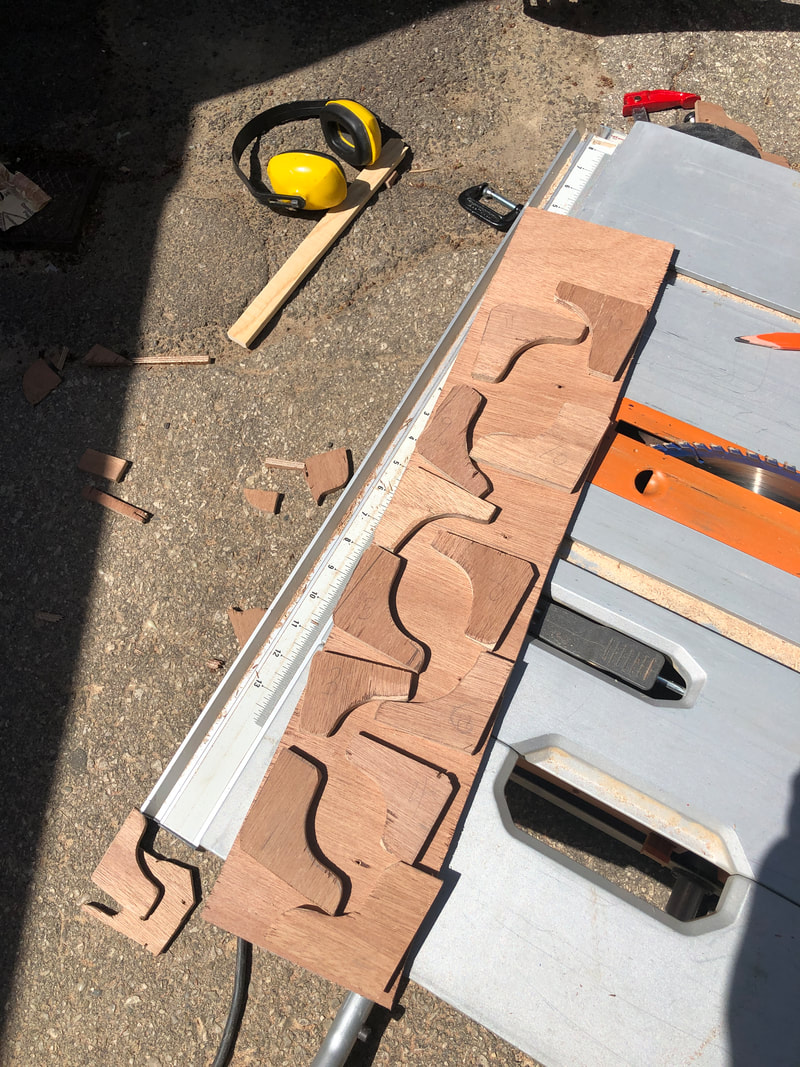
I started with a more traditional shape but eventually played with three versions of a triangle.The right most shape became the final design.
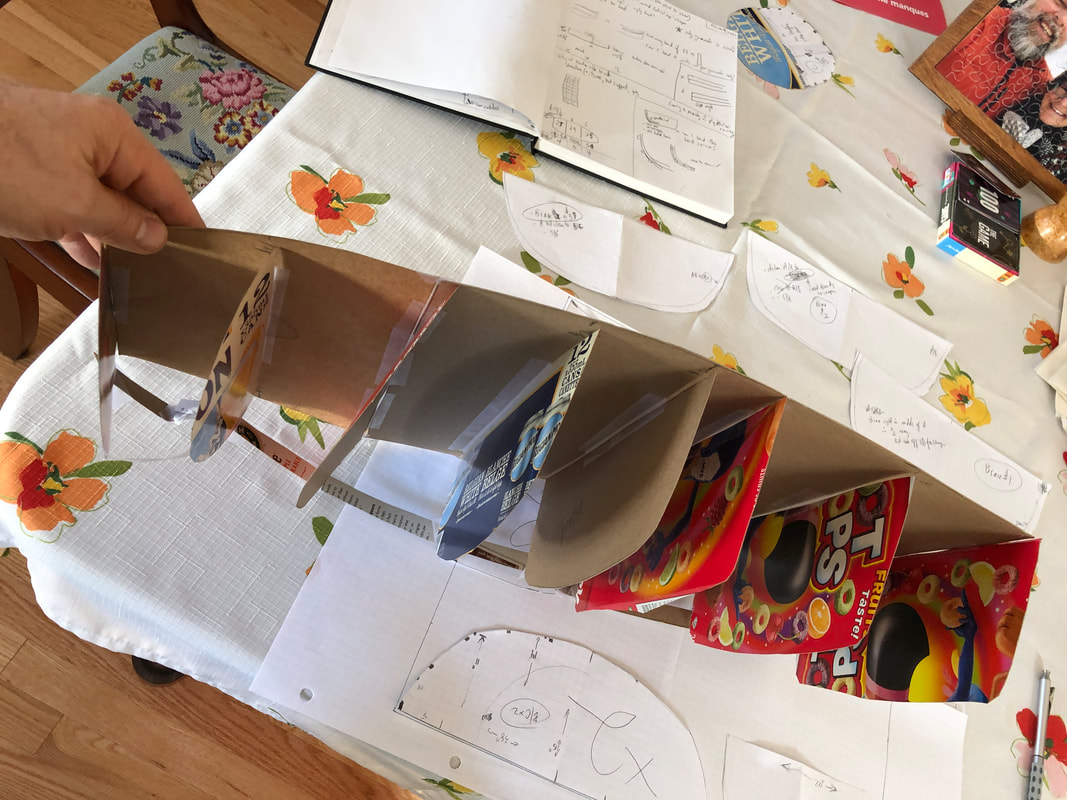
Old cereal boxes were perfect to mock together what the boat could look like prior to plan committment. It’s hard to believe we bought Froot Loops but there it is. ?
|
4. Soaking kiln dried ash
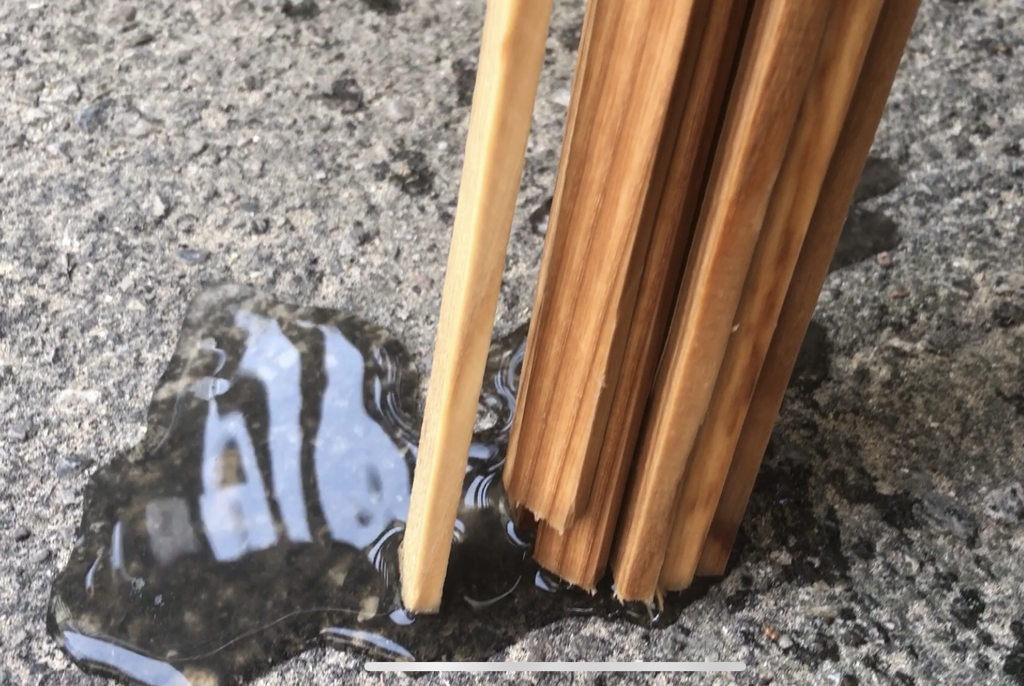
I also studied wood choice and decided that green (not kiln-dried) ash would be best although impossible to source. So I purchased some very straight grained kiln-dried ash from Exotic Woods in Burlington, Ontario. Later I would rip it on my table saw with a thin kirf blade and then soak it for a week in our cistern prior to steaming.
5. Skin and coating choice
|
For the skin portion of the boat, I decided on 9oz dacron which is a marketing name for polyester cloth. For many years, 3.7oz dacron has been used in SOF boat and airplane construction. This heavier grade dacron sounded like it would be tougher. I purchased this from Aerolite Boats as I watched every video owner Larry Lalonde produced for YouTube. Great work Larry!
The waterproof coating decision was more difficult. In the end I landed on an outstanding 2 part urethane product by Corey Freedman of Skinboat/Spirit Line Kayaks. What moved me to commit to the product was viewing and connecting with YouTube member Josh Richard who has some great videos on the topic. You can find him on YouTube under the name Joshua Richard. When I was applying the product, Corey Freedman even took my calls on short notice to help me get it right. With the wood soaking, and key components arriving, it was time to build. I began by translating my graph paper dimensions to some baltic birch that would form the bulkheads and quickly realised I should have used waterproof plywood. I made the important decision to readjust my approach and transferred my work to meranti waterproof plywood. I then cut out the bulkheads using a friends bandsaw and long belt sander which made the work progress quickly. I set the bulkheads up on a strongback and got ready to lay down the lengthways stringers which required no bending. Once they were epoxied into the bulkheads, using West System 105A epoxy resin, 205 Hardener, and 406 Colloidal Silica adhesive filler, it was time to bend some wood for the ribs. I had built a simple 6’ steam box out of 1 x 8 pine and placed a steamer hose into a hole to get the steam going. I attached the door using a piece of bicycle inner tube instead of a hinge and let gravity hold the door in place by cutting the opening on an angle. This saved me precious seconds during bending as I could let the door close by simply letting it drop into place while I was already bending and placing wood. 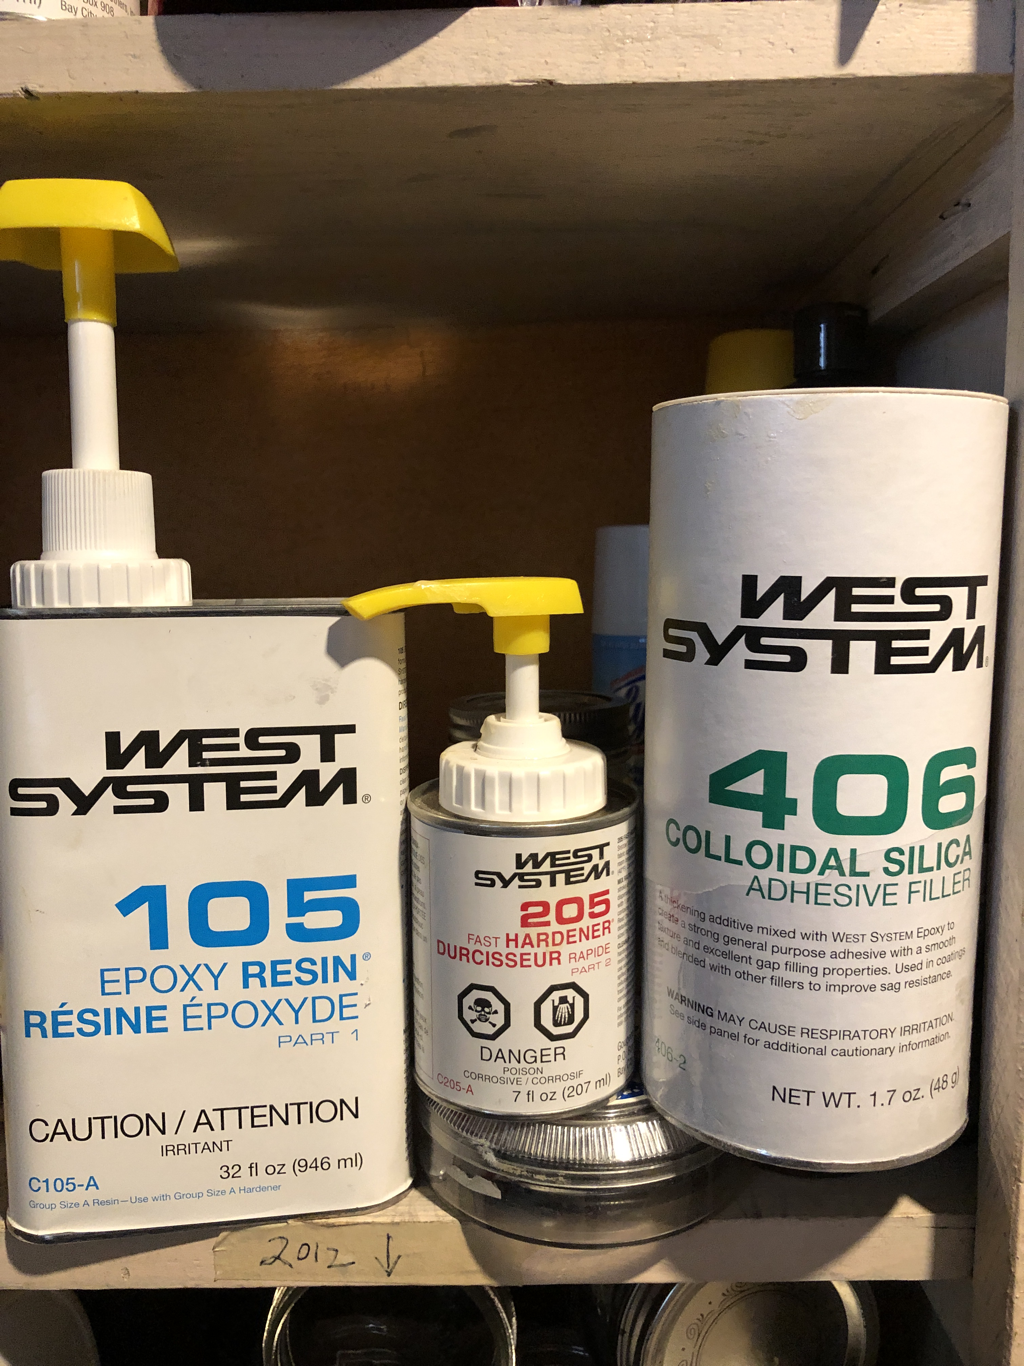
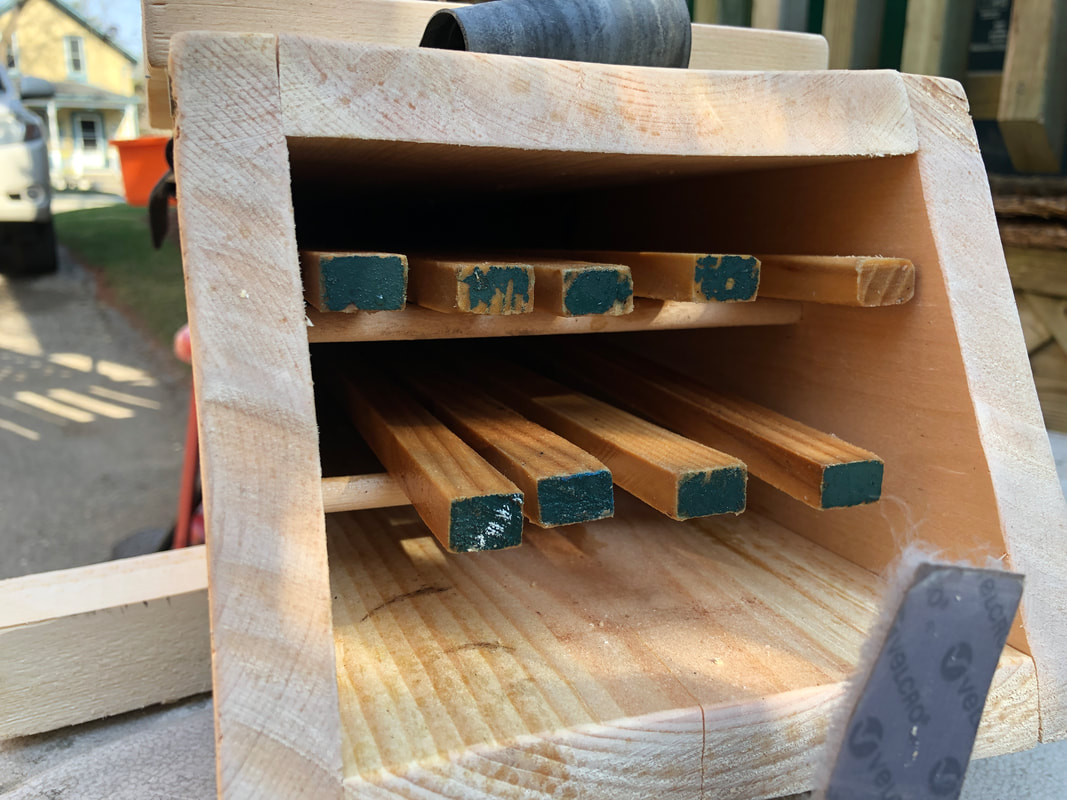
The steamer was simply 4 pieces of pine screwed togther--no glue. 6' long and 8" wide each. Two rows of dowels inserted through holes provide two trays for the wood to sit on.
|
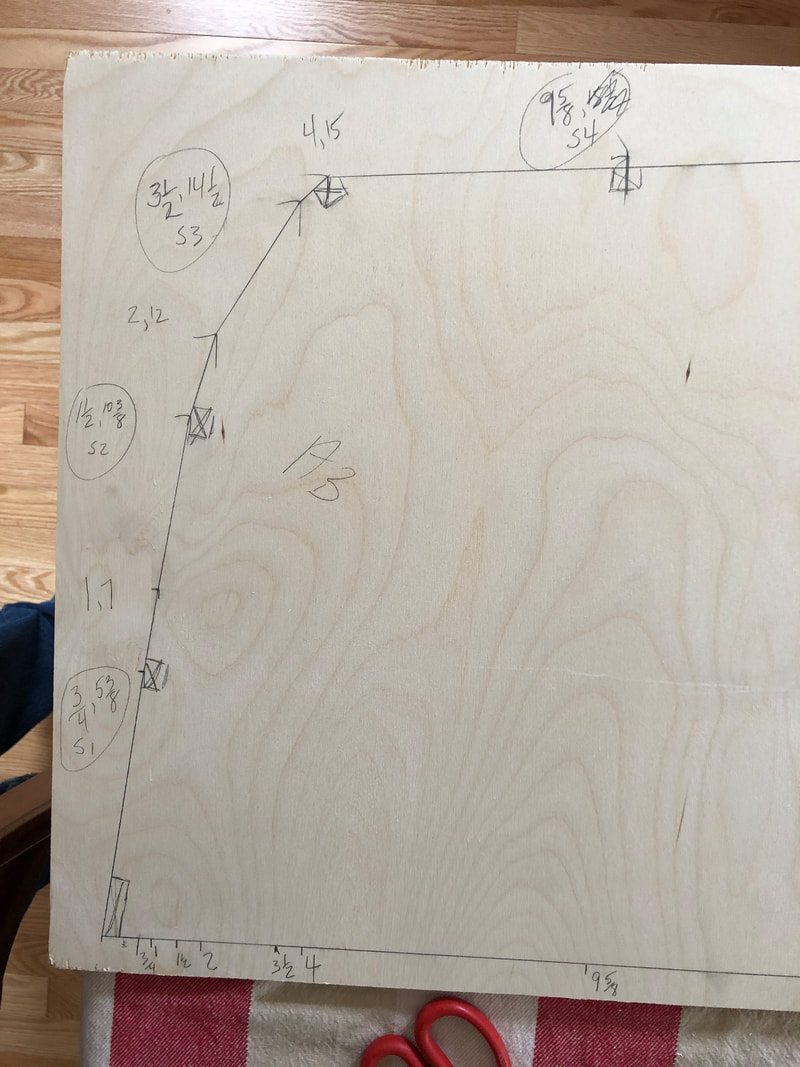
Initial layout on the wrong wood!
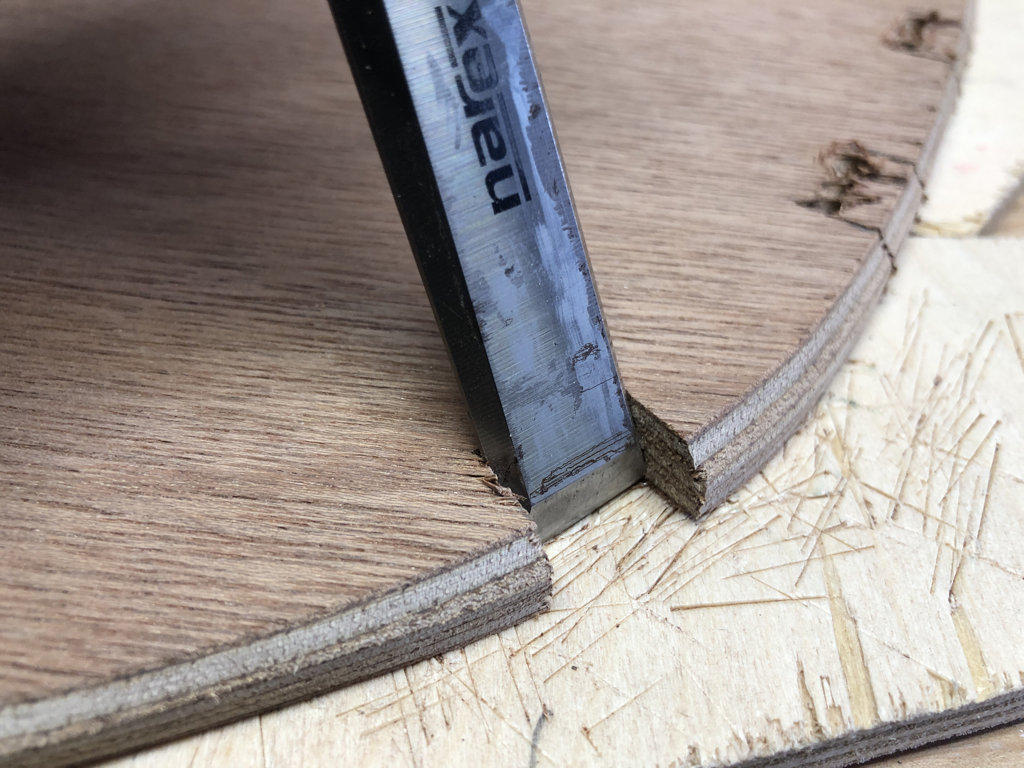
Sharp chisels are key.
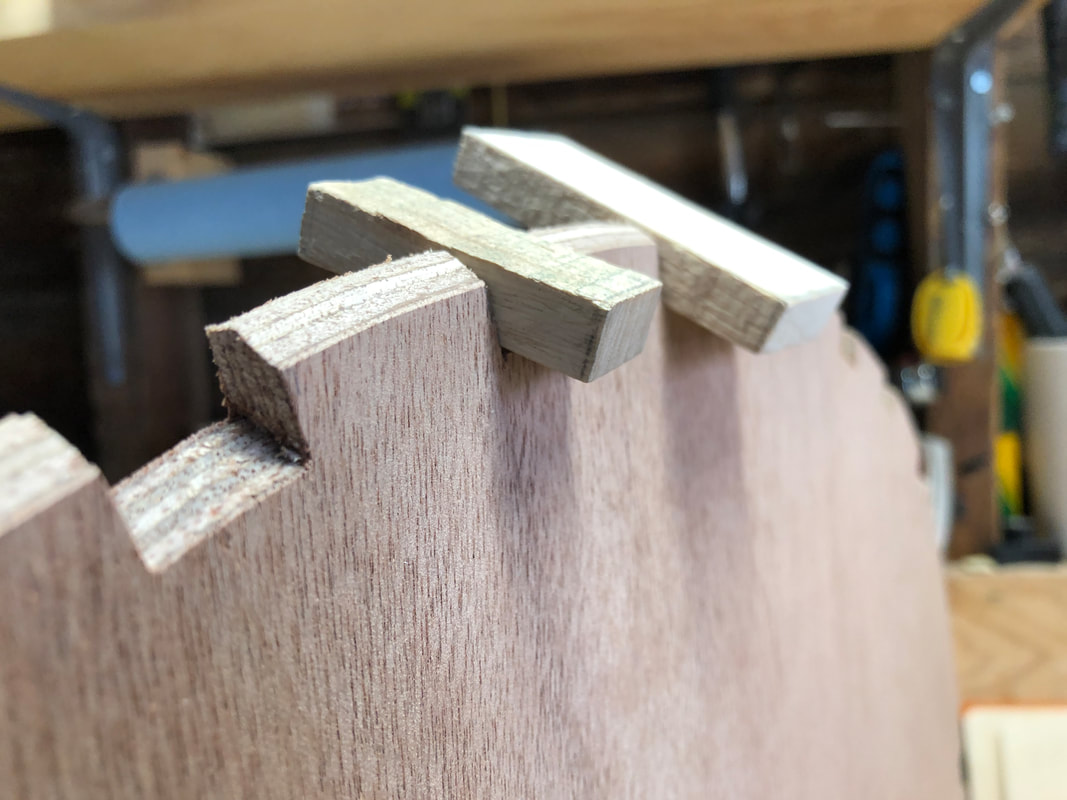
Test fitting where the stringers will join the bulkheads.
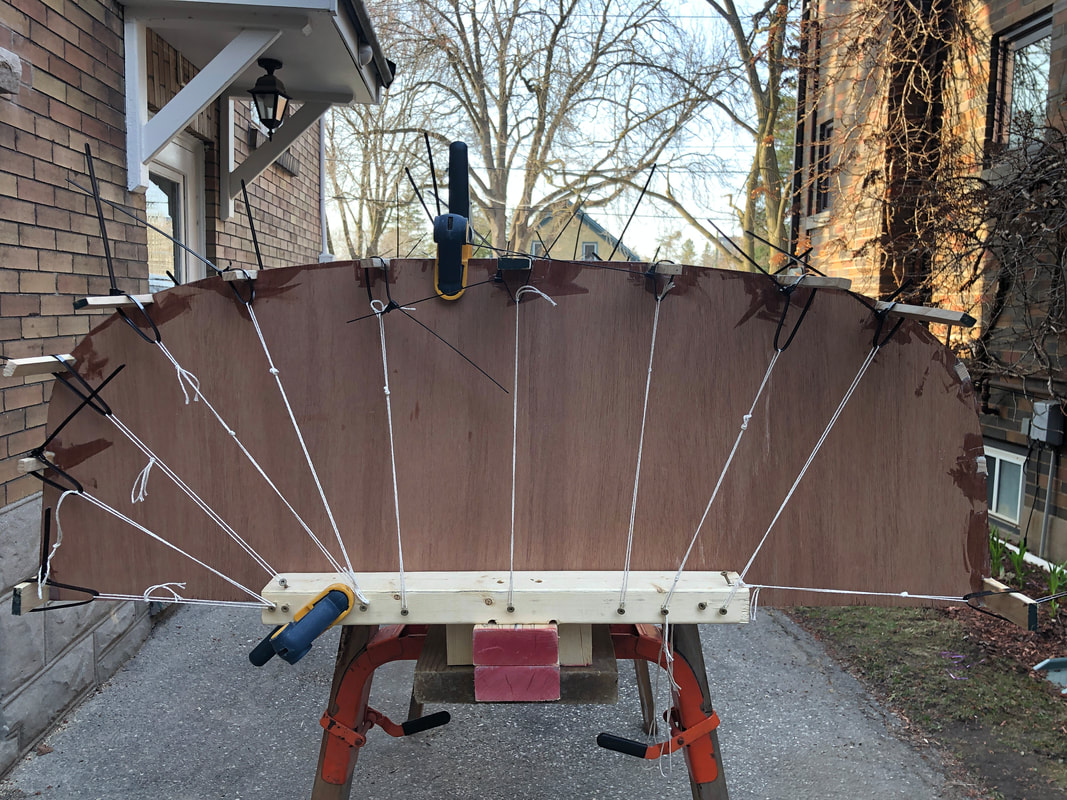
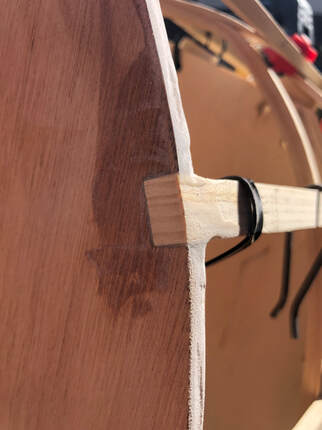
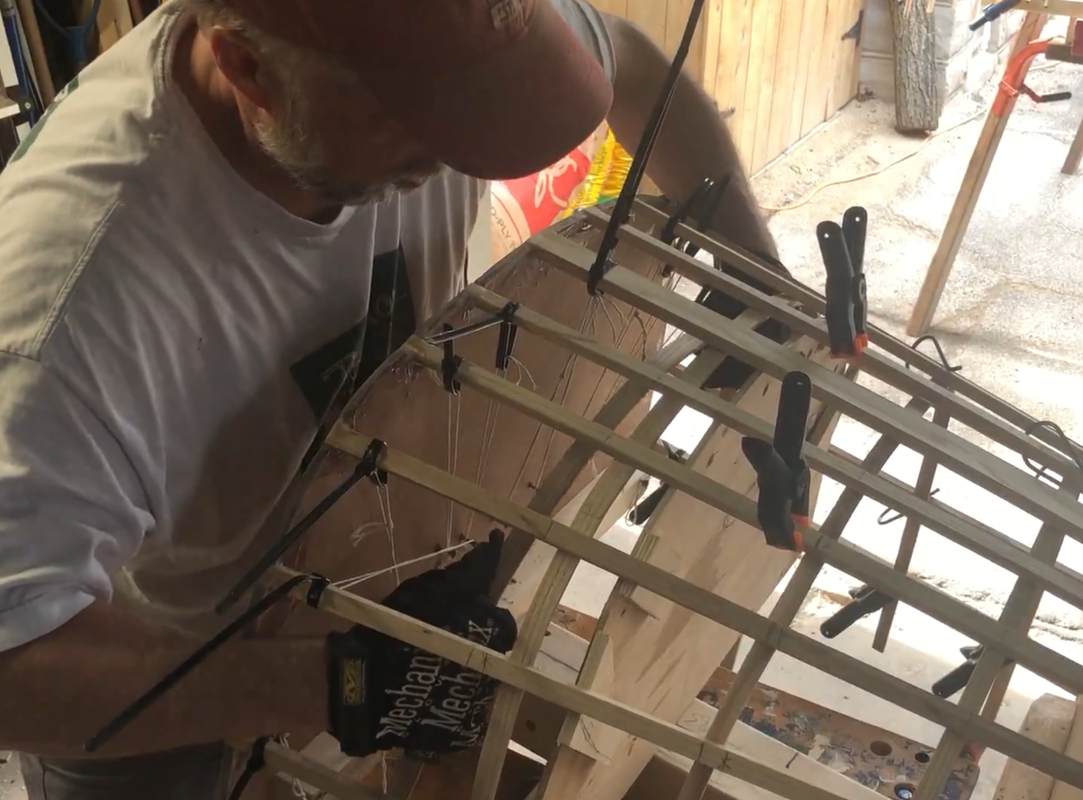
I used releasable zip ties and string to hold the stringers in place while they dried. I attached the holds to scrap wood on the strongback as I wanted to avoid screwing into the top of the bulkhead.
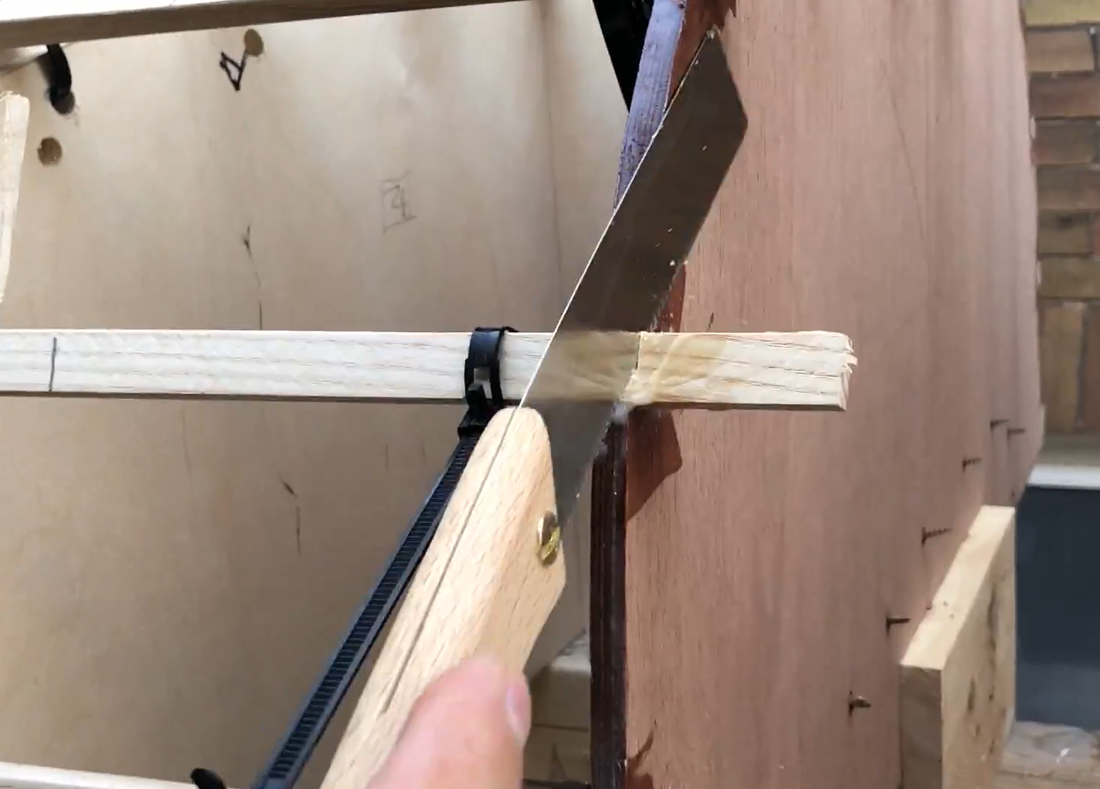
I used a fine japanese saw to cut off the extra wood from beyond each transom.
|
6. Steam bending ash
|
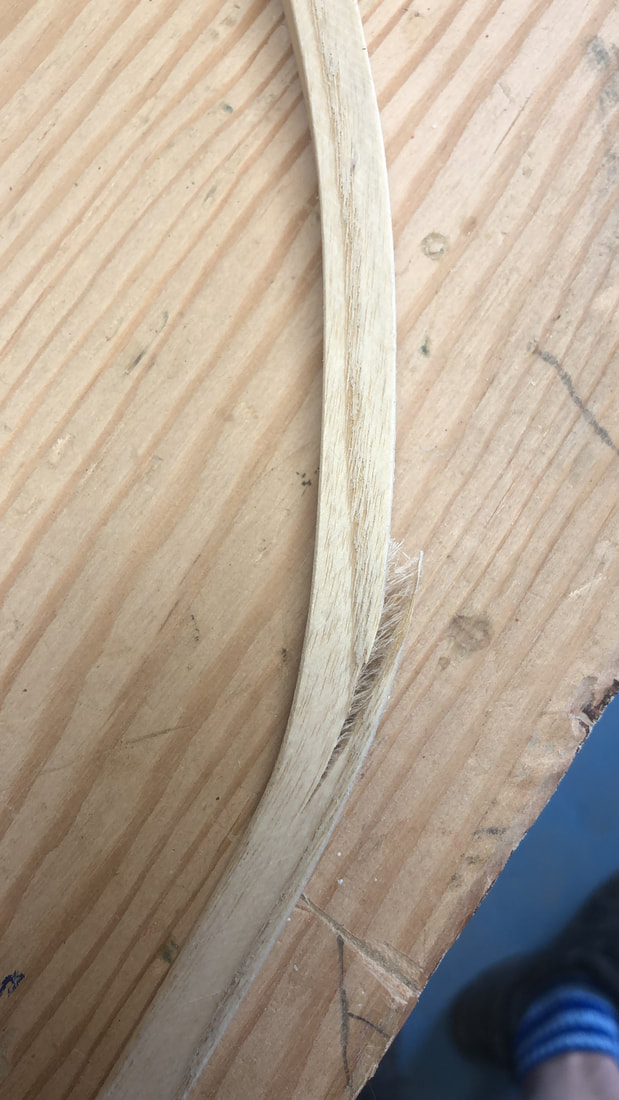
I began to bend the wood and yes, I broke a few. I slowly learned that ONLY excellent straight grained wood was worth the risk of the attempted bend. And timing could be anywhere from 10 minutes to 20 minutes. The trick became simple tests. Open the door, give it a trial bend and return it to the steam if not ready. Some have said that you can over steam wood, but I have not personally experienced this yet. I will at some point try a very long steam to see if there is such a point.
|
I pulled the soaking wood out of our cistern after one week. Next I would place the wood in the steamer.
|
7. Bending wood and epoxy
|
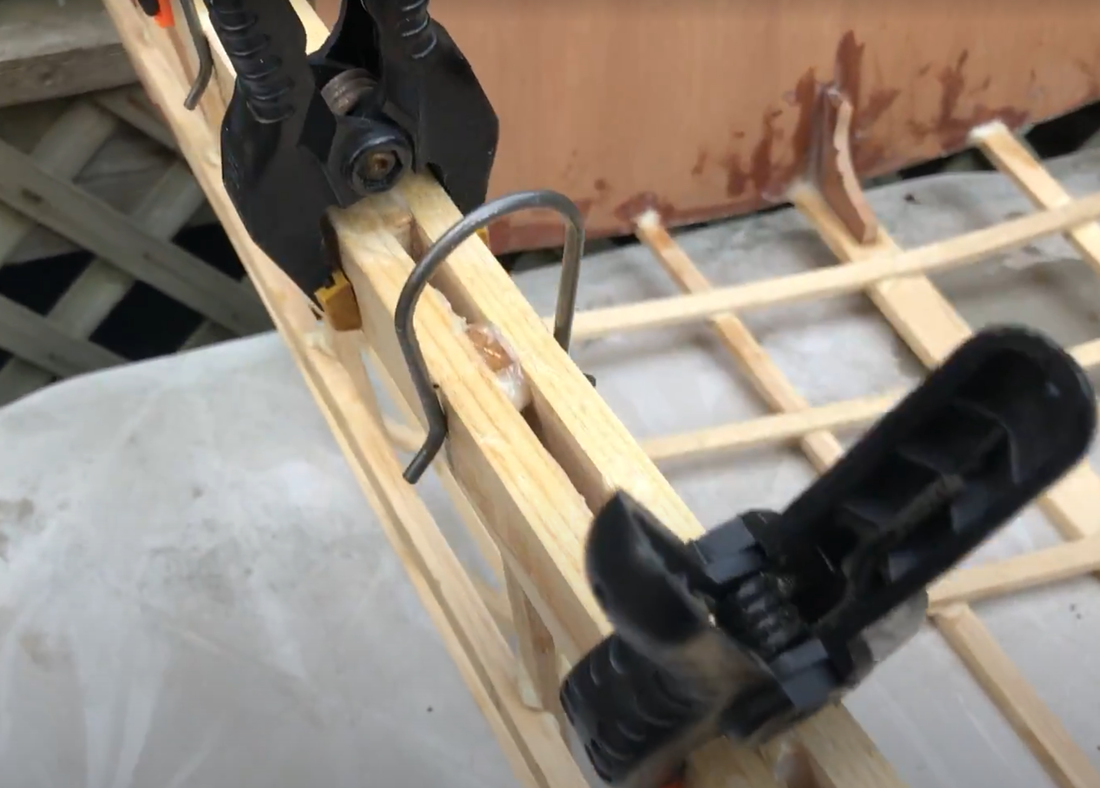
I began placing the wood in the boat while clamping it with the clamps I had or the very effective clampits from Larry Lalonde. A short video below shows the dramatic action.
After an overnight dry process, I removed all clamping devices and began epoxying the joints. I then put all the clamps in place again to hold everything stable until dry. It was cool to take off all the clamps and see the boat emerge visually. Next was the application of two coats of Corey Freedman's Amazing Tung Oil product on the ash. I released the three boat sections from the strongback and layed the boat out on the ground for a good first look. 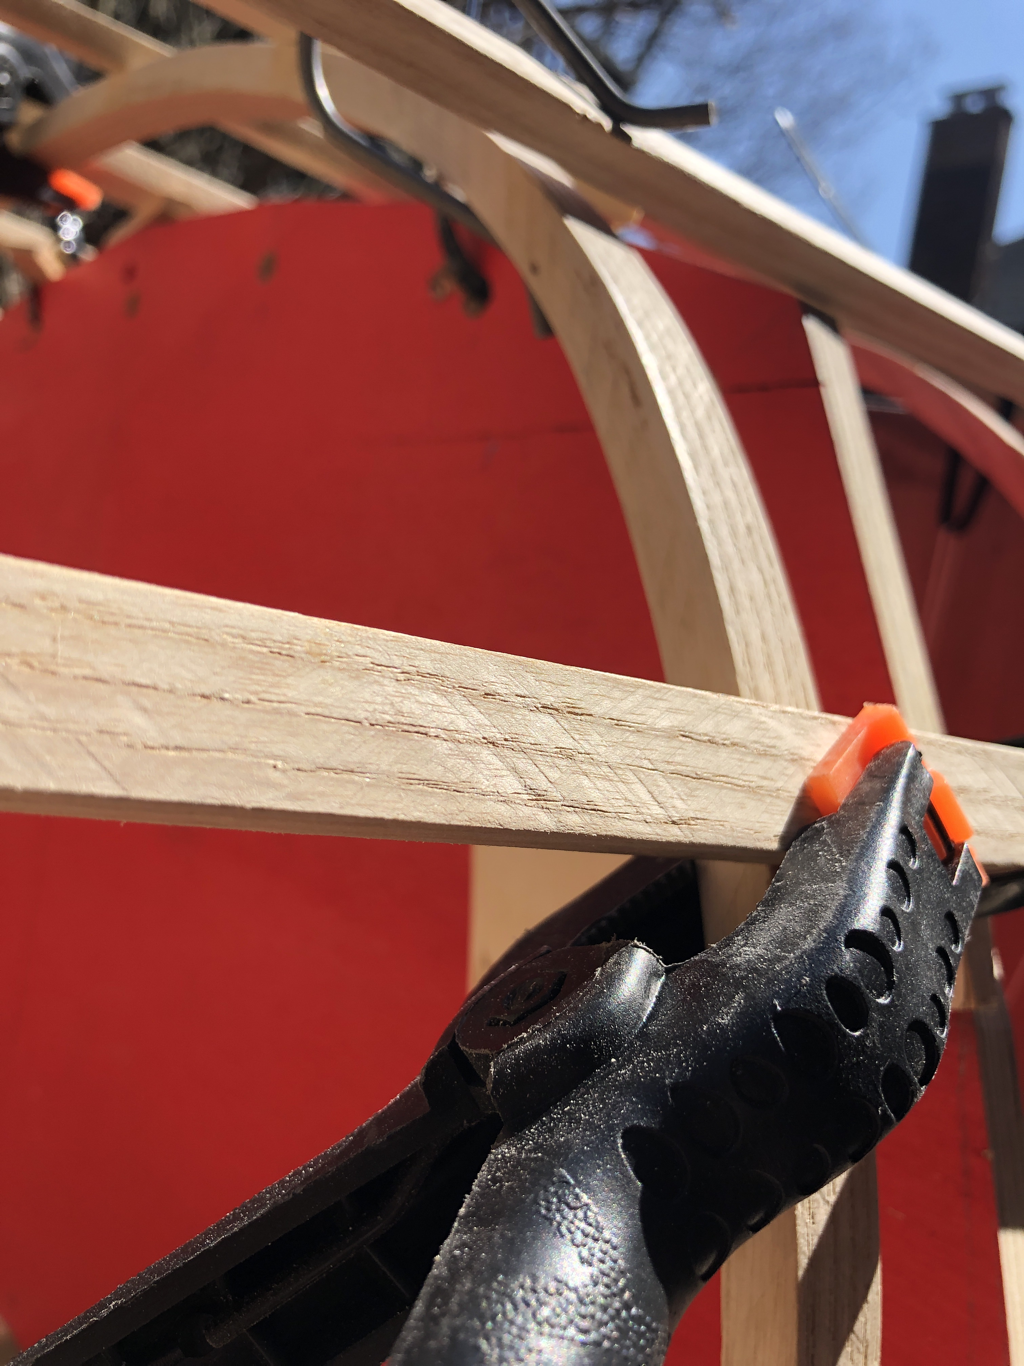
This picture shows both a traditional clamp and a Clampit in use.
|
I had less than 1 minute to get each piece of ash in place.
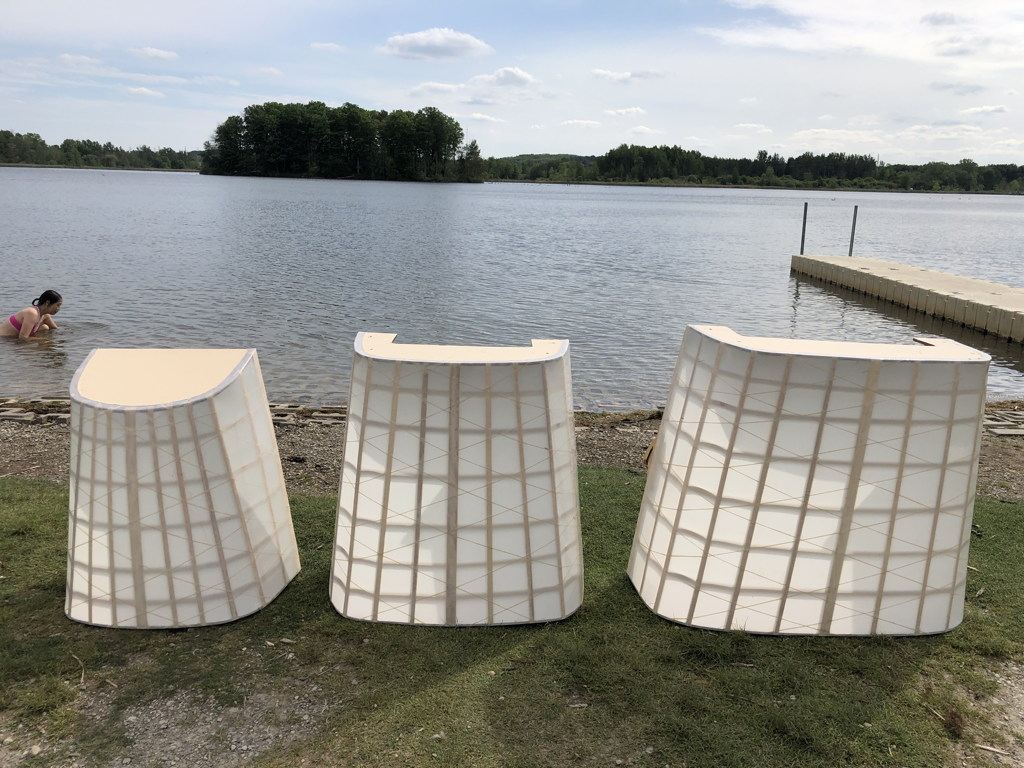
I cut corner supports out of scrap meranti waterproof plywood and used the epoxy to install them.
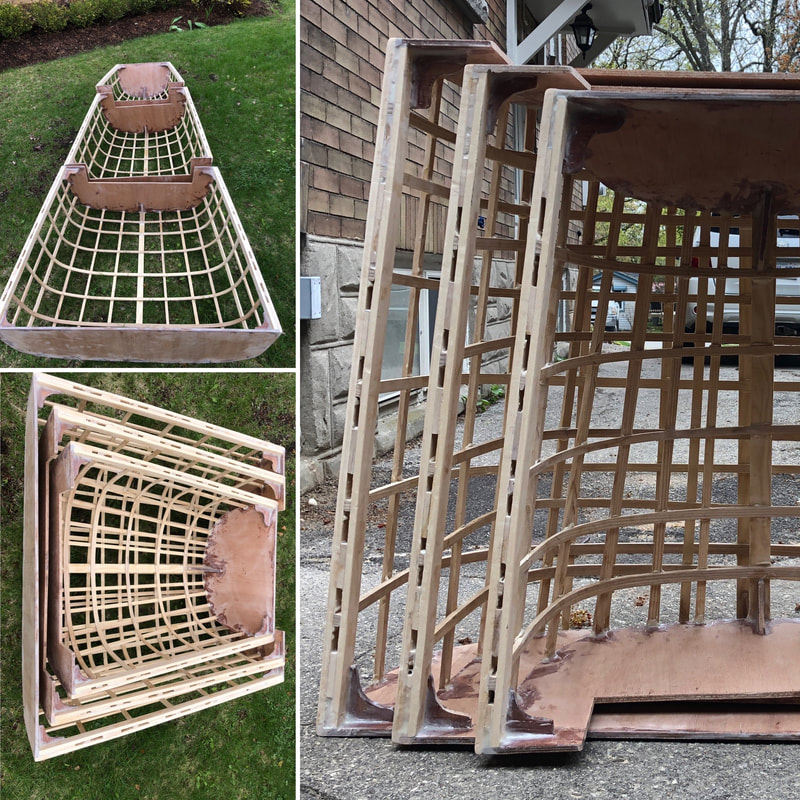
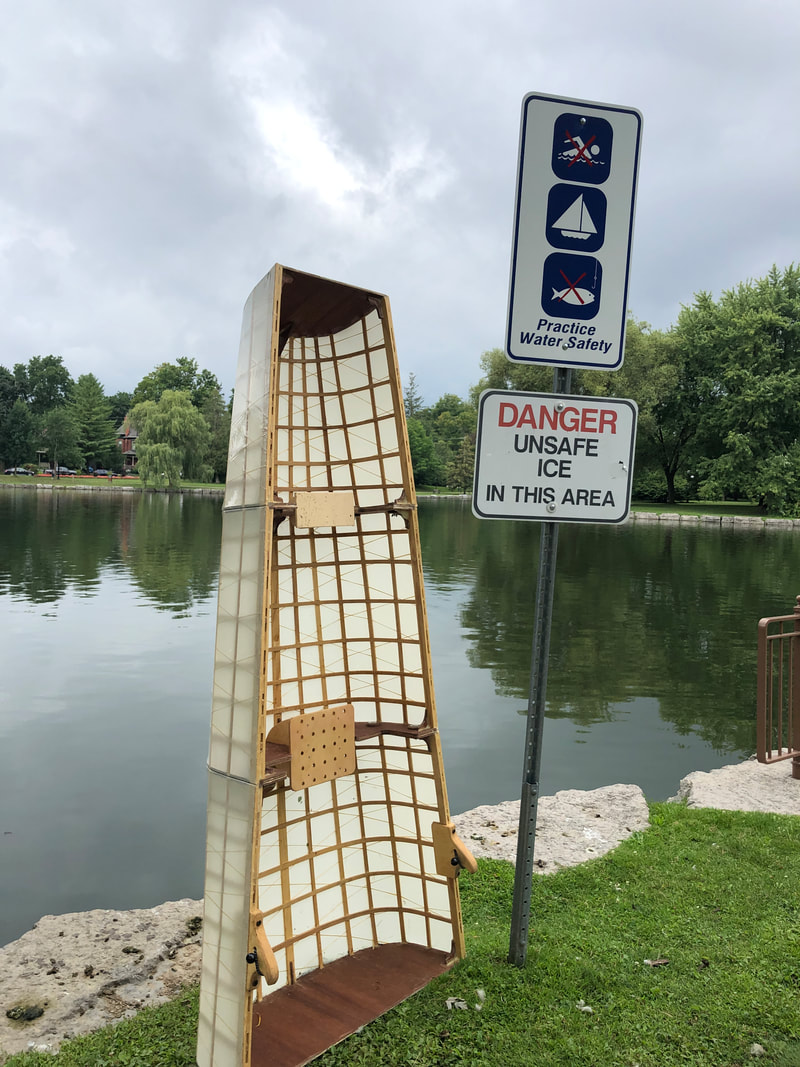
It's starting to look like a boat! And the nesting worked!
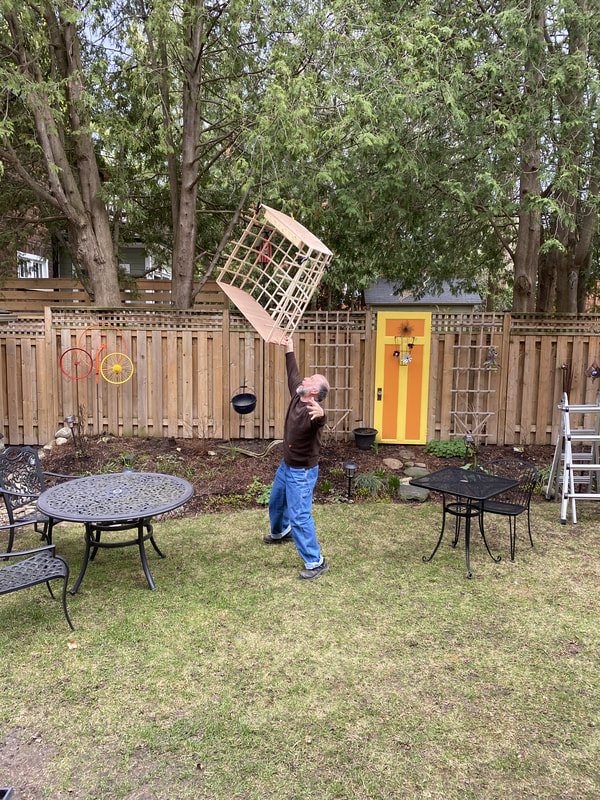
What a cool moment as the boat started to appear!
|
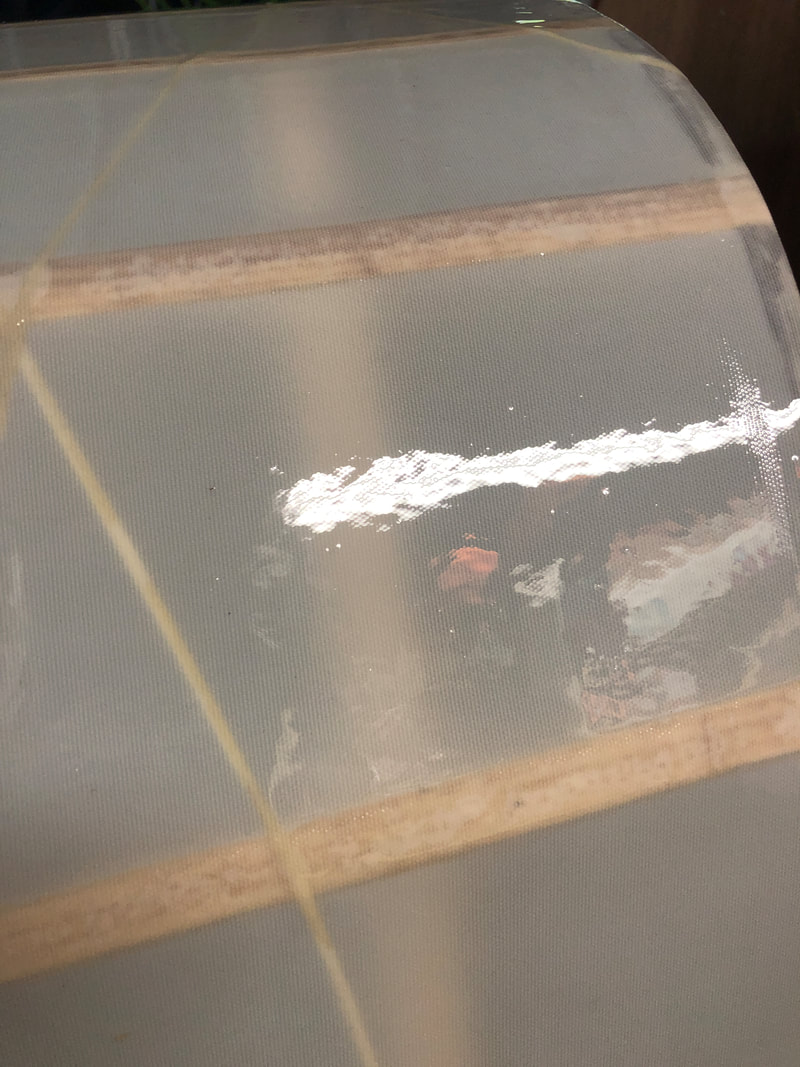
8. Kevlar rovings for strength
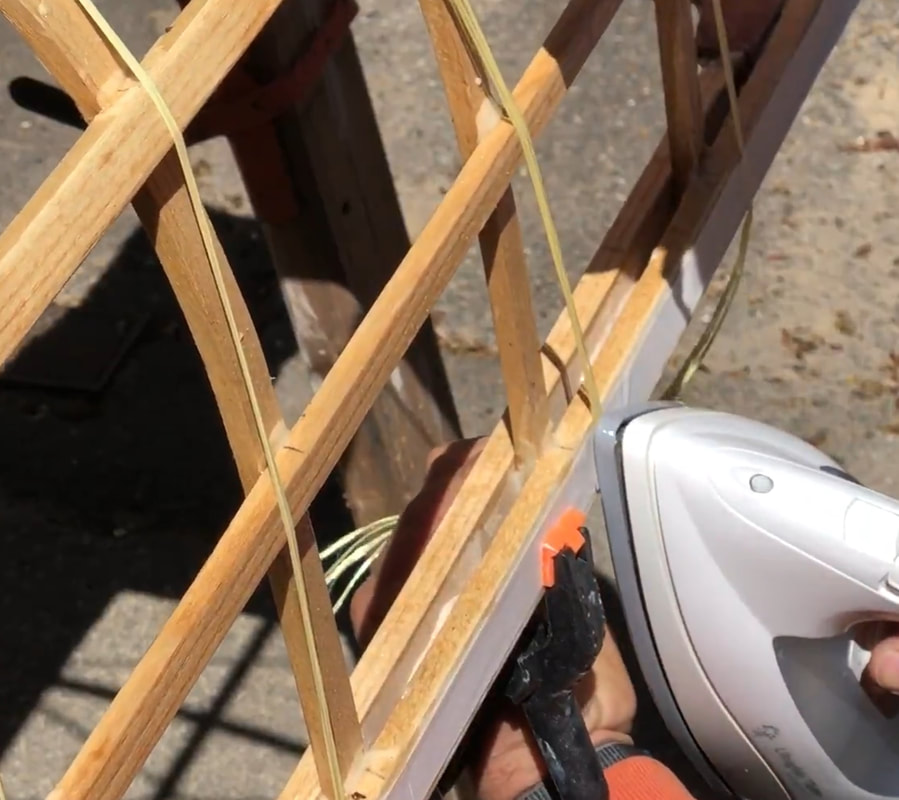
The next step was to apply the Kevlar rovings (also from Larry) to give the boat strength and support between the stringers. I say stringers and not ribs because the fabric should never touch the ribs. I am not convinced rovings are important and may test this theory in future. But I had to remain humble at this point as this was my first boat. Learning from the experience of others was a must. The 5 part rovings were attached to the gunwales using the amazing 3M Heat‘n Bond tape product. Following Larry’s advice about applying some urethane to the rovings and restretching them was clearly important to ensure they were tight.
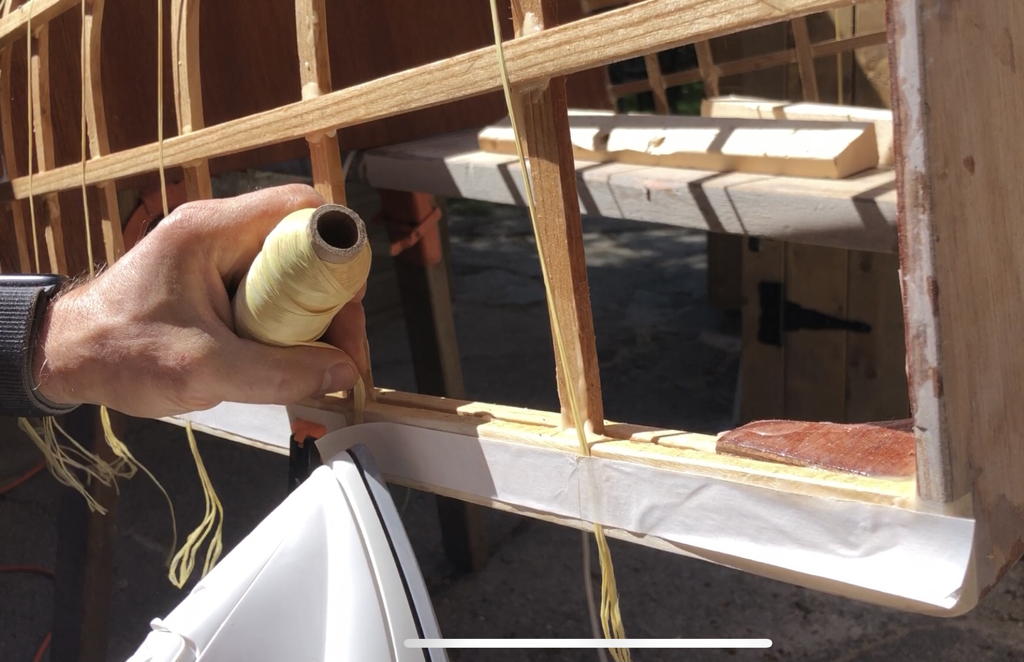
Key step: I peeled back the protective cover on the Heat'n Bond tape and placed the roving on top of the sticky tape. I then put the protective covering back in place and ironed it. The heat of the iron melted the tape and roving together. In seconds it would cool.
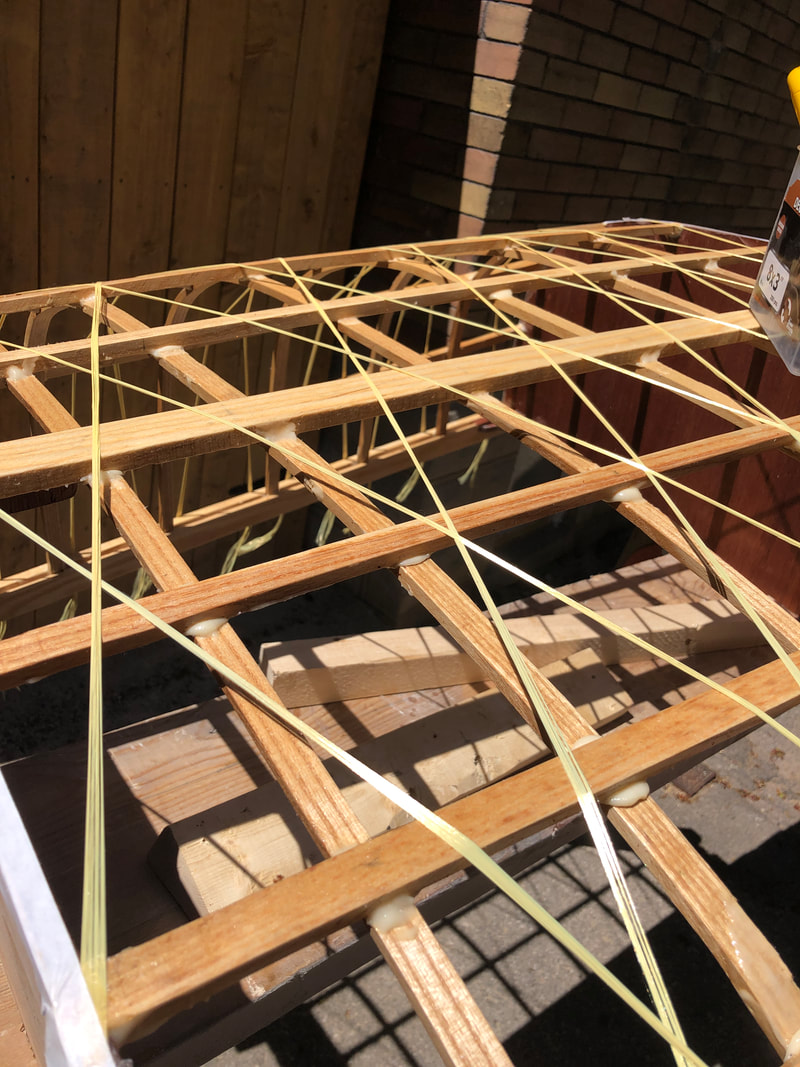
I chose the heavier 5-yarn kevlar rovings. You can view how the kevlar rovings will add exta support for the dacron.
|
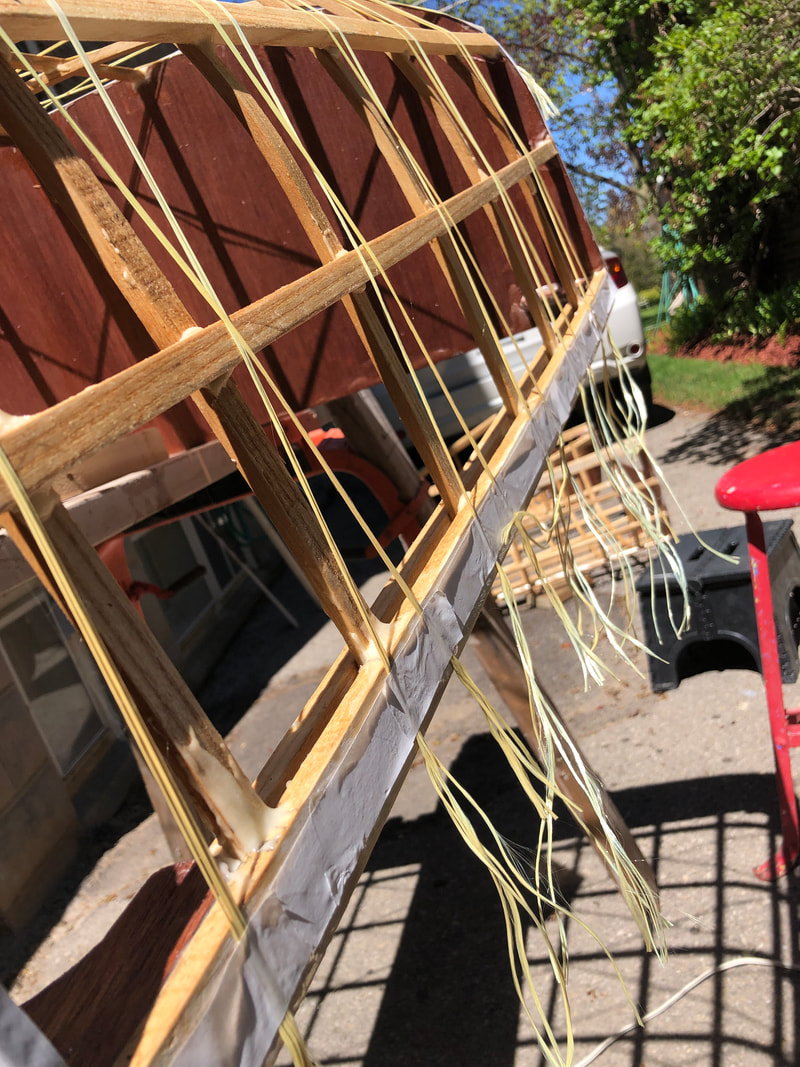
I left the tails long so that I could easily grab them during tighening. Notice the rovings are behind the heat'n bond tape.
|
9. Attaching the skin to the edges
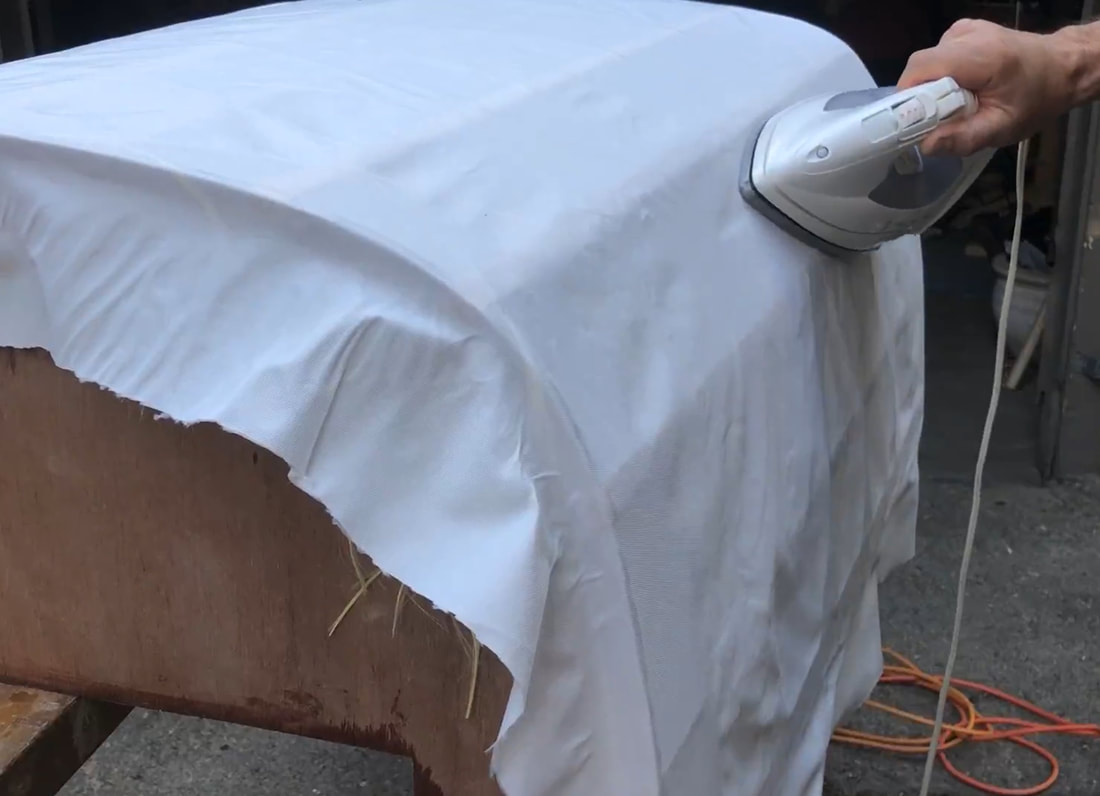
I was nervous about the next step as I knew that getting the skin on without wrinkles could be a challenge. I thought that I might be OK given the small length and gentle curve of each boat section. In the end I was correct in my forecast and no wrinkles resulted after a good iron. I had to apply Heat‘n Bond liberally to the gunwales first to provide an attachment point for the dacron. Where the fabric would meet each transom, I ensured heat ‘n bond was wrapped around onto the back of each transom. Otherwise the only attachment point would be the minimal 10mm depth of the plywood. I purchased the Platt Monfort video from Larry and watched it many times to learn the finer points of tape application. Platt was a pioneer of these processes.
Next, I used my iron to fuse the dacron to the gunwals and transoms while ensuring that the tension on the rovings was maintained. This was tricky. Check the captions on the pictures below for more on this important step.
Next, I used my iron to fuse the dacron to the gunwals and transoms while ensuring that the tension on the rovings was maintained. This was tricky. Check the captions on the pictures below for more on this important step.
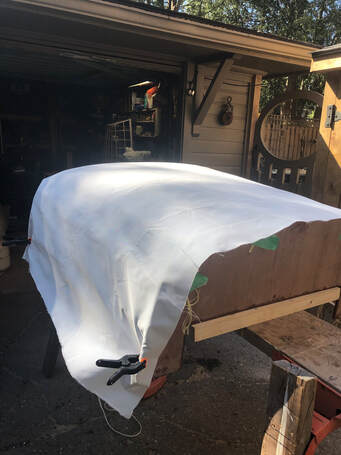
Initial layout of the 9oz dacron.
|
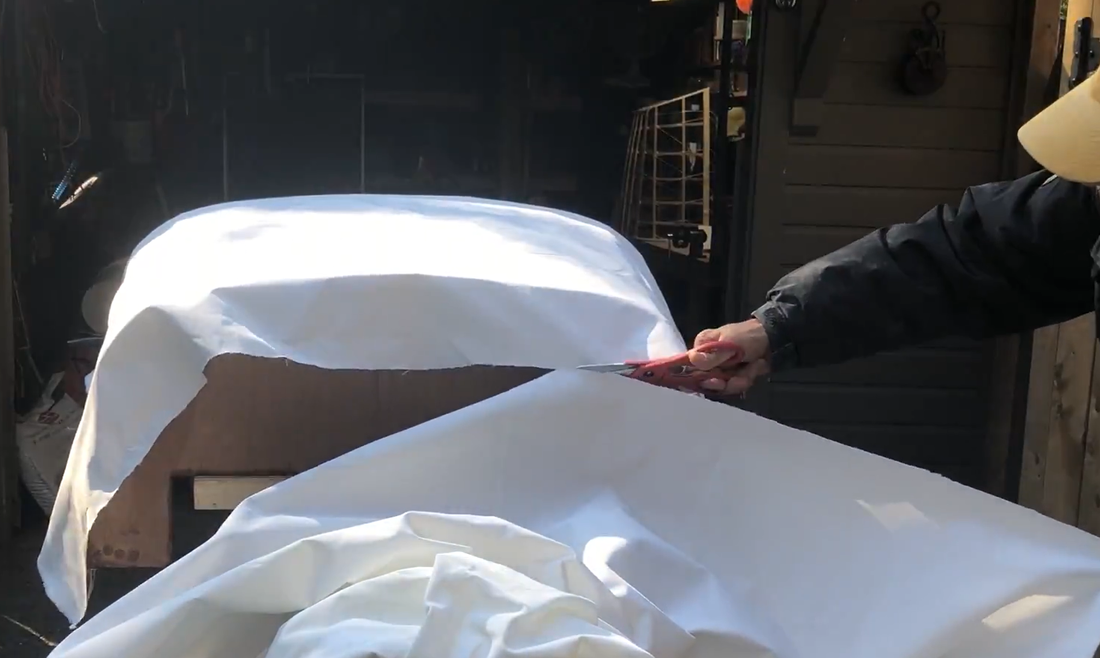
Some cutting was necessary. I was so careful to cut at the right spot.
|
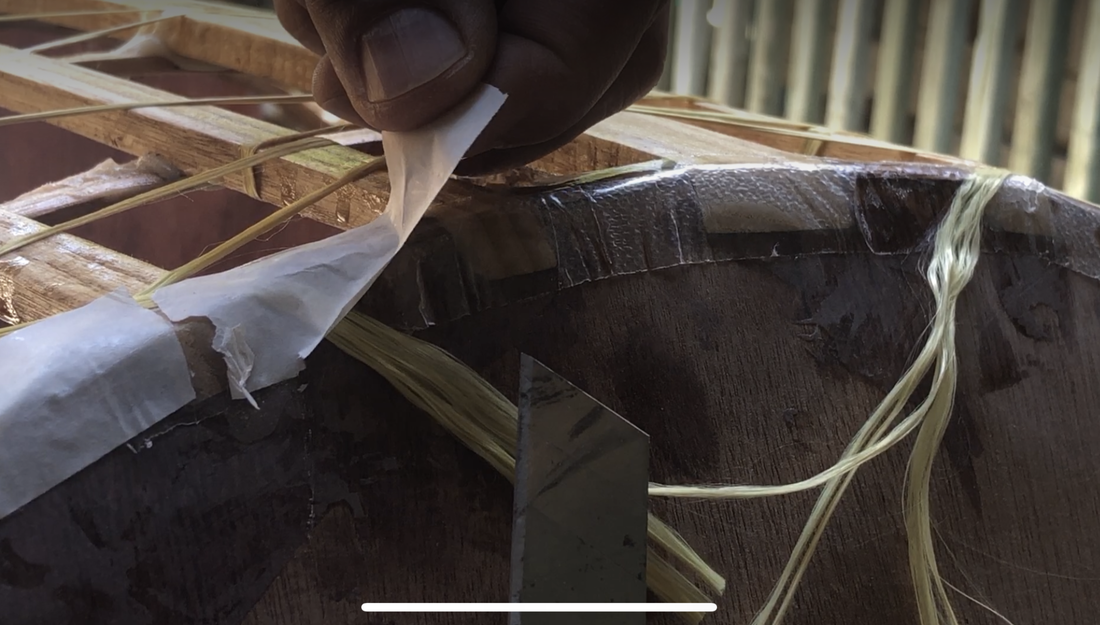
A key step. I used a razor knife to remove the Heat'n Bond protective cover prior to ironing/attaching the dacron. Notice that the Heat'n bond wraps around to the outside of each transom.
|
I held the dacron tight with one hand while I applied the iron to the gunwale. The heat'n bond tape then melted into the material.
If I was ironing the gunwale where dacron was applied, I had to hold the dacron in the correct (tight) position AND ensure that I was pulling gently on the kevlar roving to keep it tight. I kept holding the roving tight until the glue had set. It only took seconds.
|
I applied the heat'n bond around the end of each transom as well as the thin edge. Remember that it was important to keep the kevlar rovings tight while ironing the dacron onto the Heat'n bond tape.
|
I realized that pushing a little piece of wood into the material helped the material set into the heat'n bond.
|
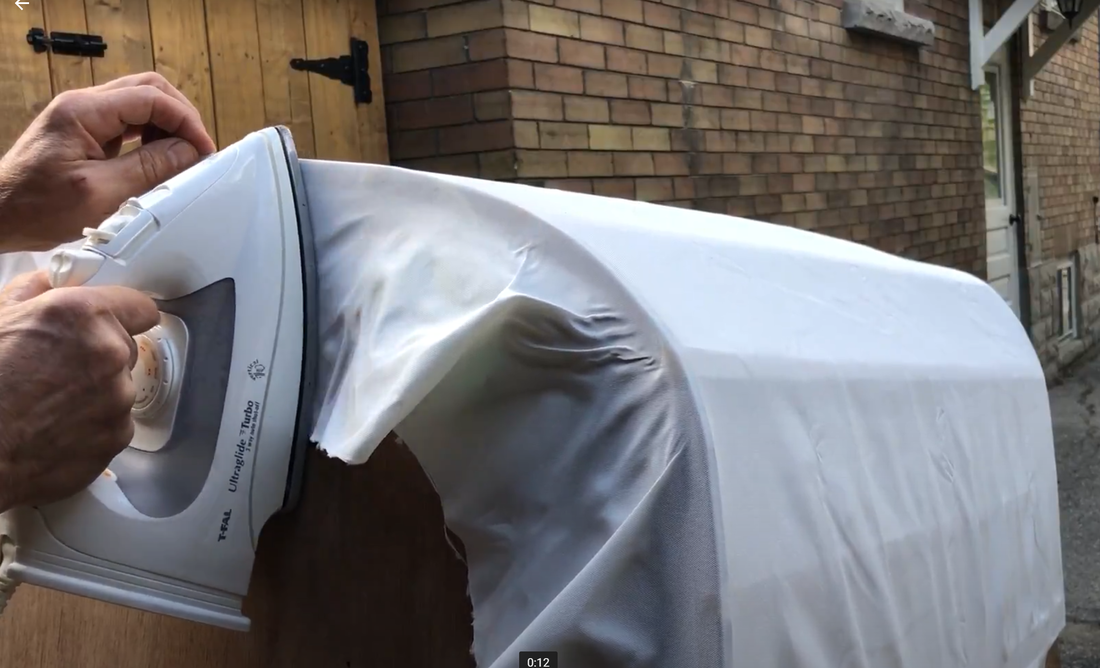
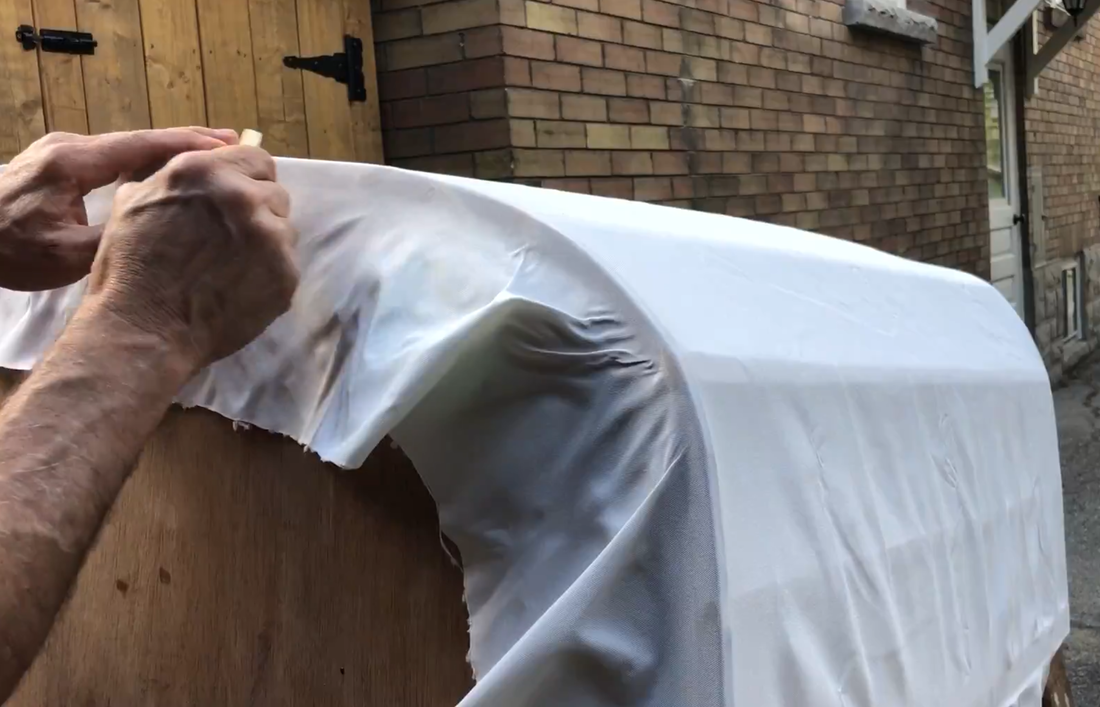
10. Shrinking dacron
|
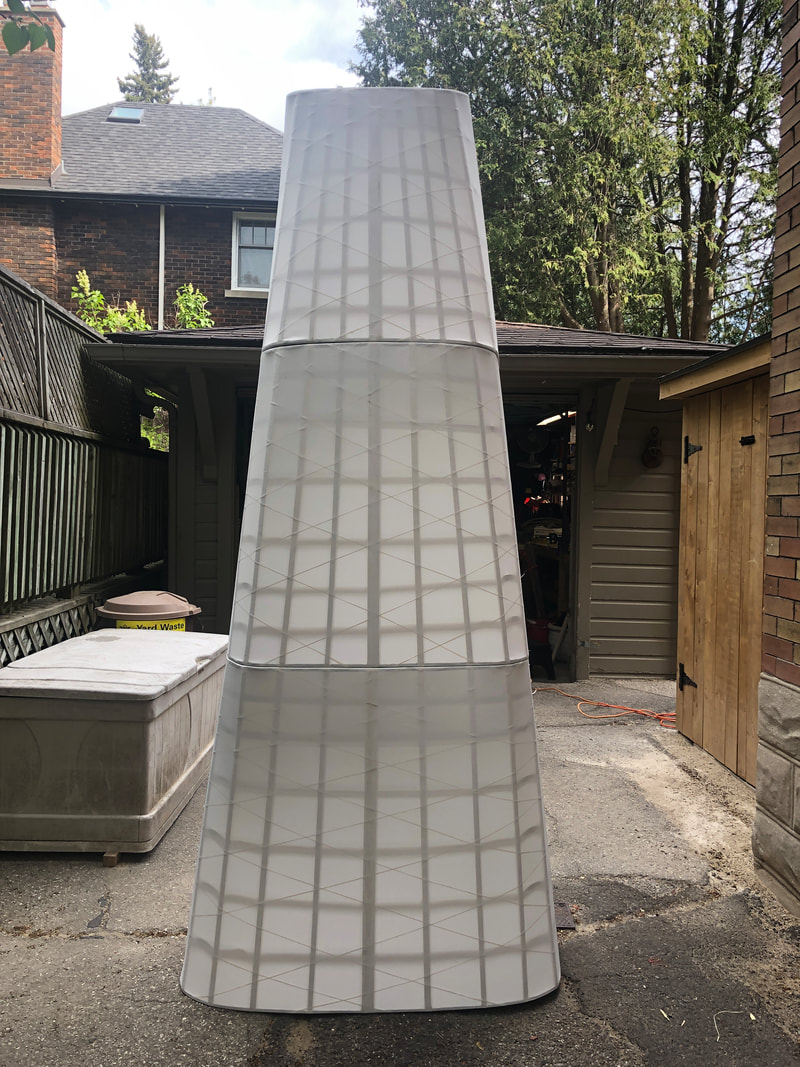
Next, I ironed that actual dacron to shrink it. This part of the process began with trepidation but quickly moved to excitement as the process worked! The skin was tightening! I was very careful not to iron (and thus loosen) the heat ‘n bond tape on the edges of areas needing ironing. I understand that 9oz dacron can shrink 10 to 15%. A short video below shows the shrinking happening. Recently (March, 2023) I learned that Larry LaLonde feels the shrink percentage is about 12%.
|
|
11. Two part urethane
|
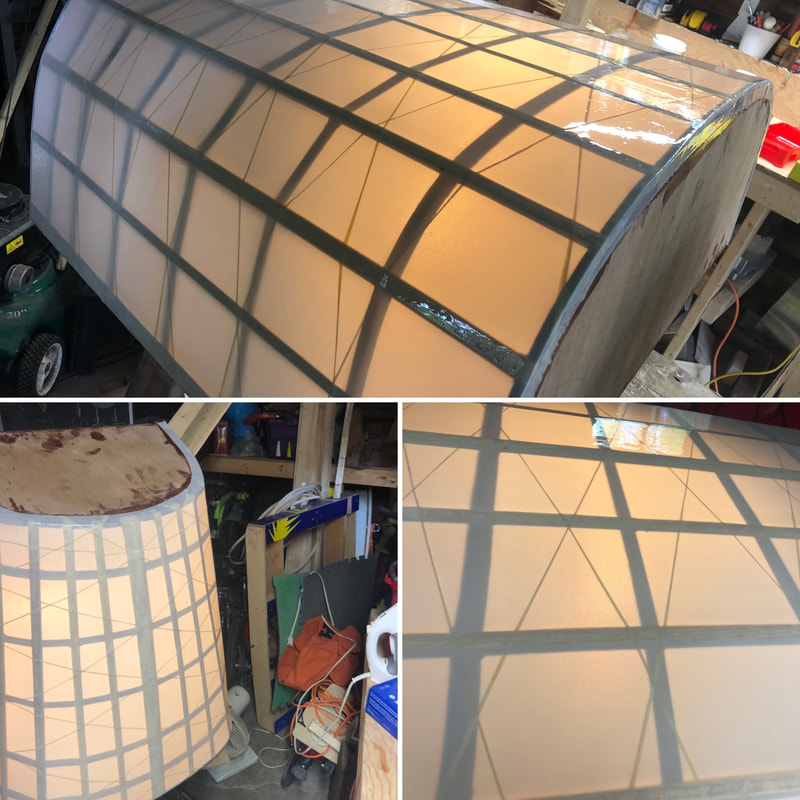
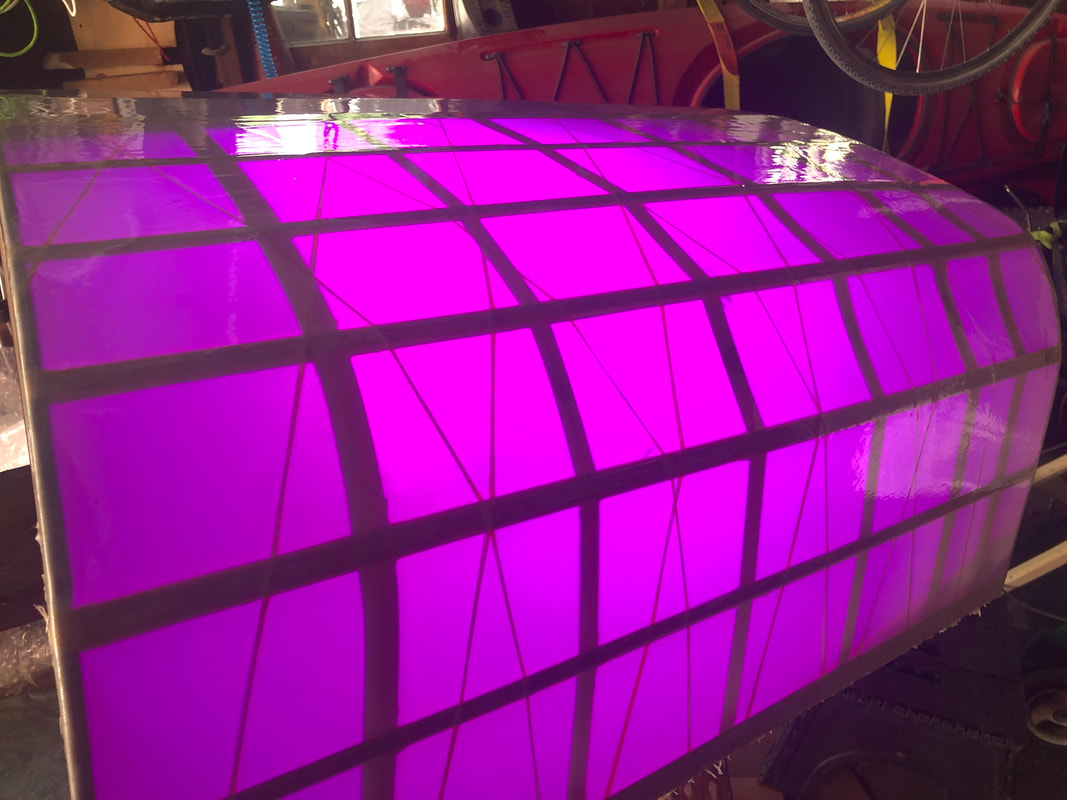
Once the fabric was attached, the boat really started to show its potential but a key step remained. I was using a two part urethane product called Corey’s Goop and began by very carefully setting up everything I would need. I then began by rolling an 18” band of the boat. I continued, making sure that I always had a wet edge and finished fairly quickly. By the time the first coat was on, I was ready for another coat and continued with this process for 4 coats. I had a few minor challenges but in the end, with some phone help from Corey Freedman, the task was complete. After 24 hours of curing time, I decided to leave it another 24hrs to make sure it was cured. In the end it’s a permanently flexible finish. It looked so beautiful, I had to experiment with lighting to highlight the translucent nature of the skin.
This would typically be the time that rubbing strakes and a keel band would be installed. I made the decision not to install these items as they would add weight to the boat and they were unnecessary. For one, the boat would never be dragged on sand. In addition, being a rowboat meant that power would be applied on both sides at once (unlike a canoe) and therefore there was no need for keel assisted tracking. Lastly, not having a keel would allow a quick spin if desired. 
The urethane install--partially applied!
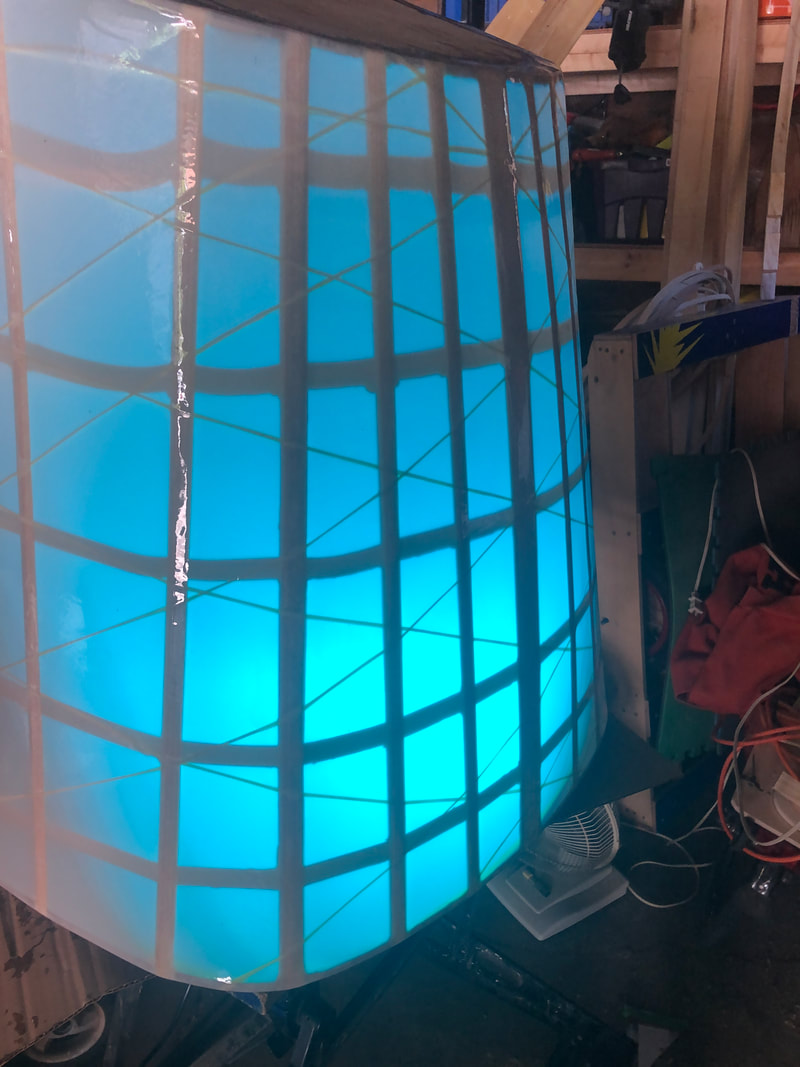
It looked special with a blue light. I call this picture the 'blue light special'.
|

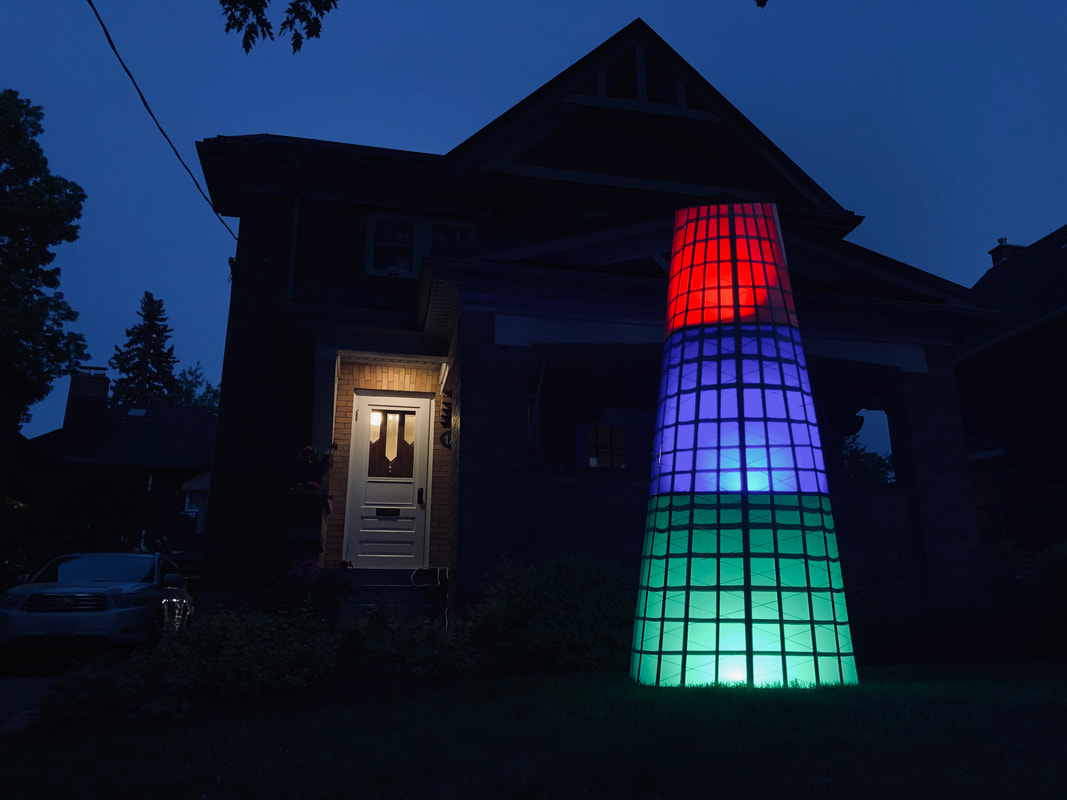
Three different coloured lights at night on our front lawn.
Wouldn't it be fun to row (safely) at night with different coloured lights in the boat!
|
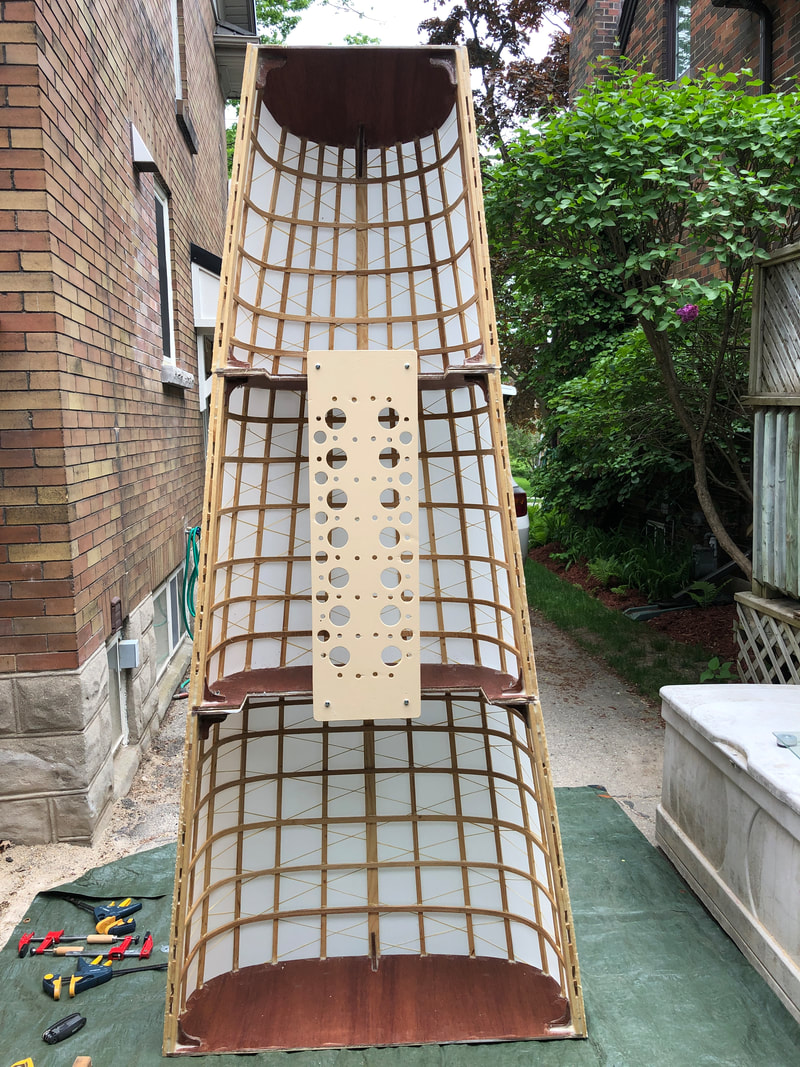
12. Adjusting the bulkheads
|
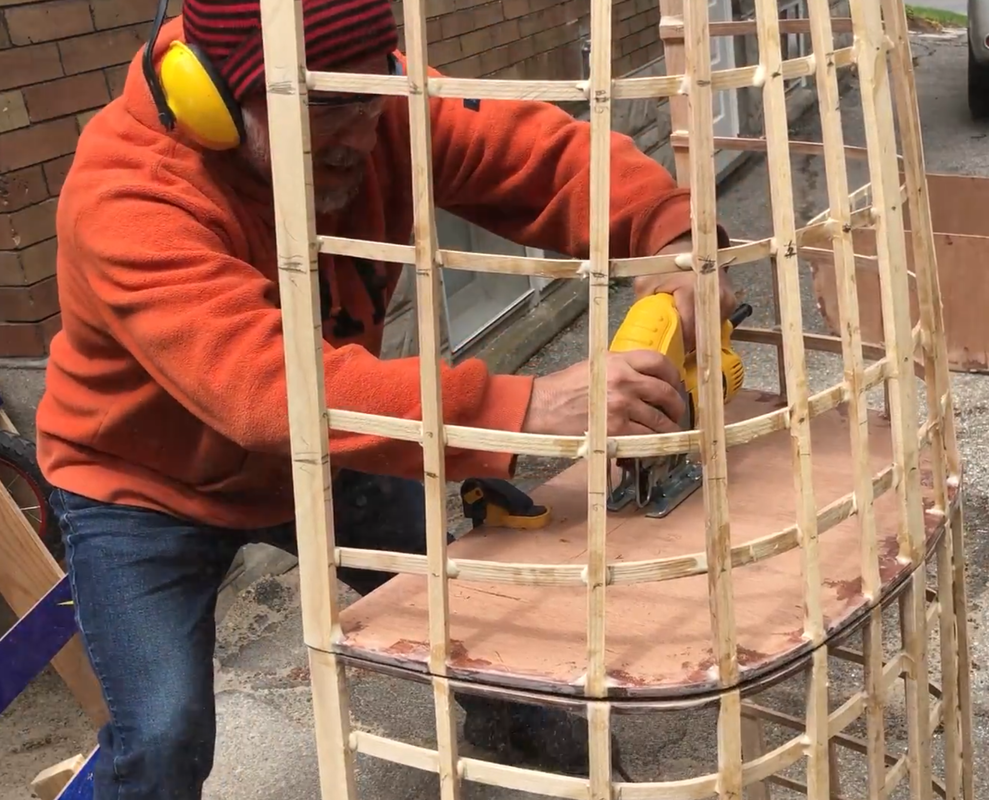
I used a jigsaw to lower the central portions of the four internal bulkheads so that a seat would have a low center of gravity. This would add to stability and safety. As you can observe, this picture was taken prior to skin application.
|
|
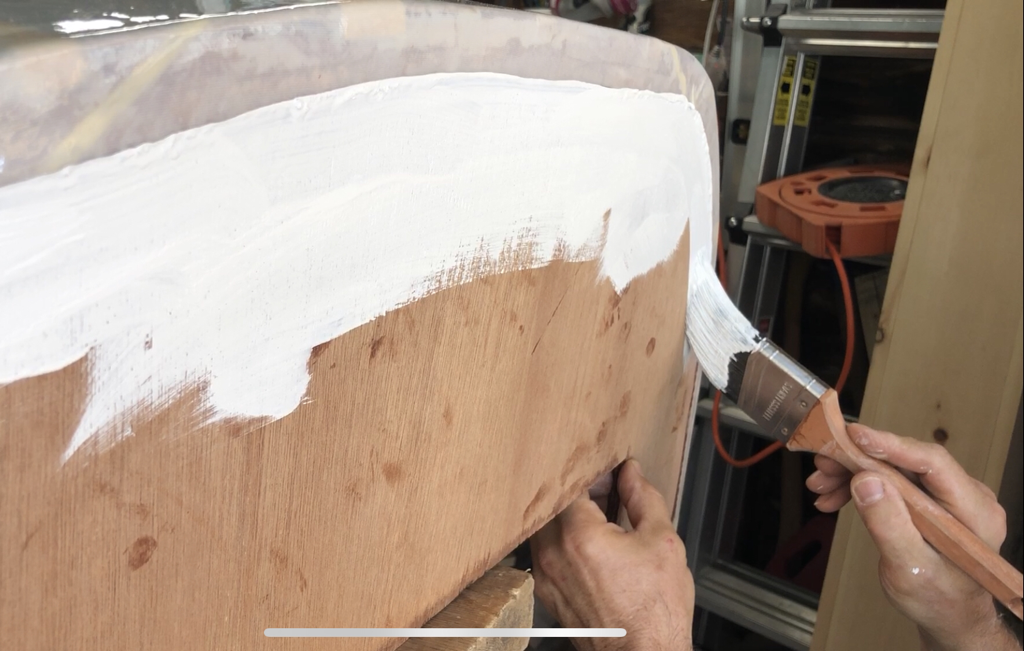
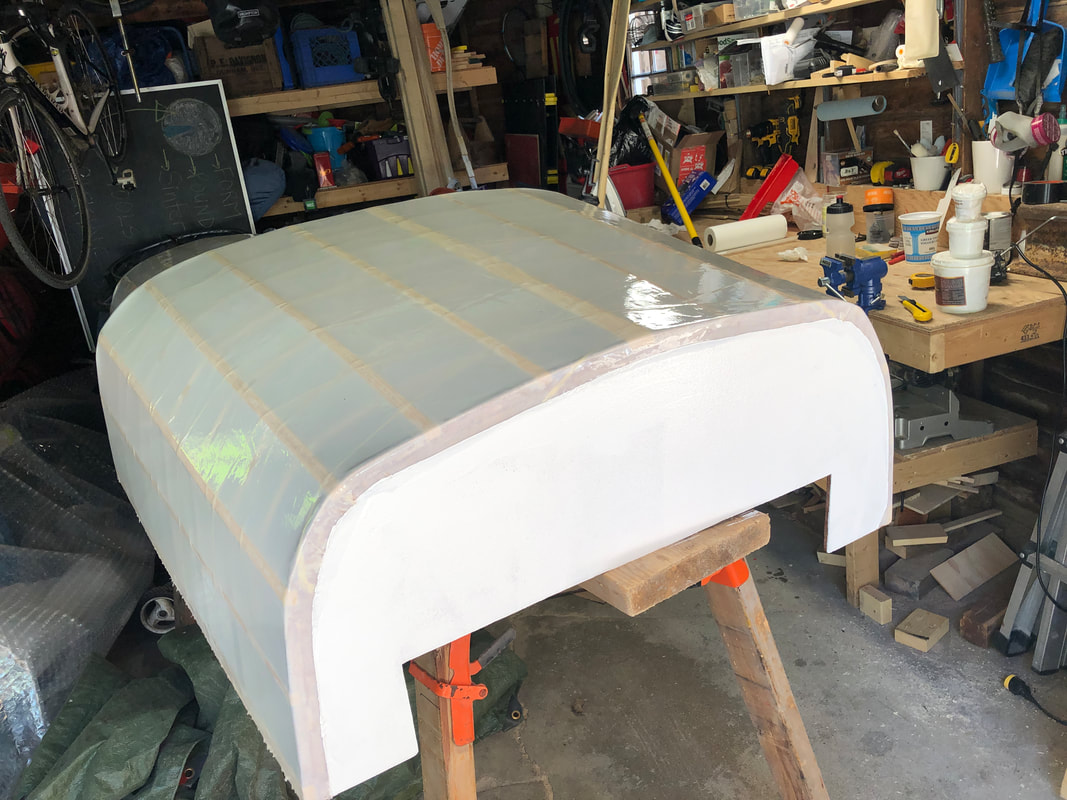
13. Waterproof paint
Next I would paint the outside of the bulkheads with acrylic porch paint where they would be in contact with the water. This would make them waterproof. The colour I just happened to pick was ‘Pearl Harbour’.
I eventually decided to call the boat the UB1000. The UB was for Urban Boat, and the 1000 recognizes that this is the first iteration of this boat.
Related smaller projects involved designing oarlocks for the boat and figuring out where they should be placed. I also needed seating and a trailer to transport the boat to the lake.
|
|
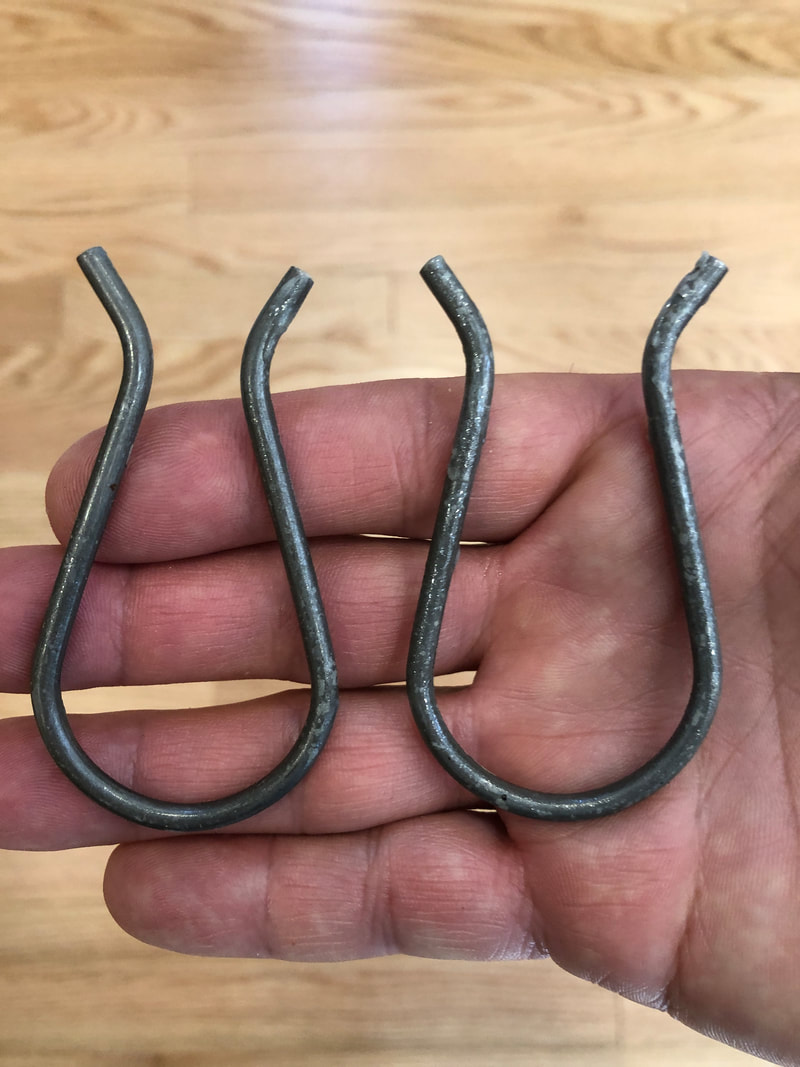
14. Budget oars
I cracked the case on the oarlocks by learning how Vikings made them. Such a simple design. My recent discovery of ball bungee cords made the installation simple. I also made a set of oars out of an old 2 x 4. I didn’t want to purchase a new 2 x 4 because the pandemic had made them ridiculously expensive. Although I must admit, even if 2 x 4’s were cheap, I wanted to be minimalist. I ripped the one 2 x 4 I had lengthways. One side had many splits so I filled them with some left over epoxy sans silica thickener. This left the epoxy thin, allowing it to flow into the splits. I planed two sides on each where I then laminated some shorter scrap pieces onto the sides. Once dry, I traced a reasonable shape and cut it out with the jigsaw. Then I went to town with a hand held power planer and got them to a crude shape that worked. I had some extra epoxy and gave them a coat near the bottom where they might get some abuse.


An electric hand-planer made quick work of the oar reduction. Note my important ear protection. Also note the error of not wearing eye protection. I have since improved my safety protocols.
|

A belt sander connected firmly to a work surface made the sanding process much simpler.
|
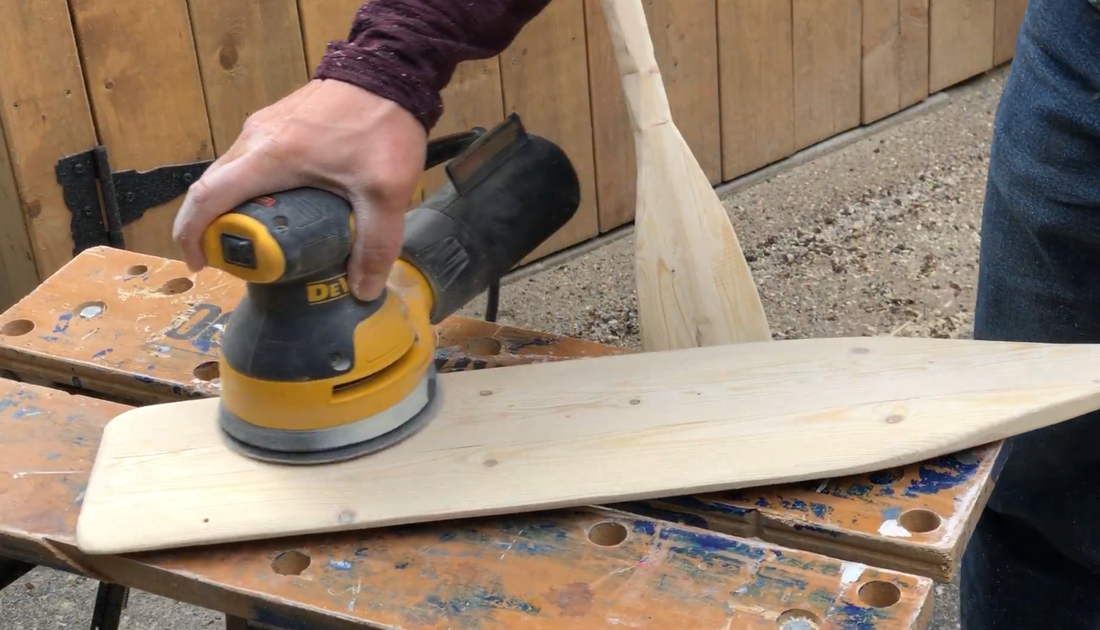
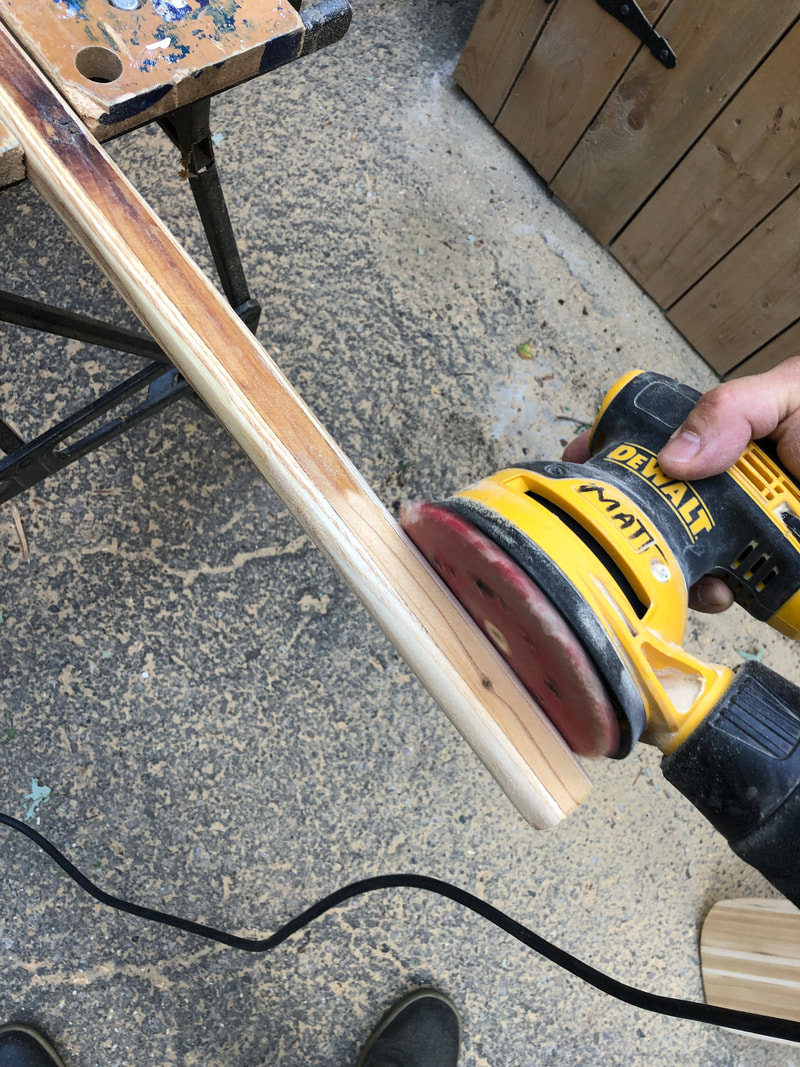
An orbital sander finished the job.
|
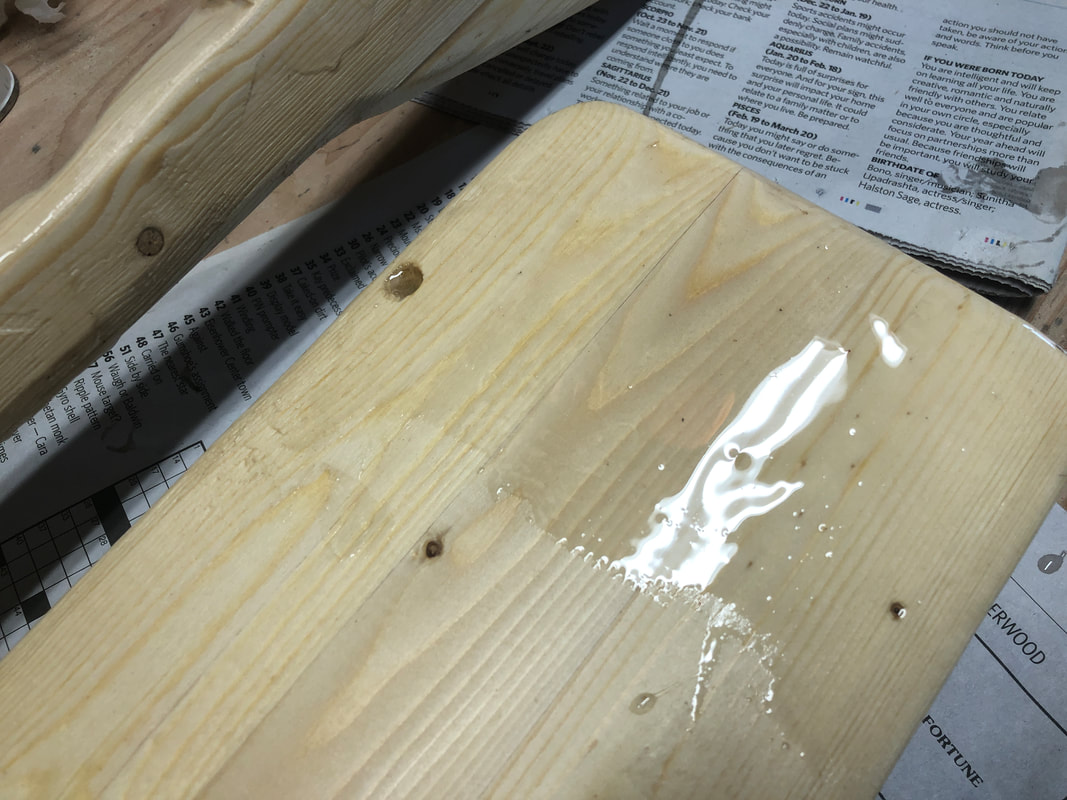
A little epoxy on the ends...
|
Below is a little video that shows the process. Again, don't forget eye protection!
And the trumpet on the soundtrack is me!
And the trumpet on the soundtrack is me!
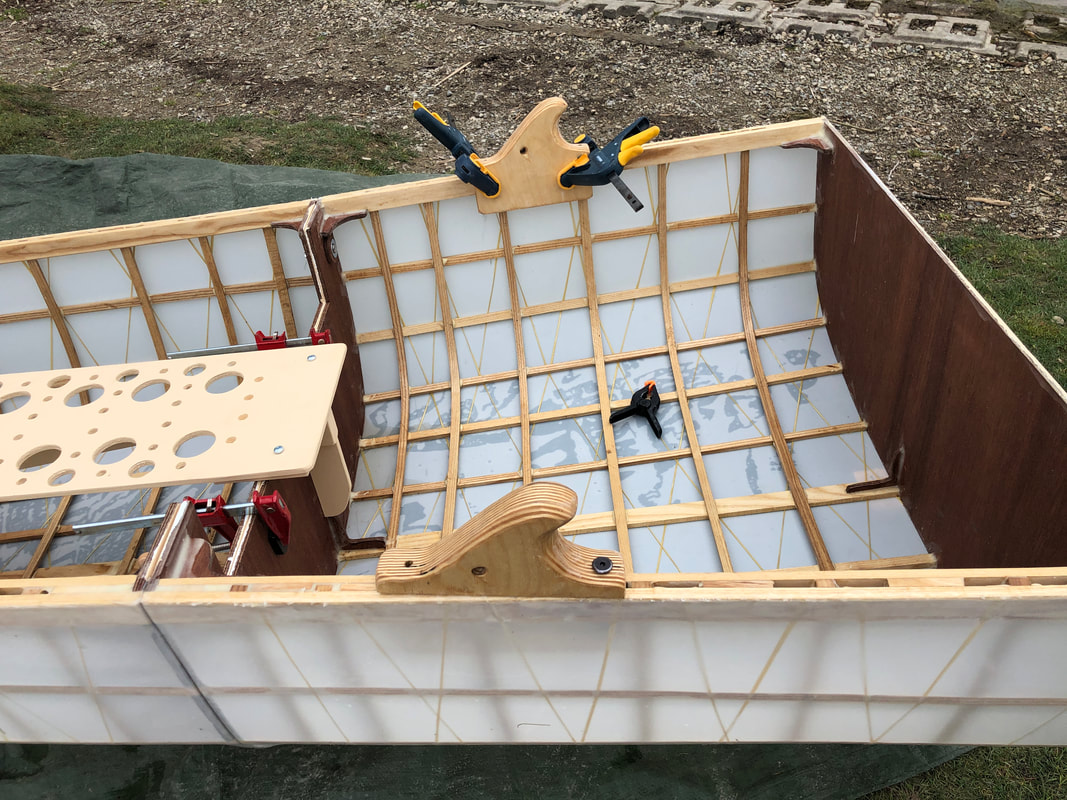
15. Oarlocks
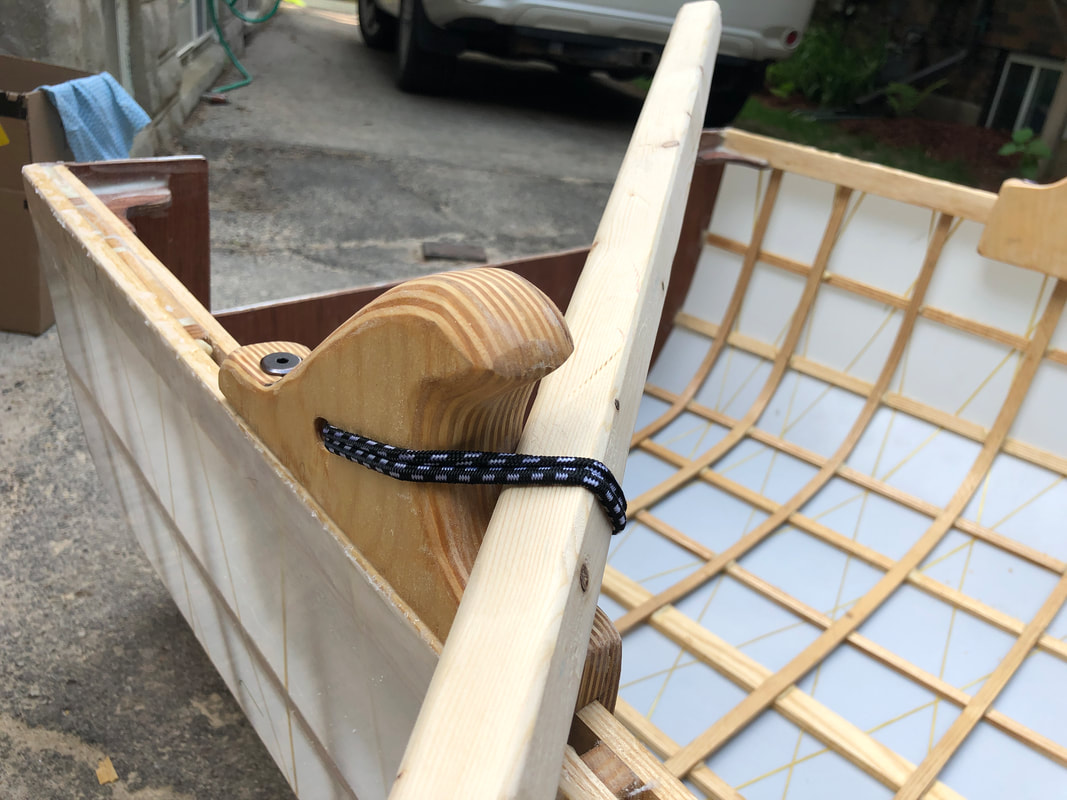
Ball bungees hold the oars in their spot!
|

|
|
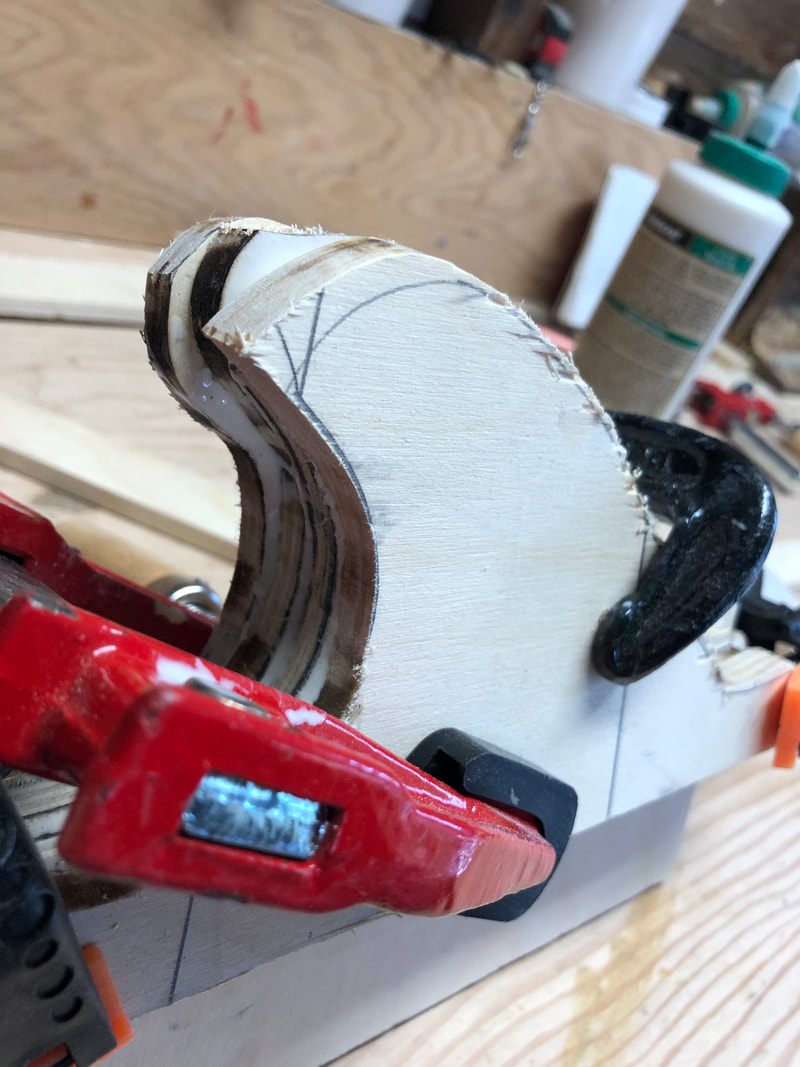
Later I would adjust the openings to allow for a smoother oar motion. I used a sandpaper (for metal) disk on my grinder for the purpose. It was I think 60 grit and made quick work of the adjustments.
|
|
16. Bolts above the waterline
|
Next I drilled upper holes in the bulkheads for bolts that would hold the boat together. I planned on lower bolt holes but wanted to see how the boat would float first. Once the waterline was determined, I would drill the second set of bolt holes just above this line. I bought ¼” bolts of the appropriate length and made wooden washers to spread the load of each bolt.
The internet will show you how to make a little tool to make wingnut tighening simple. Here is my version which was accomplished by drilling some holes in a scrap piece of wood.
The wood washers helped spread the load of the attachment bolts. The paint you see on the edge of the bulkheads was later sanded off....
|
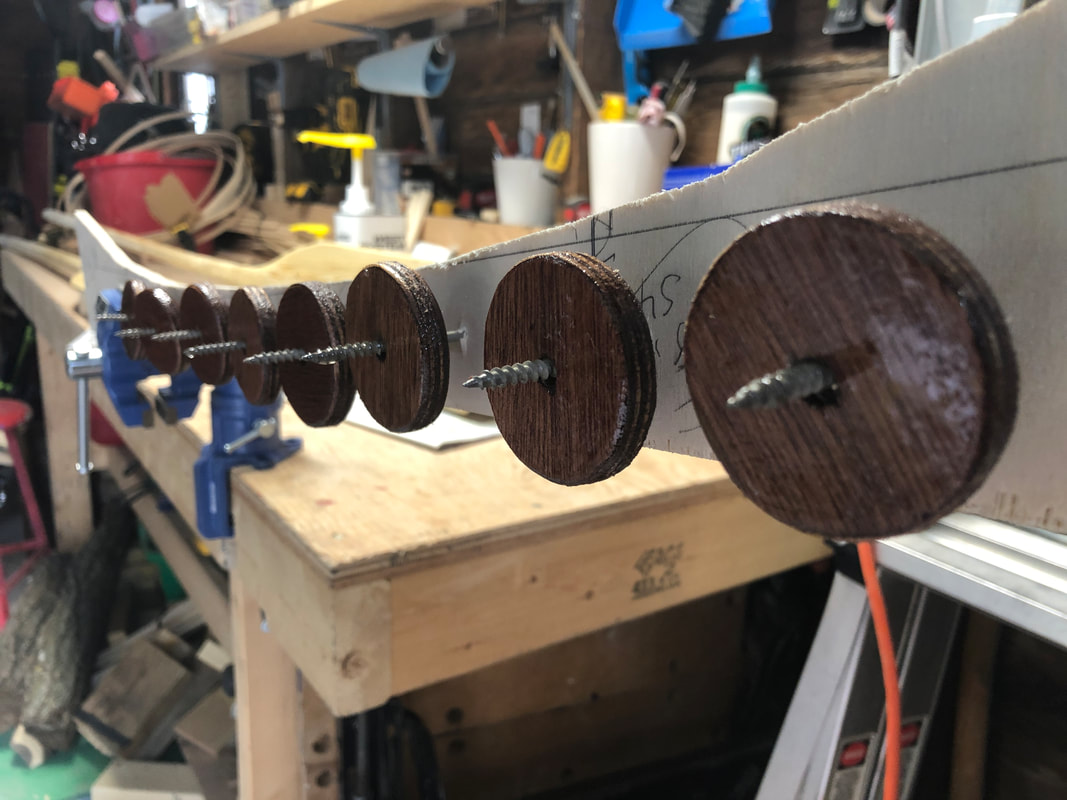
I drilled some deck screws into a scrap piece of wood. Next, I cut some wooden circles out of meranti waterproof plywood to use as washers. I coated them in epoxy and let them dry on the screws.
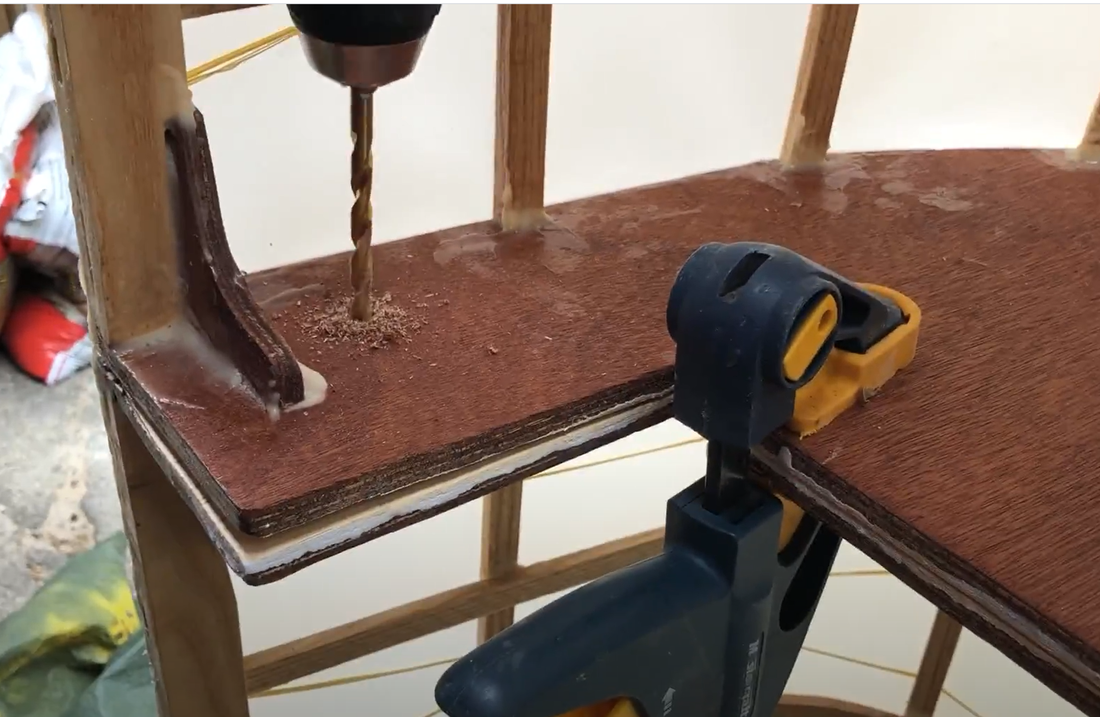
A key moment when I drilled a hole through two bulkheads. It was so important to ensure they were lined up properly first!
|
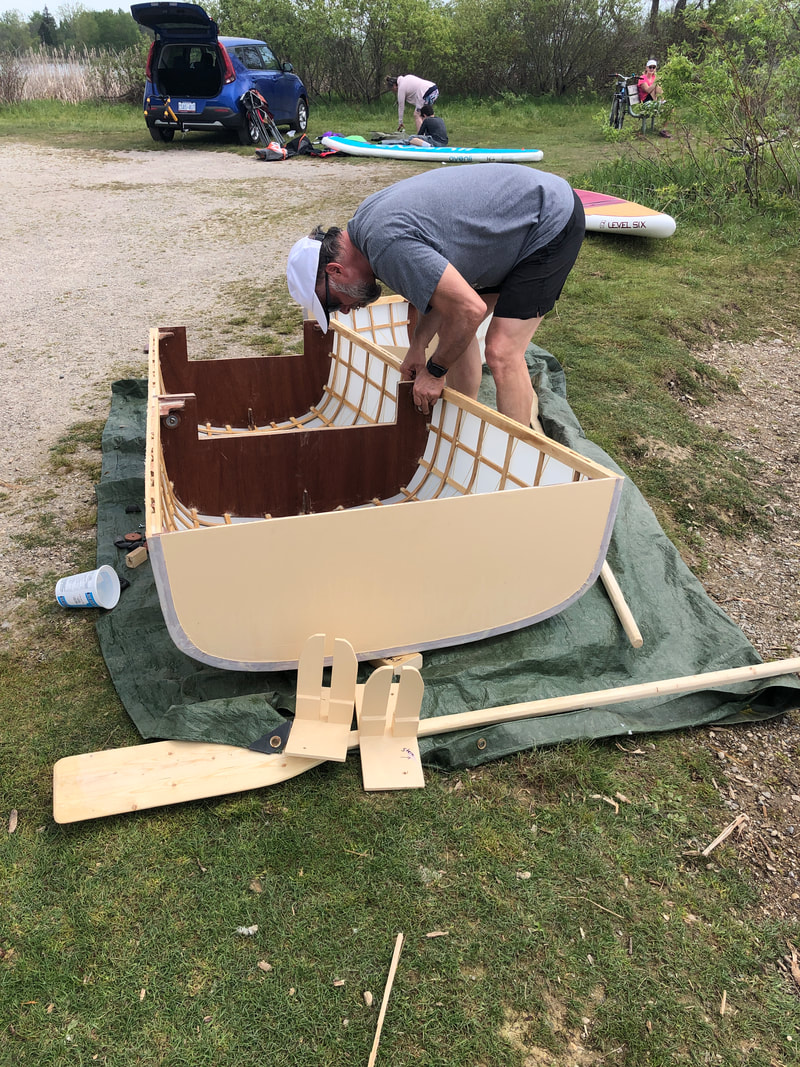
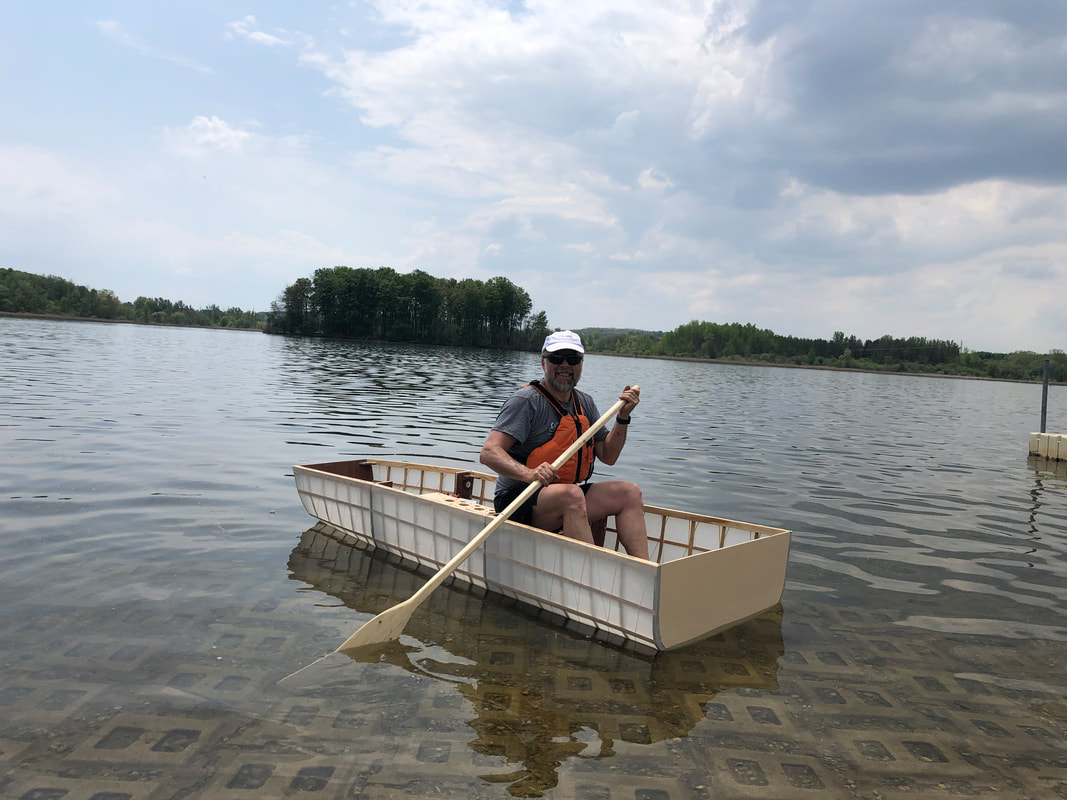
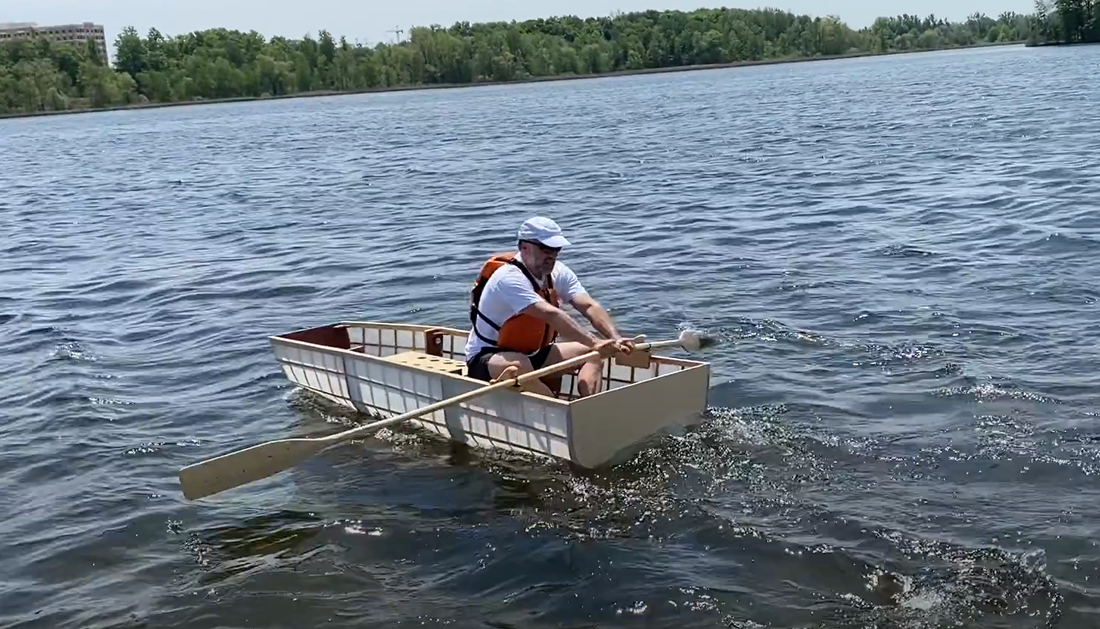
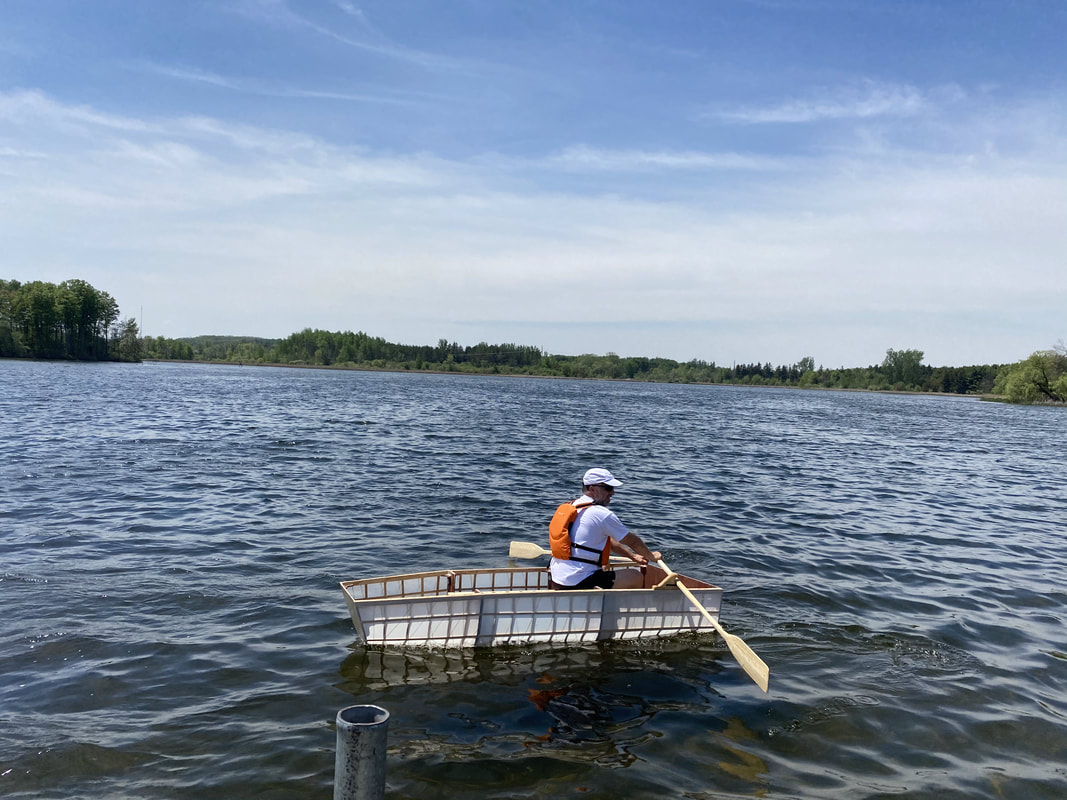
17. First float and a broken seat!
It was time to float the boat! I took the boat to a quiet local lake with an easy launch (Laurel Creek Reservoir) and bolted the boat together. I added temporary clamps too as the lower bolt hole locations were not determined yet. I was about to see where the waterline was so that I could place the bolt holes above this position. I also wanted to determine where the naturally best seating position (front to back) would be so that I could properly place the oarlocks for good ergonomics. I put the boat in the water and installed some clamps and the seat. The seat collapsed somewhat, but I was able to get a read on where the best seating position would be. Back at home I strengthened the seat so that it would not break. But I also made single seats that I thought would work better. I lowered the rear seating position even more and also drilled holes for bolts in the bulkheads just above the (newly established) waterline. The next test proved the changes good and I have stuck with the single seat approach. During this test the newly placed oarlocks were tested and they worked well.
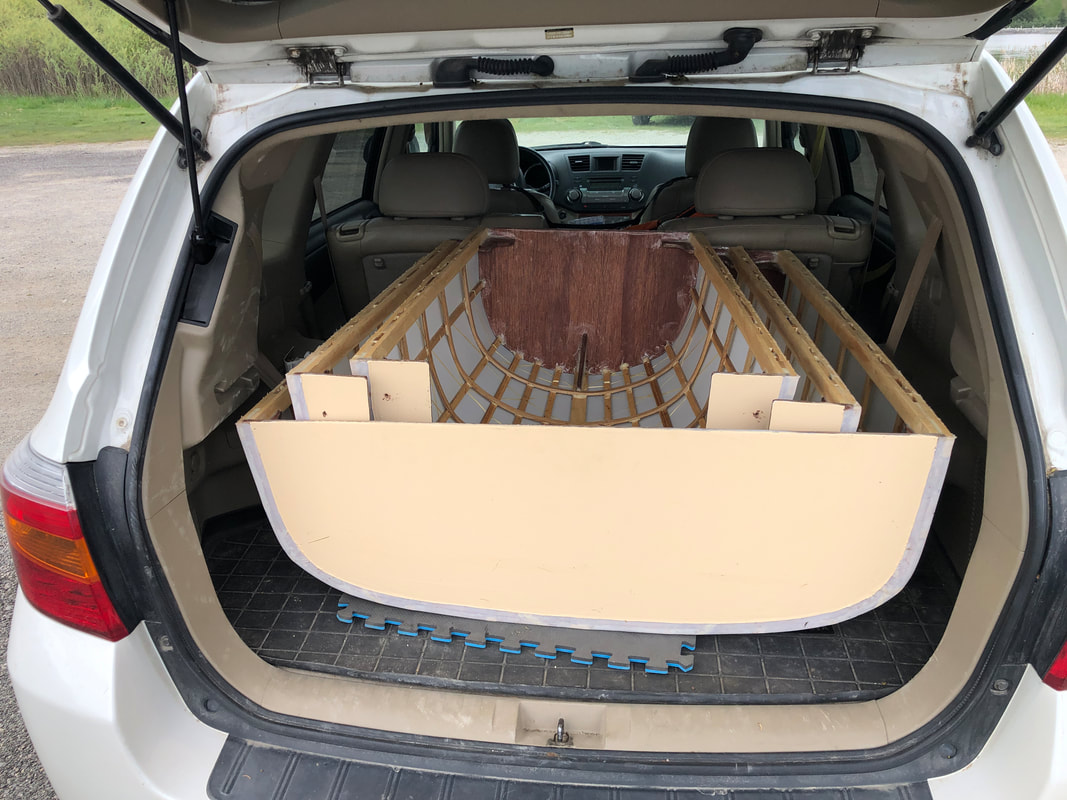
It fit in the car! I could have actually made it a bit wider as I had measured between the wheel wells which are partway down the boat (where it is narrower).
|
|
The very first trial at Laurel Creek Reservoir. Note only the top bolt exists at this point. I wanted to see where the waterline fell before drilling holes for the lower bolts. Now if we reallly think about it, the bolt holes could be below the waterline. But this position would require a rubber gasket on the bolt between the two bulkheads. This gasket would be tightly sandwiched between the two bulkheads keeping water out of the drilled holes.
|
|
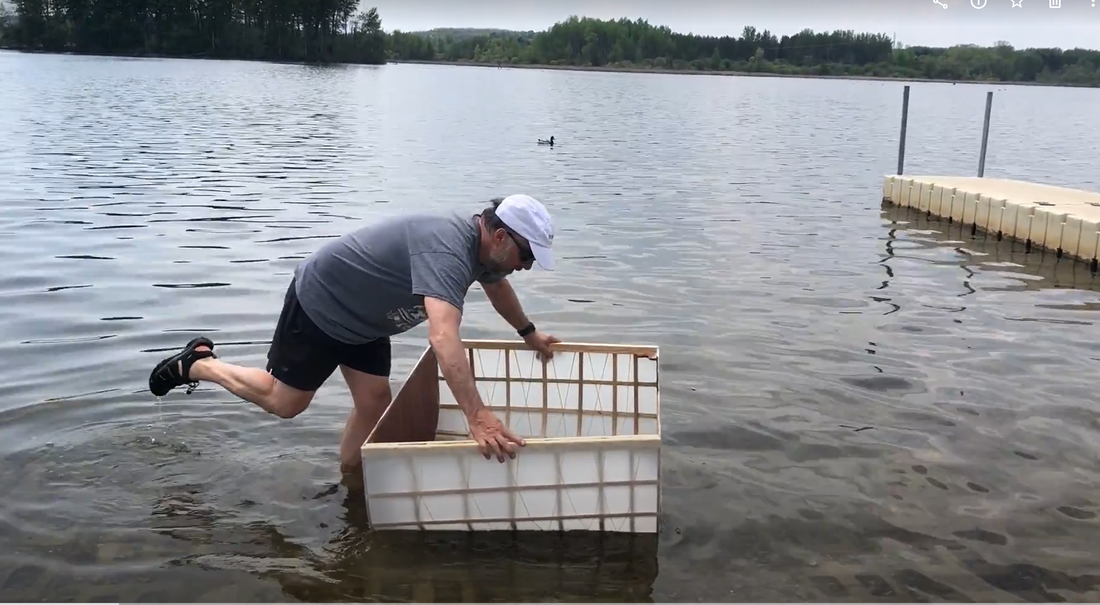
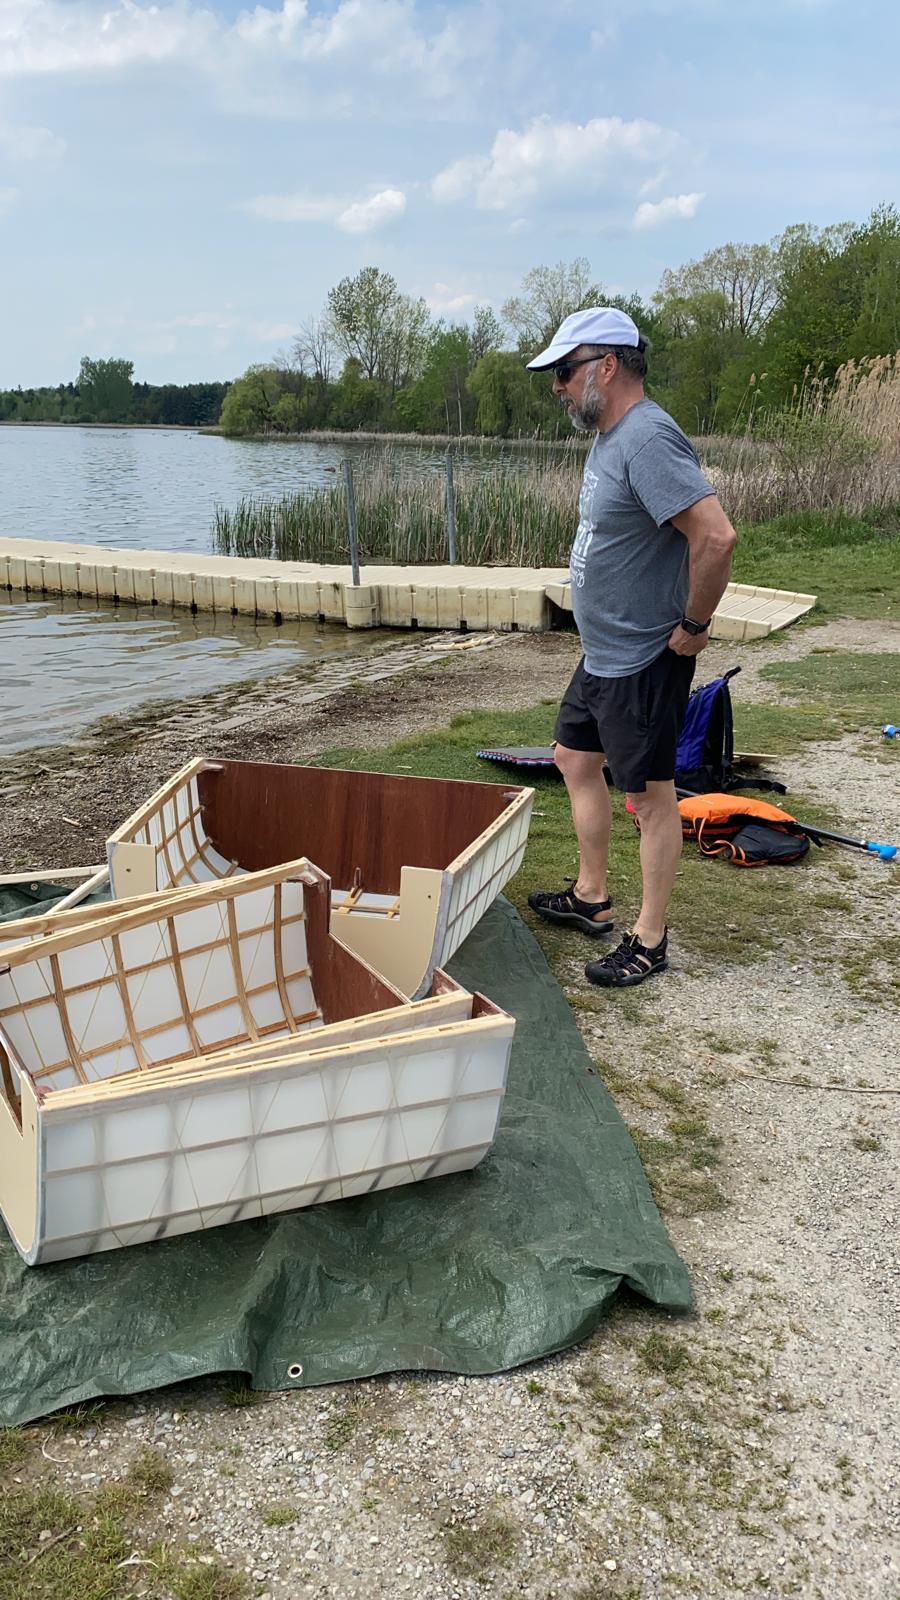
I initially tried to get into one piece of the boat. Not a good idea. It was a bit disheartening as I was concerned the boat would not be stable. But once I put all three pieces together it worked! I fully expected the unexpected during this critical phase. It was very satisfying to make that first push off the shore!
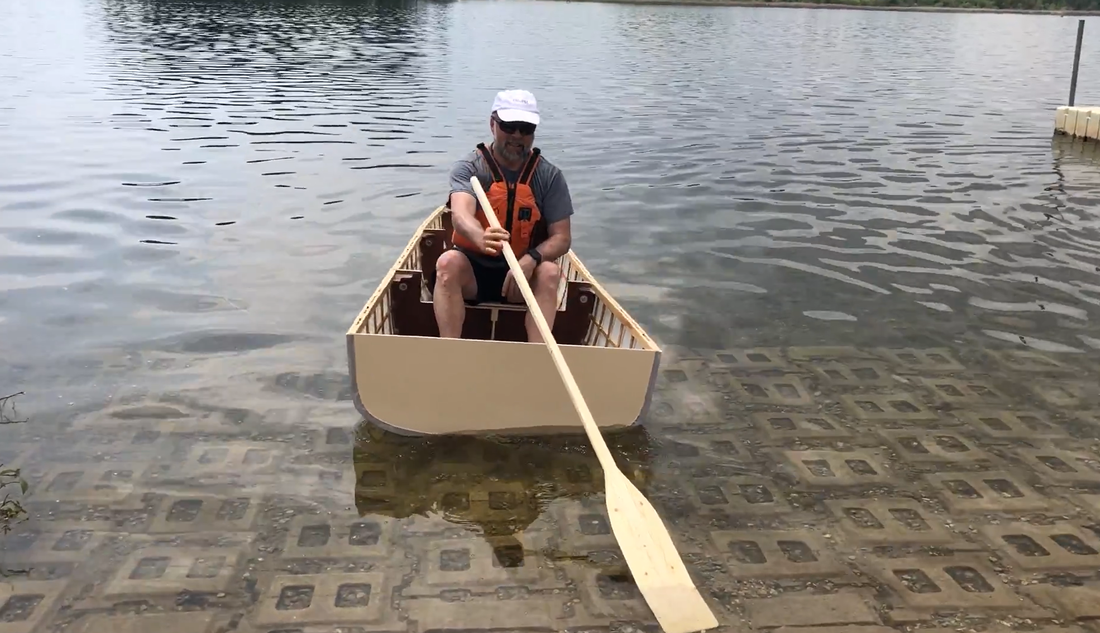
First pushoff with one oar! Note no oar locks yet! And no lower bolt......yet.
|
|
The intial bench looked cool but proved impractical. It also broke initially. I have since redesigned the seating situation.
|
The new chair was minimal, perfectly positioned for rowing and also acted as an additional clamp on two of the sections. Later I would lower the transom underneath the single seat (even more) to allow an even lower center of gravity.
|
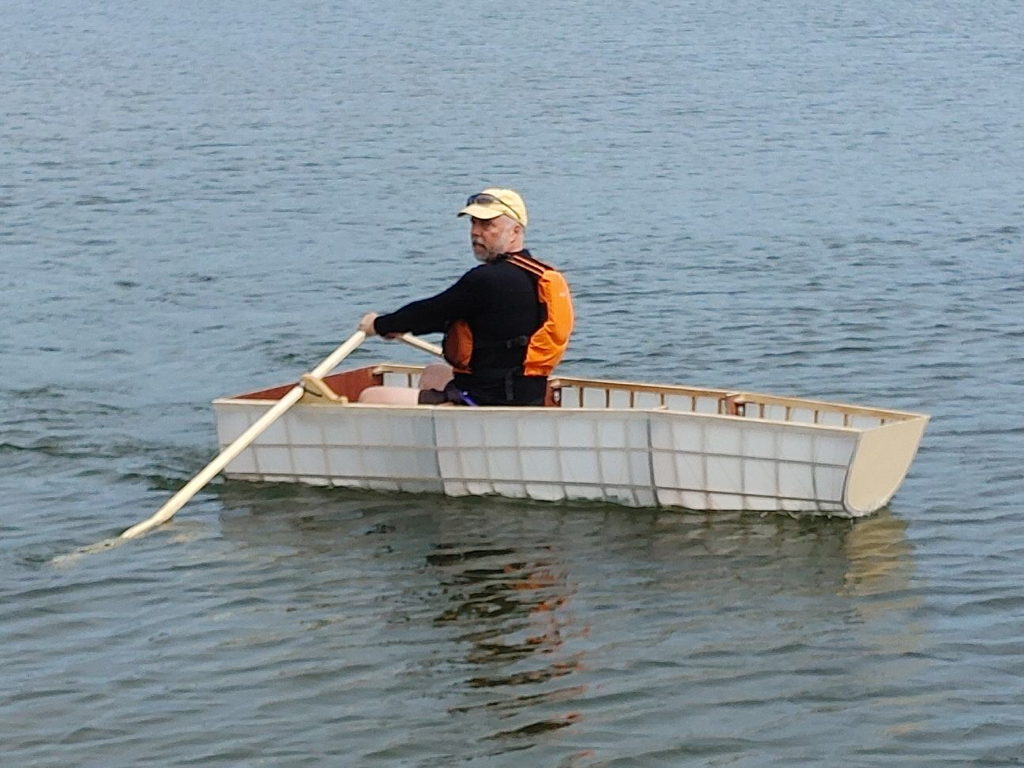
18. First evaluation
So I now had basically a working boat. What was my initial evaluation? It was a totally intriguing and fun project that had many different phases and new distinct skills to learn. And it floated! I was very pleased.
I did observe that the top line of the boat dipped in the front making the sheer line not horizontal. This may have been because the keel in the front section should have been steamed to ensure it held its proper position vs pulling the front down. I could have also been just a bad setup on the strong back. I may build a 4th section at the front to allow the boat to cut through the water better, especially if I proceed to add a sailing rig to the boat. I must say that I have not really felt the boat plowing. My aft seating position countered this propensity to some degree.
I did observe that the top line of the boat dipped in the front making the sheer line not horizontal. This may have been because the keel in the front section should have been steamed to ensure it held its proper position vs pulling the front down. I could have also been just a bad setup on the strong back. I may build a 4th section at the front to allow the boat to cut through the water better, especially if I proceed to add a sailing rig to the boat. I must say that I have not really felt the boat plowing. My aft seating position countered this propensity to some degree.
|
|
19. Boat Trailer design
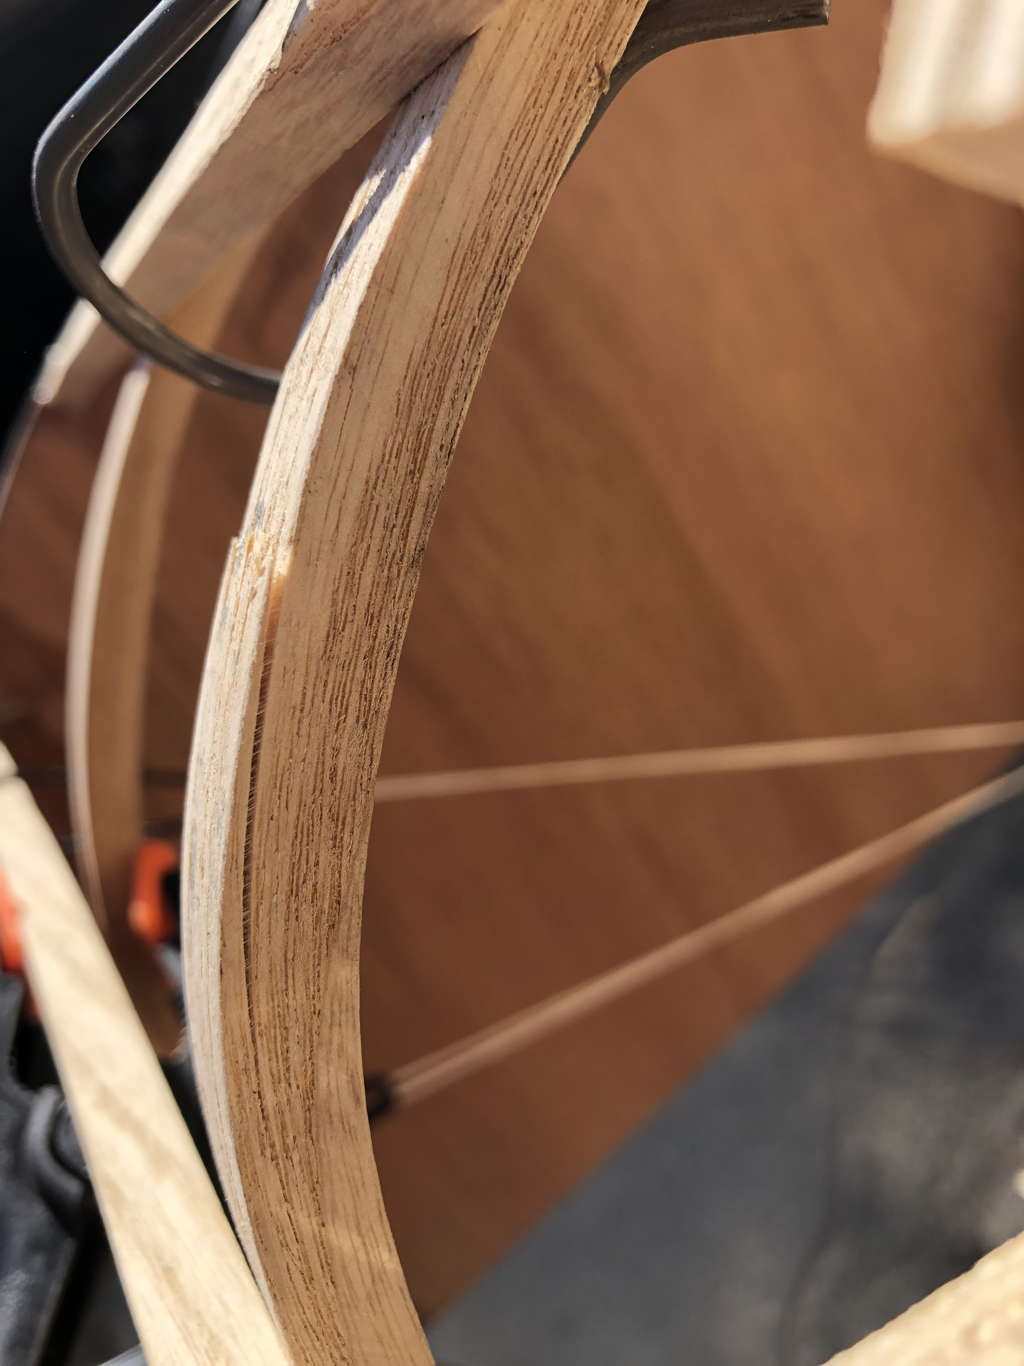
At one point I was waiting for the urethane to arrive from the USA. I used this time to design the needed trailer. I found two tires in the garbage from a used children’s bicycle. I then took some scrap plywood to make a simple trailer that would meet the requirements. I bent another piece of ash to create a tongue for the trailer and designed a simple hitch contraption that works very well. After initial tests with the boat, I created a stiffer tounge and moved the wheels back about 1 inch to make the tongue weight ideal to eliminate sway. I also added two oar holders on the trailer where my 7’ oars could be slid through. In the end I decided to paint the trailer. It just had to be done. More Pearl Harbour yellow!
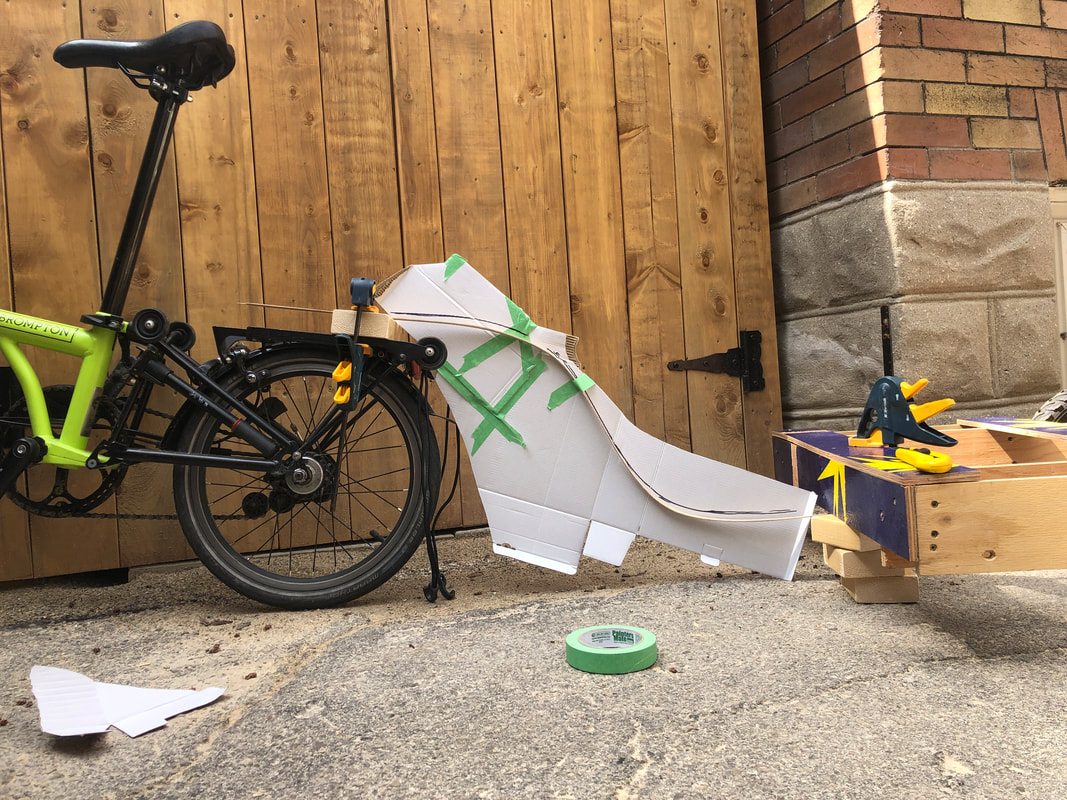
I used a scrap piece of cardboard to draw the improved tongue shape. I took this picture once I made the new tongue.
|
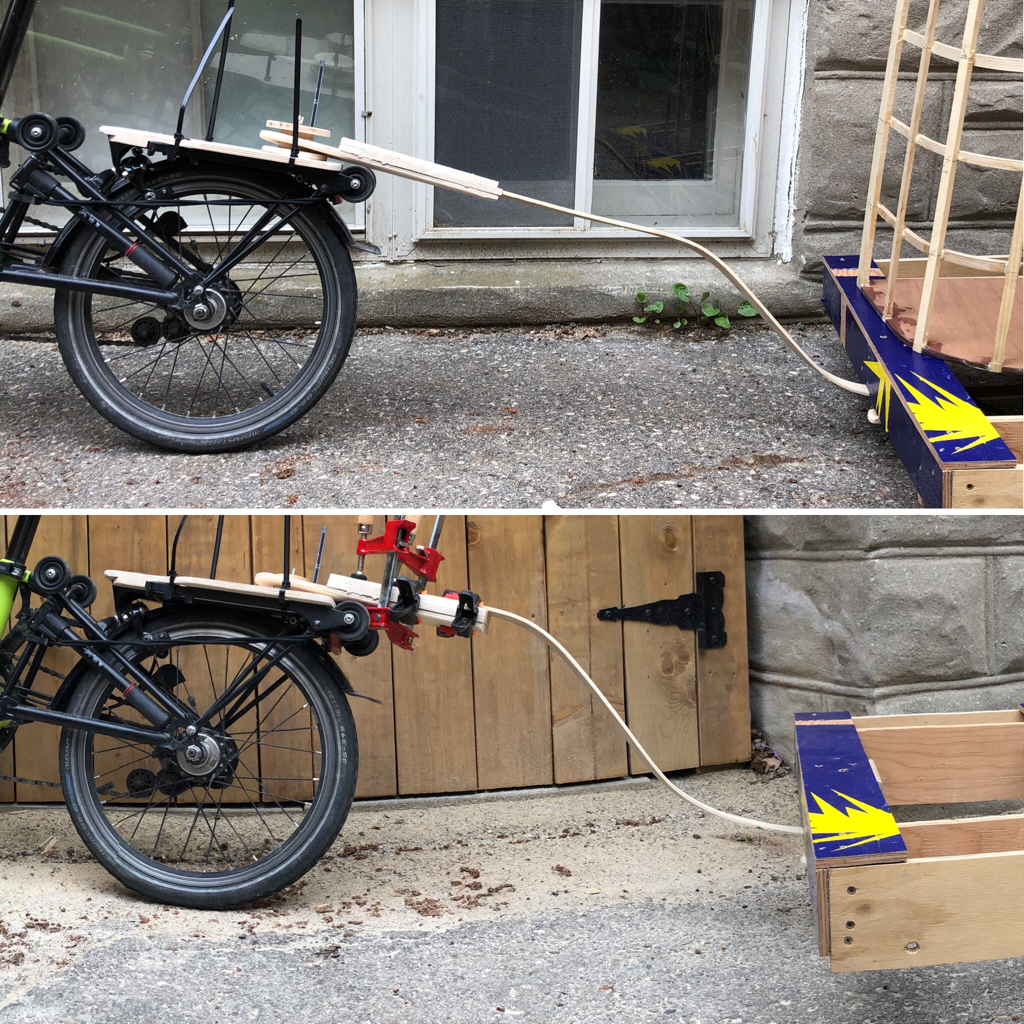
The first iteration of the tongue was not right. The trailer was too bouncy. I fixed the issue by changing the bend of the ash I used. I also beefed up the tongue somewhat to add to the stiffness.
|
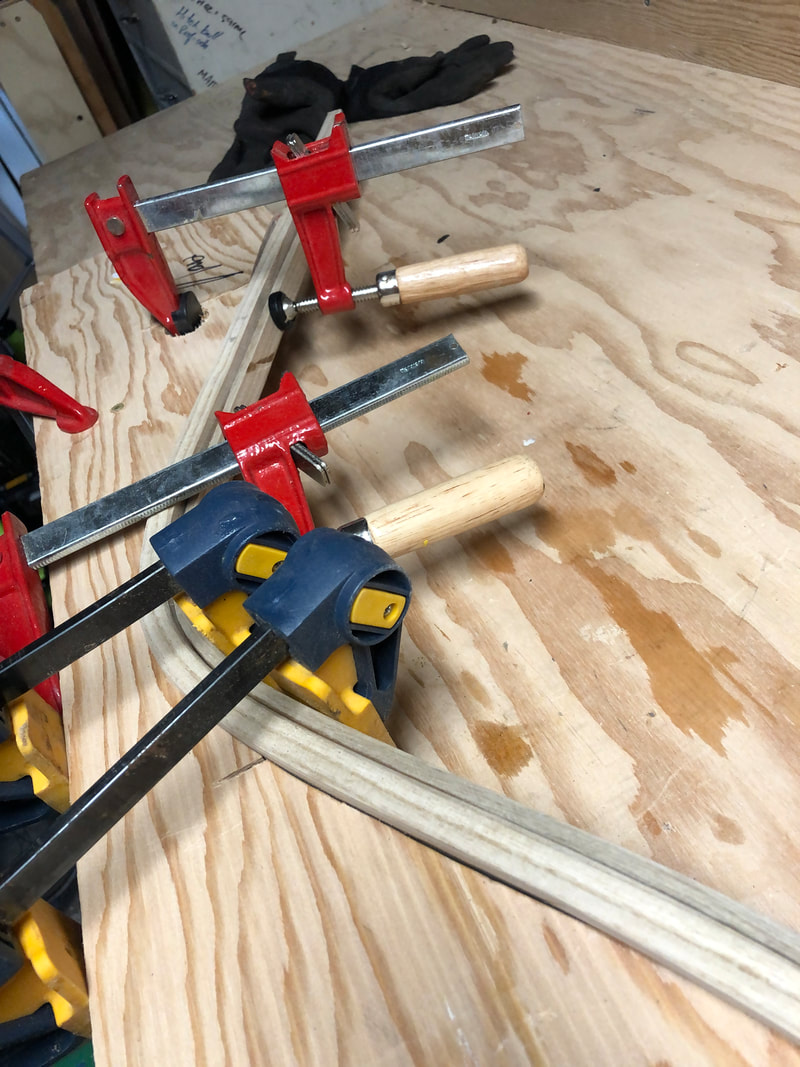
I traced the desired curve onto a scrap piece of plywood and then cut out the shape. I then clamped in a steamed piece of ash to the curve. I may have even exagerated the curve slightly knowing there would be a bit of springback once released from the form. I gave it a good day or more to dry before the release.
|
The more clamps the better. I used waterproof Titebond glue.
I used four releaseable zip ties to attach my trailer hitch base to my bicycle carrier.
|
The second trailer tongue shape was a big improvement. So the connector had to be recreated too.
This picture shows V1 of the hitch. It was great for the first test but had to be built again with the new tongue shape.
In the above video (starting at second 16) you can observe the first test of the trailer hitch. Notice the wobble. Moving the wheels back 1" and changing to a stiffer tongue eliminated the problem.
|
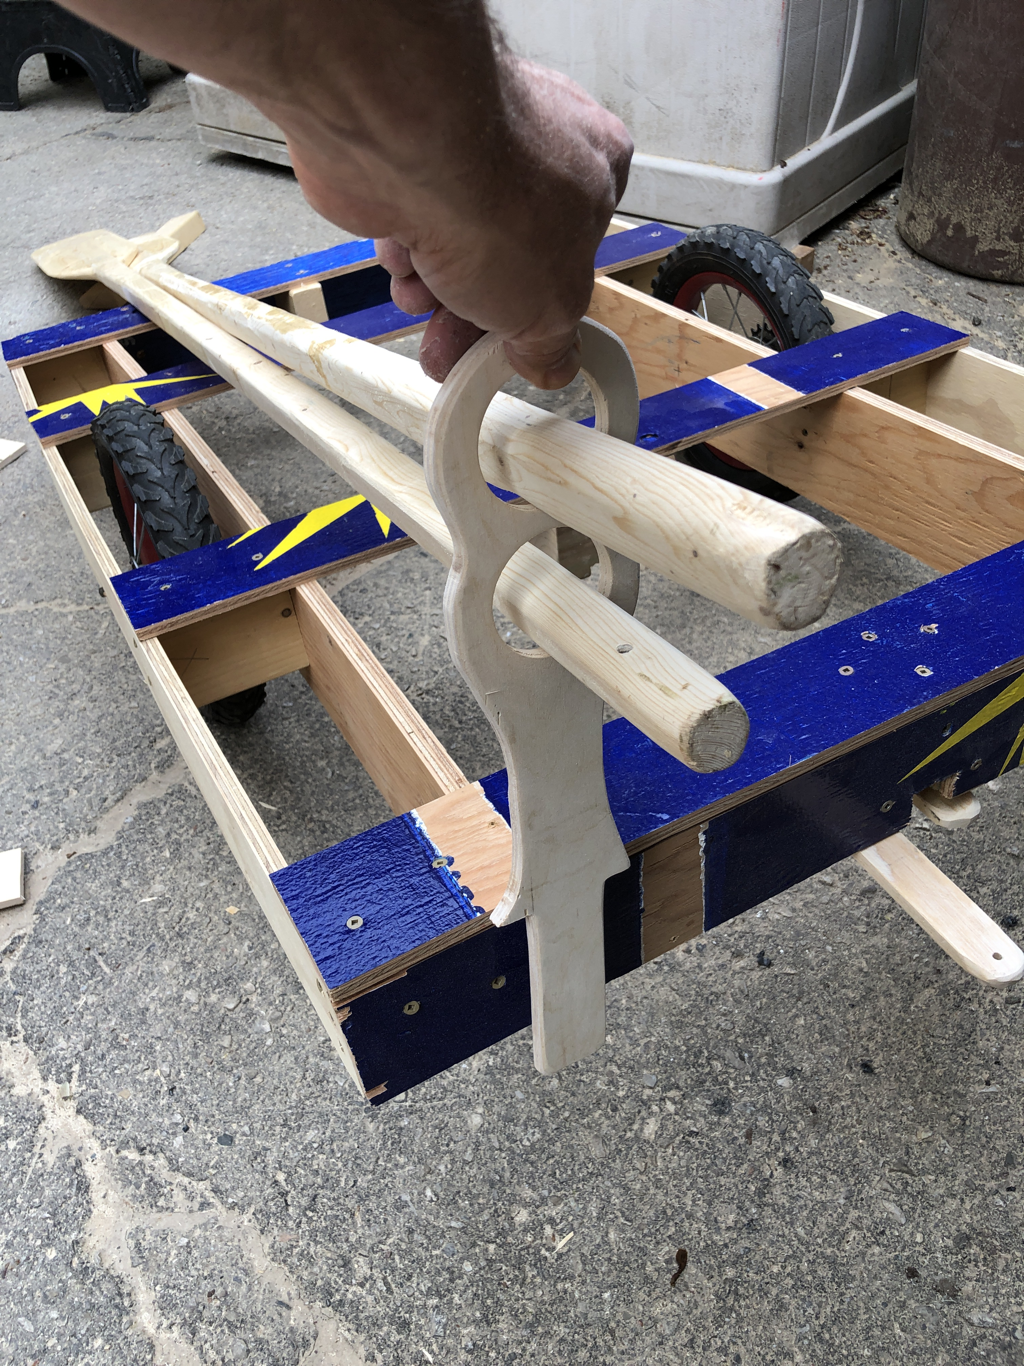
I designed a little holder for the oars and then simply created a slot in the trailer plywood where I jammed it in.
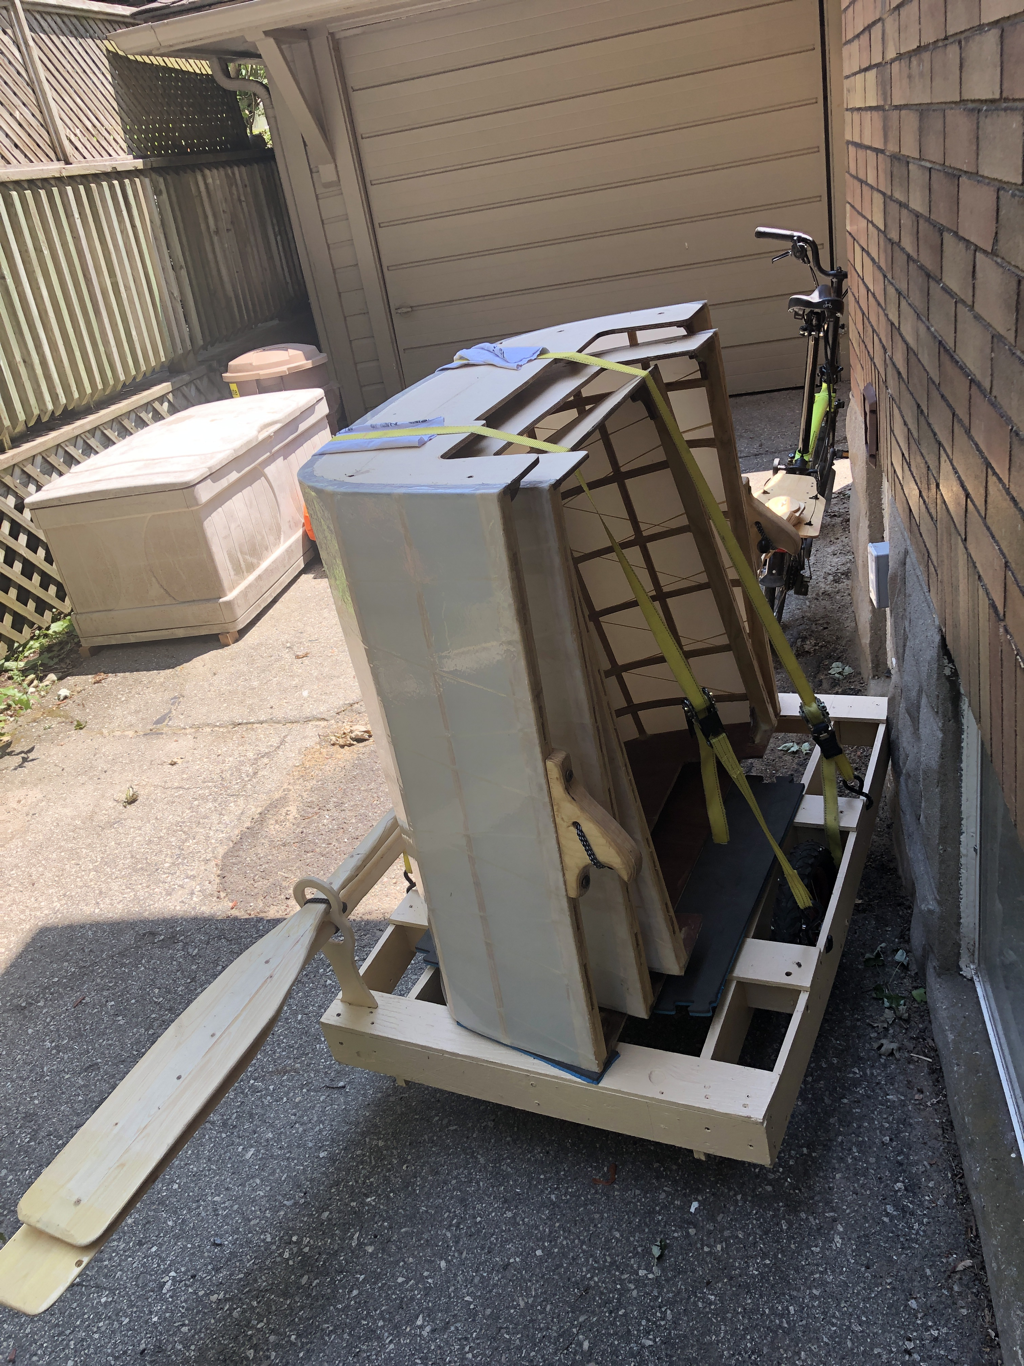
Strapped in and ready to ride!
|

The tongue can be removed for storage.
|
20. Test ride
It was now time to try out the boat with the bike in the urban setting. But Silver Lake was not ready. The work was proceeding and was looking amazing, but it was still a construction zone. Luckily, Waterloo is attached to Kitchener--the home of Victoria Park and is just down a bike trail from our home. So I hooked up the trailer with the boat, and with great trepidation started pedalling to Victoria Park. As I rode, I was pleased to not experience any sway from the trailer. Bumps would be the big test. As I proceeded to ride down the trail and cross intersections, I observed that the trailer was acting quite well. The two straps holding the boat in place were working as were the oar holders.
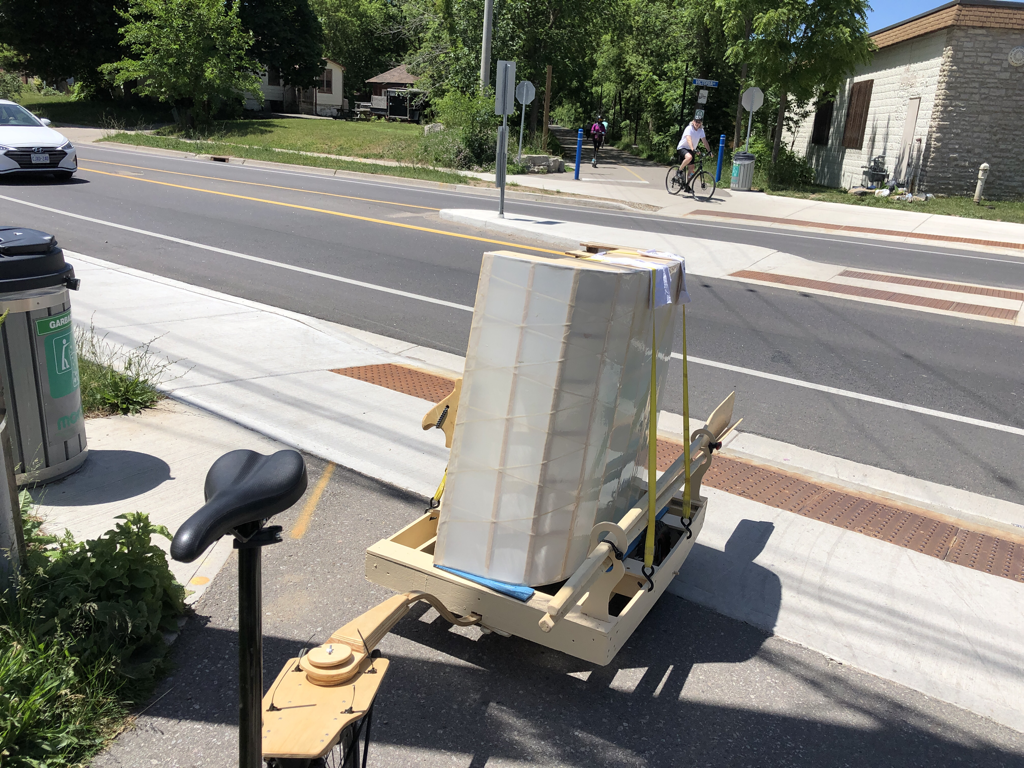
Making a crossing at the infamous (and recently improved) Victoria Street crossing.
|
|
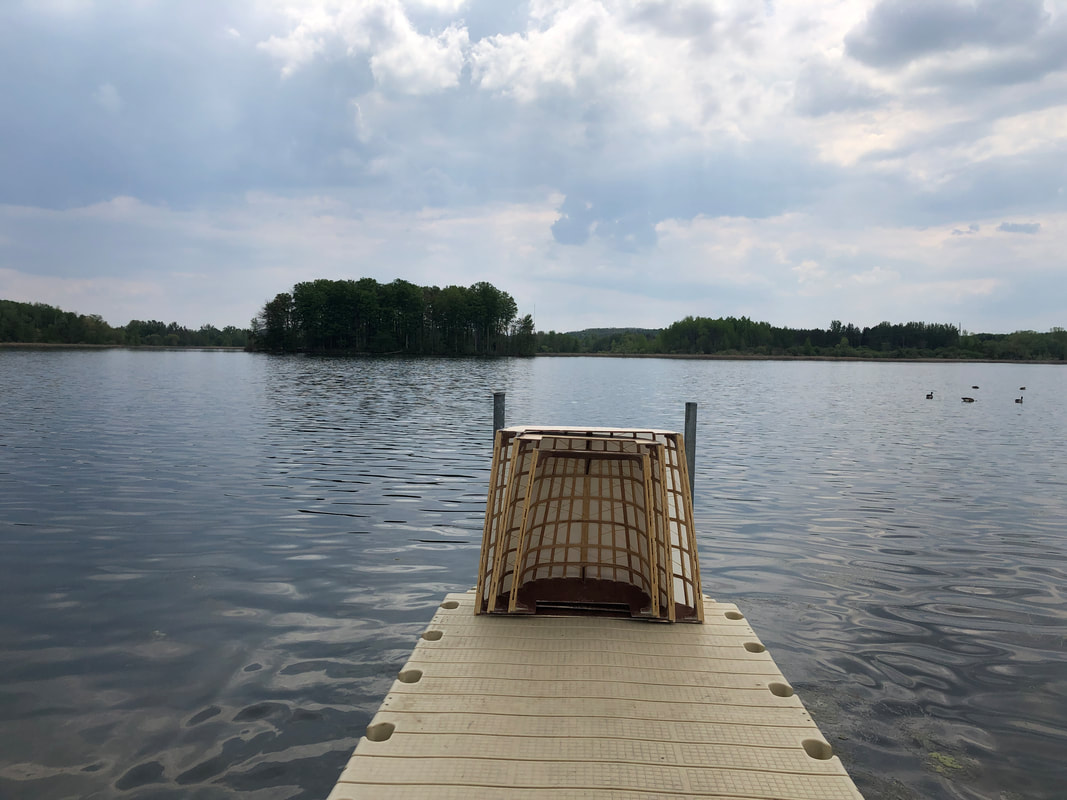
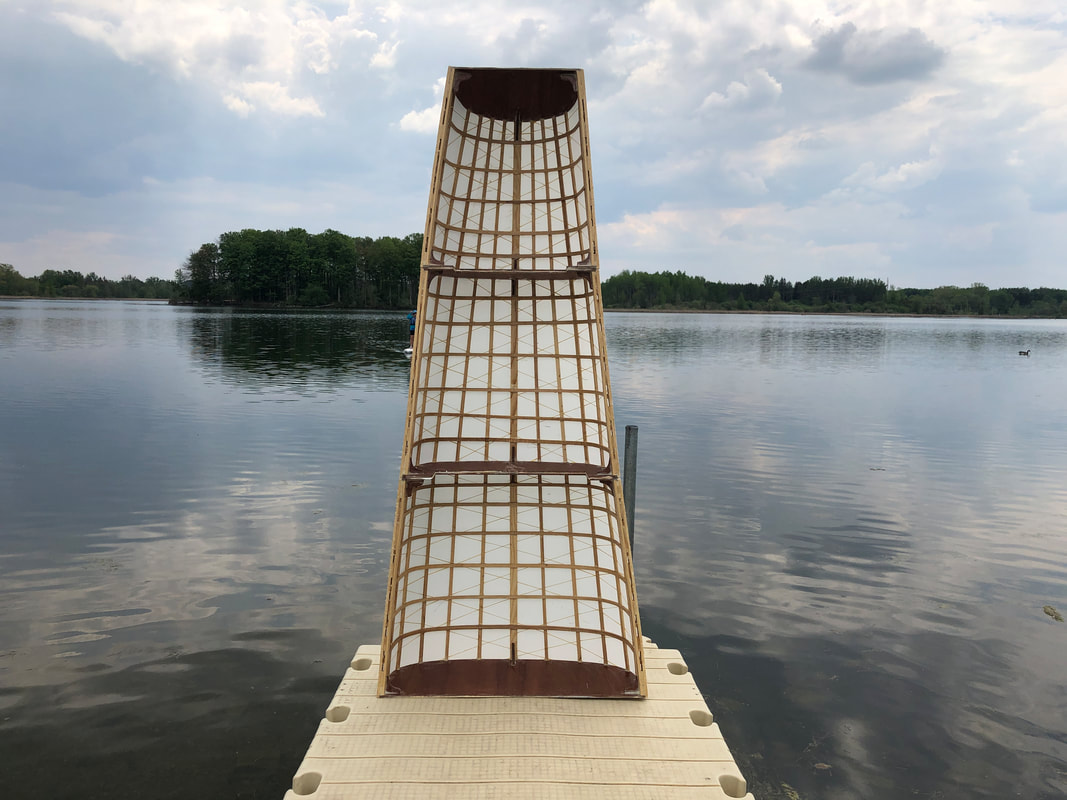
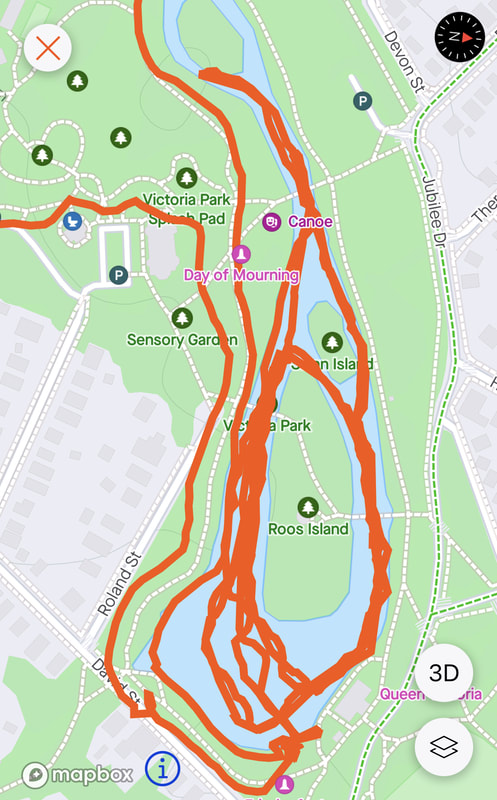
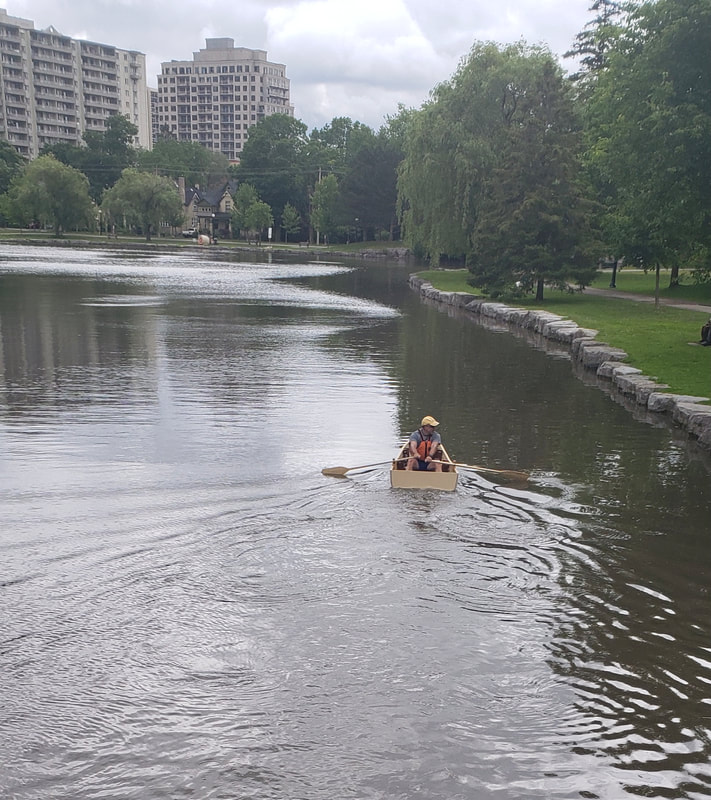
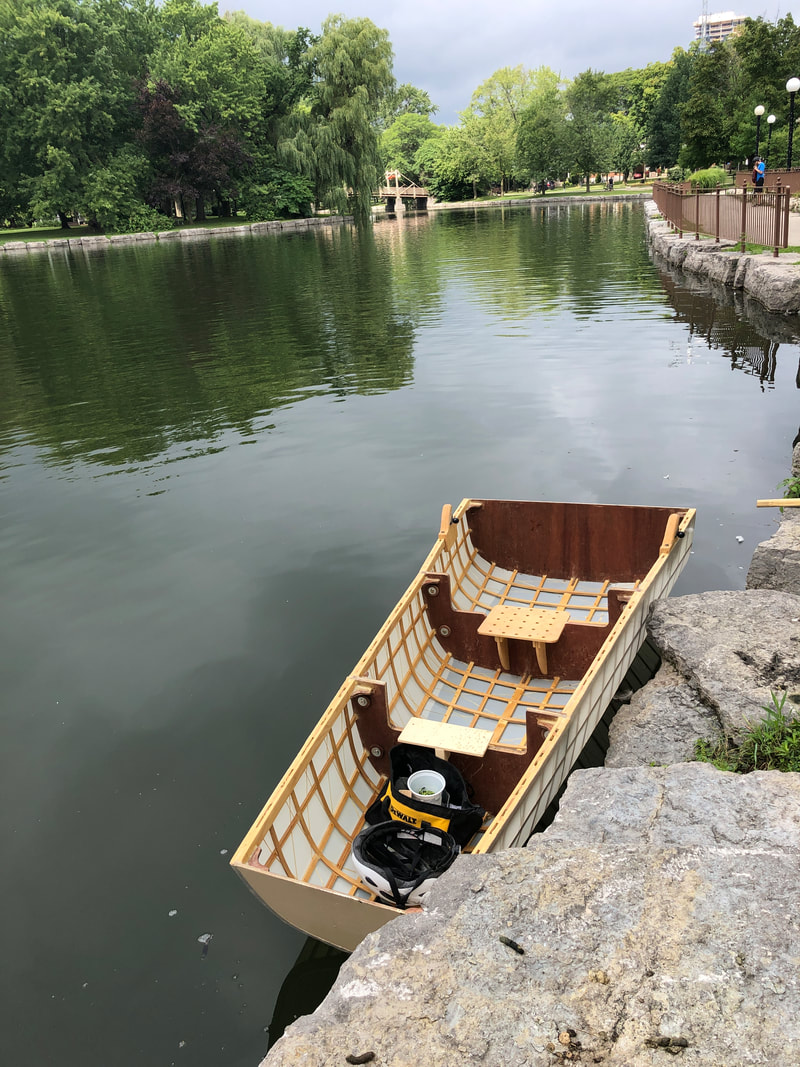
21. Launch
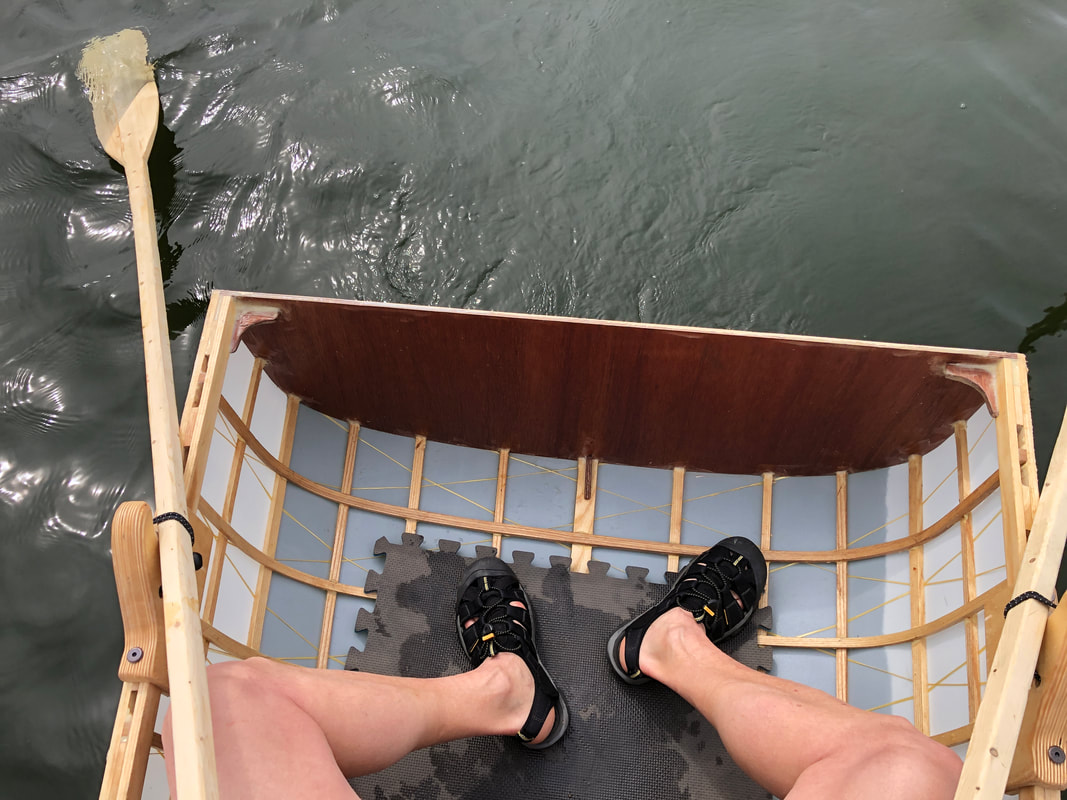
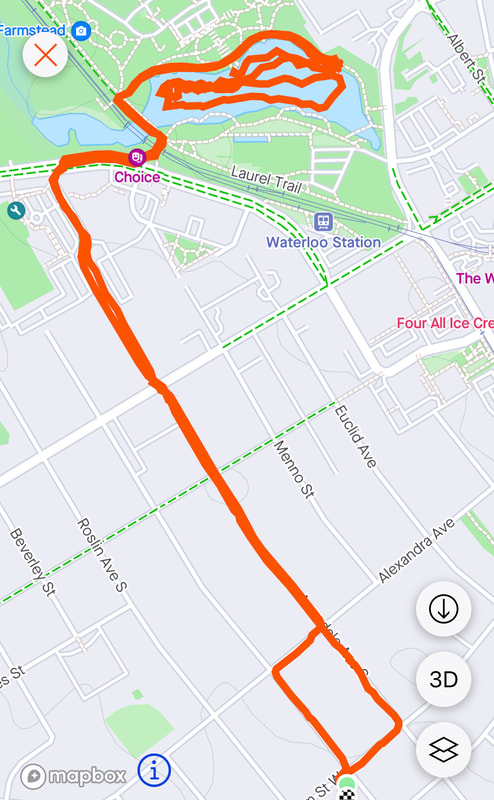
Once at the lake, it took me about 10 minutes to get the boat assembled and trailer locked to a tree. I put the boat in the water, placed my folding bike in the middle and rowed into the sunset! Actually, it was mid-day, but such a wonderful moment to be realizing my dream of urban rowing.
After a great loop of the water system, I came back, took the boat apart and reloaded it on the trailer and got ready for the ride home. After some great conversations about the boat with people enjoying the park, I headed out up the trail. I took a route that would ensure a gradual uphill effort but later took it on the most direct route home up a very steep hill without issue. I've now done the excursion a few times and the entire 'trip' takes about and hour and a quarter.
After a great loop of the water system, I came back, took the boat apart and reloaded it on the trailer and got ready for the ride home. After some great conversations about the boat with people enjoying the park, I headed out up the trail. I took a route that would ensure a gradual uphill effort but later took it on the most direct route home up a very steep hill without issue. I've now done the excursion a few times and the entire 'trip' takes about and hour and a quarter.
|

|
22. Summary
My boat now awaits the completion of Silver Lake in Waterloo and I can’t wait to pull my little 36lb boat behind my bicycle, down to this body of water in the middle of Waterloo, to enjoy some urban boating! Maybe I’ll see you on the water! I’d love the idea of urban boating to take off. I see great opportunity for fun and community with such activity.
|
|
|
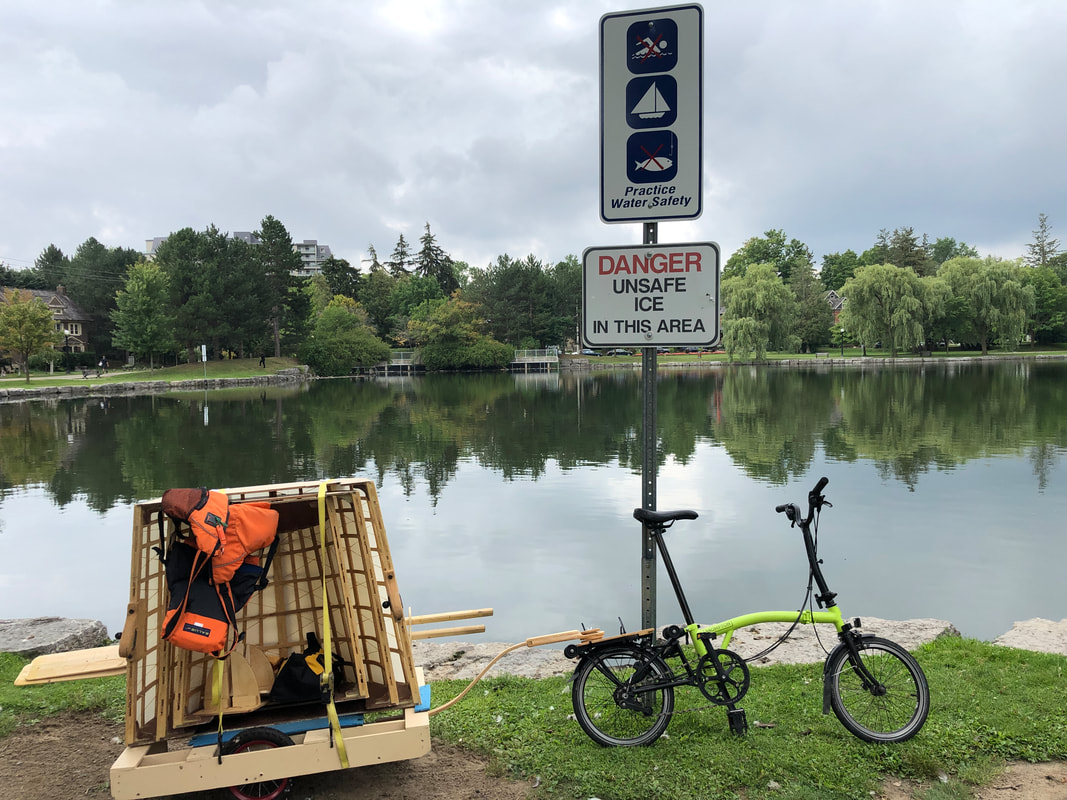
I had to take a picture with the sign that started it all!
|
|
My folding bike came along for the ride!
|
|
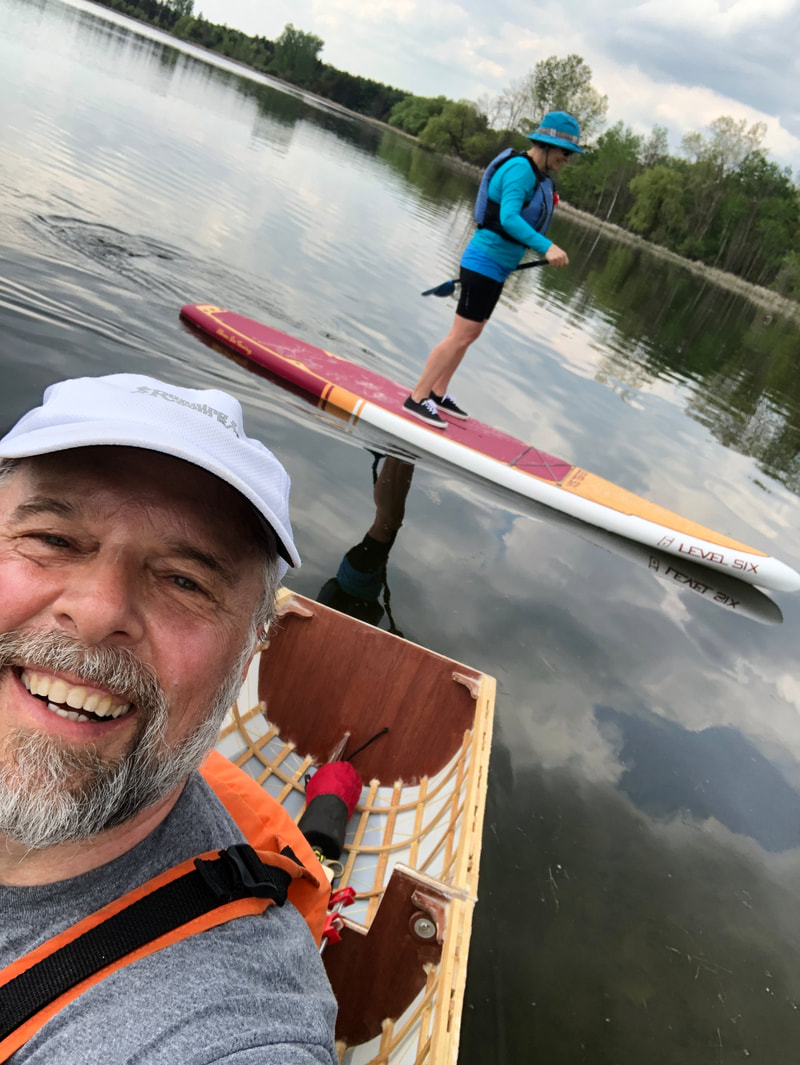
My wife Lorna has been such a big supporter of my little project! While I was rowing up at Laurel Creek Reservoir, she learned to handle a Stand Up Paddleboard.
|
Important to note:
I am not a professional boat builder. I've had great fun with this project but am very much learning each day.
Any information here is for information only.
Always be safe with tools. Wear eye protection, ear protection and other appropriate safety gear.
Children should not use power tools without adult supervision.
Always wear a life jacket.
Always wear a helmet when riding a bike.
I invite you to review my other social media sites:
Instagram: Snowbankproductions
Twitter: Matthew_morris
YouTube: mattdjmorris
Instagram: Snowbankproductions
Twitter: Matthew_morris
YouTube: mattdjmorris
Post Build changes!
23. Sailing rig V1
I had always planned to add a sailing rig to my little boat. After ensuring that the boat worked, it was time to start planning.
Many many years ago, I learned about Alexander Graham Bell's work with tetrahedral kites. I decided to make one which was great fun. And I remembered just recently that I had used ripstop nylon as the kite material, so I decided that I would attempt to use this material--total cost around $17.
The design assumptions for the sail would include the need to be lightweight, trailerable and installable within the boat.
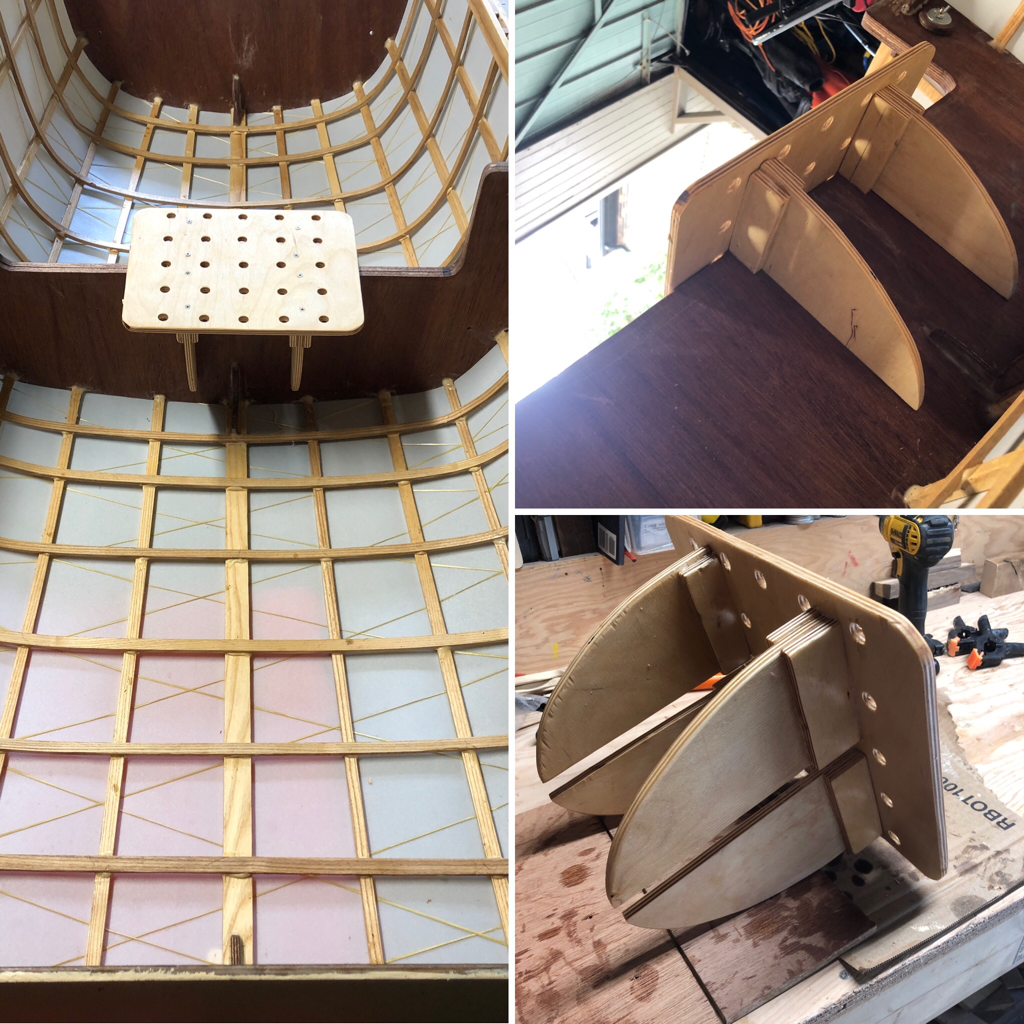
I also needed to design a way of supporting the mast. I decided to use some scrap baltic birch plywood even though it was not waterproof. I crafted a removable base that would sit 'locked' into the bottom of the boat. Then I crafted a piece that would sit across the boat that the mast could be slotted into. I used ball bungees to attach this part to the gunwales of the boat. Thanks Brian Schultz of Cape Falcon Kayaks for the idea! Using bungees made removing it simple, which would allow proper nesting during towing behind my bicycle.
Many many years ago, I learned about Alexander Graham Bell's work with tetrahedral kites. I decided to make one which was great fun. And I remembered just recently that I had used ripstop nylon as the kite material, so I decided that I would attempt to use this material--total cost around $17.
The design assumptions for the sail would include the need to be lightweight, trailerable and installable within the boat.
I also needed to design a way of supporting the mast. I decided to use some scrap baltic birch plywood even though it was not waterproof. I crafted a removable base that would sit 'locked' into the bottom of the boat. Then I crafted a piece that would sit across the boat that the mast could be slotted into. I used ball bungees to attach this part to the gunwales of the boat. Thanks Brian Schultz of Cape Falcon Kayaks for the idea! Using bungees made removing it simple, which would allow proper nesting during towing behind my bicycle.
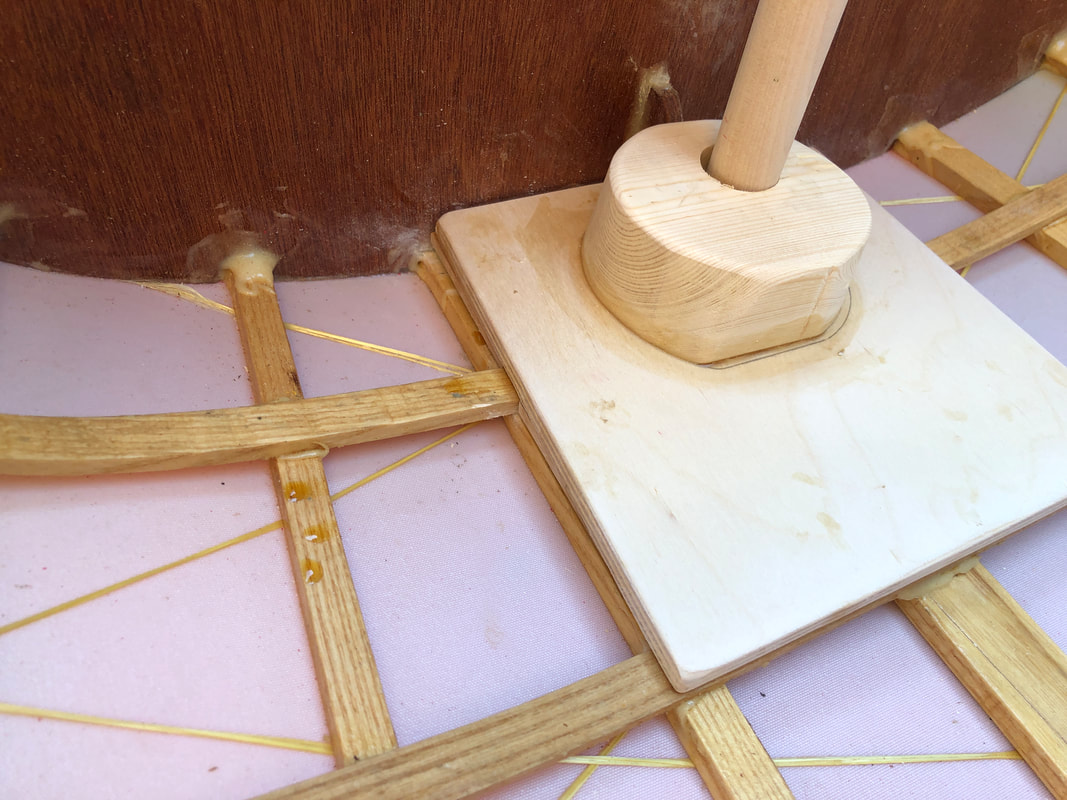
The final base that would hold the mast.
|

The base as it began. Here I'm cutting little spacers that were glued to the bottom side of the base. These little pieces of wood would help it lock into it's proper location. Notice the little notch in the base which helps it link into the L brace at the front of this section of the boat.
|
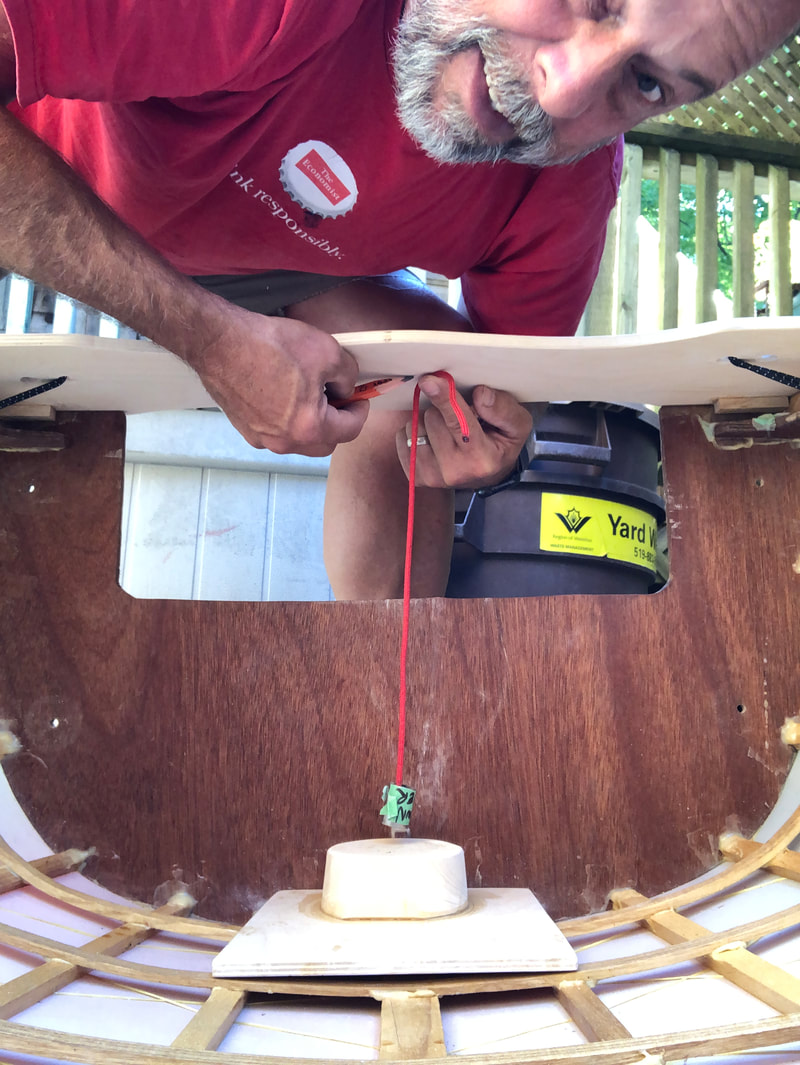
Once the base was placed in its final position I had to make sure the mast was perfectly vertical. To get it right meant I had to attempt to drill the top hole in exactly the correct position. I used a very crude plumb bob to mark a spot. I then drilled the top hole. Once drilled, I made sure the boat was level (as it would be floating), placed the mast into the hole, placed a level on the mast to ensure it was exactly vertical, and then marked where I had to drill the bottom hole. You will note from the final drill in the base that it is not exactly centered on the supporting wood. I'm ok with that as it's strong and stable.
|
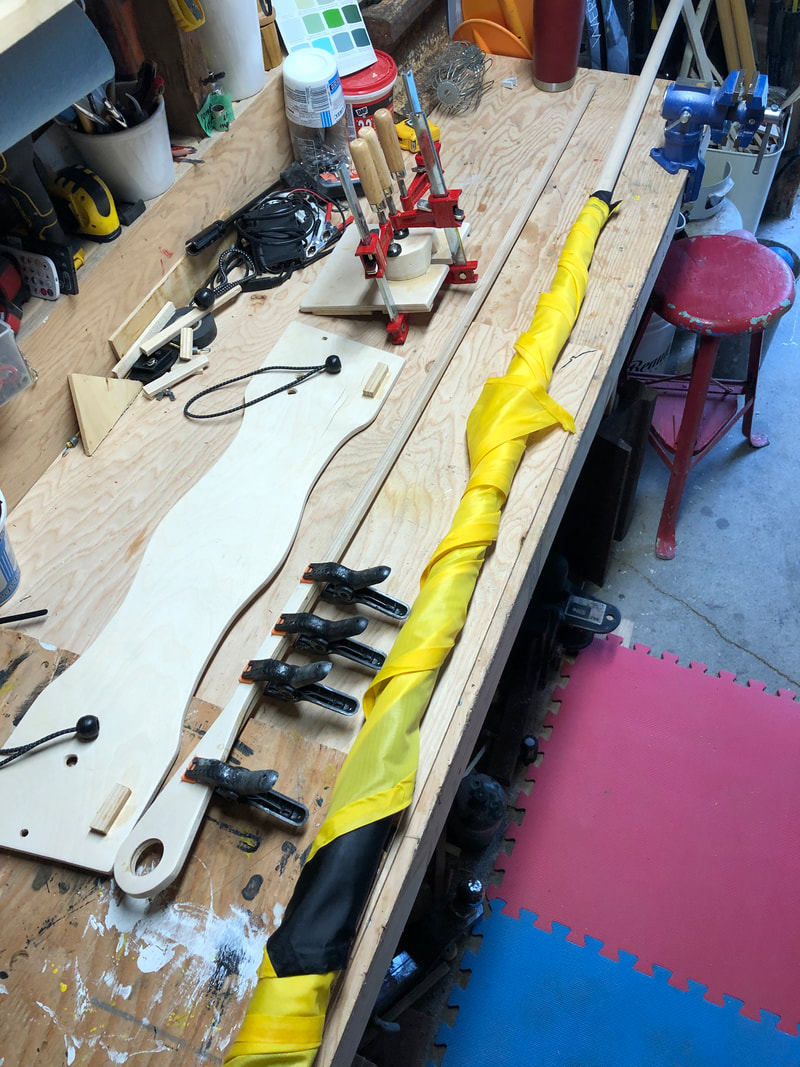
In this photo, notice the little blocks of wood on the underside of the top support. These blocks help hold the support in the correct location by locking it into the corner of the middle boat section. Also pictured is the boom. In this initial iteration, the boom has a circle that the mast is stabbed through during installation. Also included here is the rolled up V1 of the sail--black and yellow.
|
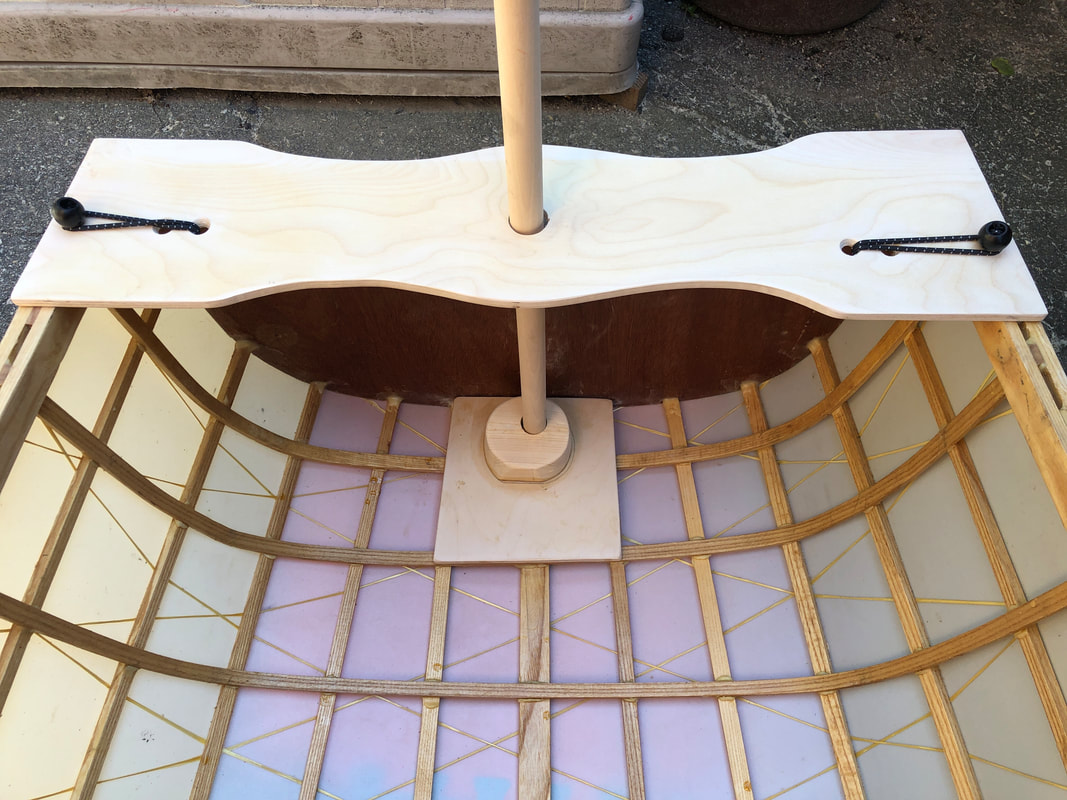
The top piece is held onto the gunwales using ball gungees. I will credit Cape Falcon Kayaks owner Brian for the idea! Notice how the hole in the base support is a little off center.
|
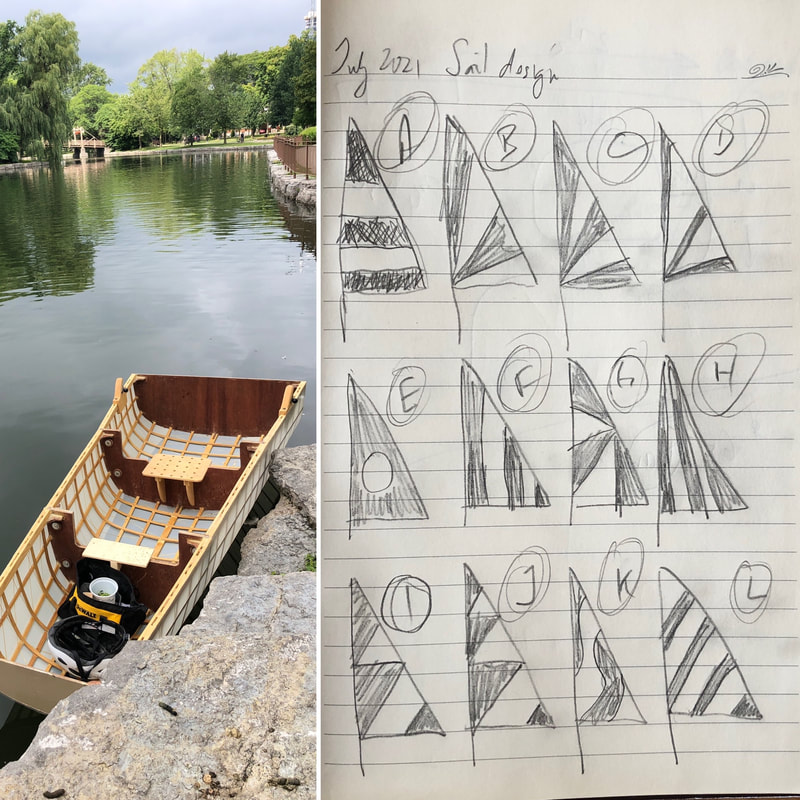
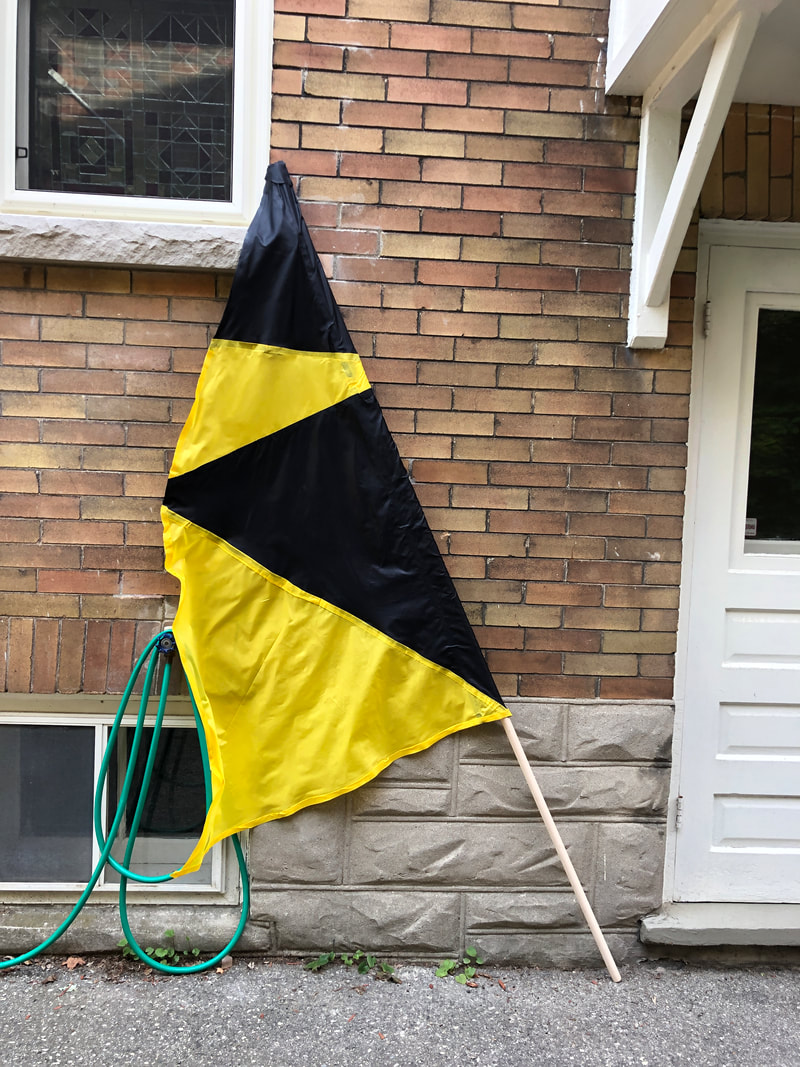
Version 1 of my sail (and related rig) was created with yellow and black ripstop nylon. I posted 12 possible designs to my Instagram (snowbankproductions) site to get feedback on which design I should pick. I then began by using my now go-to product Heat'n Bond to create the sail. The boom was separate and would need to be lined up over the mast hole as the mast was installed each time.
In my first test, I quickly realised that it was not a good solution. Not enough sail area, poor sail shape and inserting the boom during sail raising added more complexity to the task. Version 2 would be better.
In my first test, I quickly realised that it was not a good solution. Not enough sail area, poor sail shape and inserting the boom during sail raising added more complexity to the task. Version 2 would be better.
|
|
|
24. Sailing rig V2
|
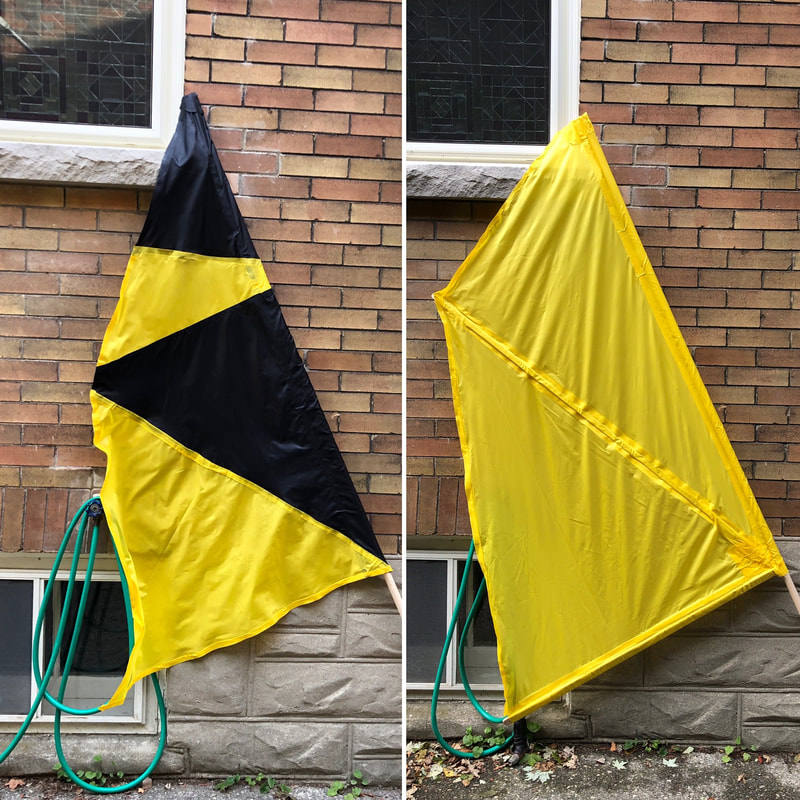
On the left is V1 of my sail, and on the right, V2! Bigger sail, new shape enhancing batten and an integrated boom.
|
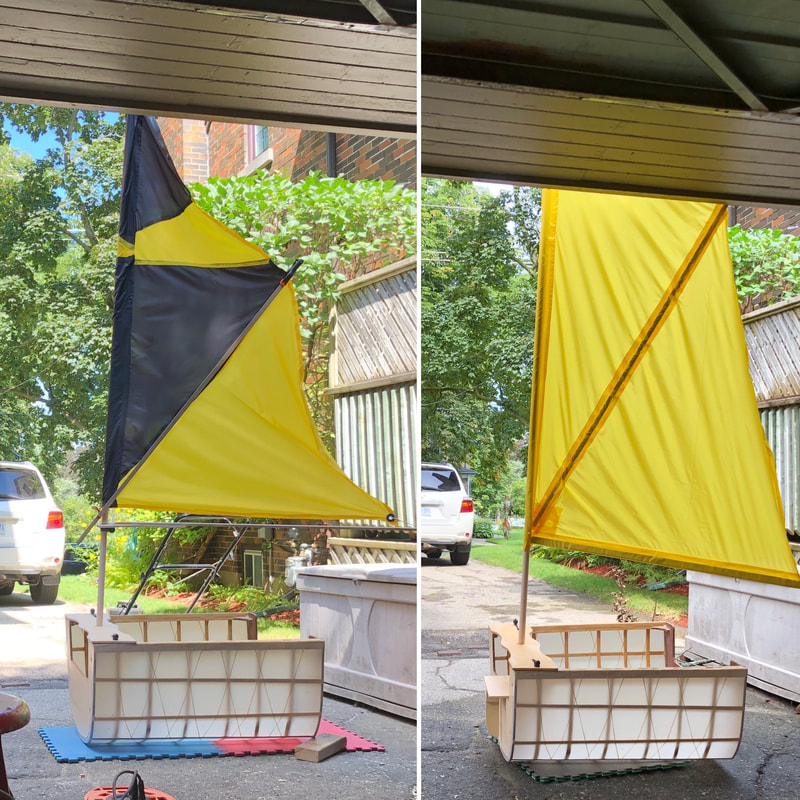
V1 and V2 of my sail sitting in just the center section of the boat.
|
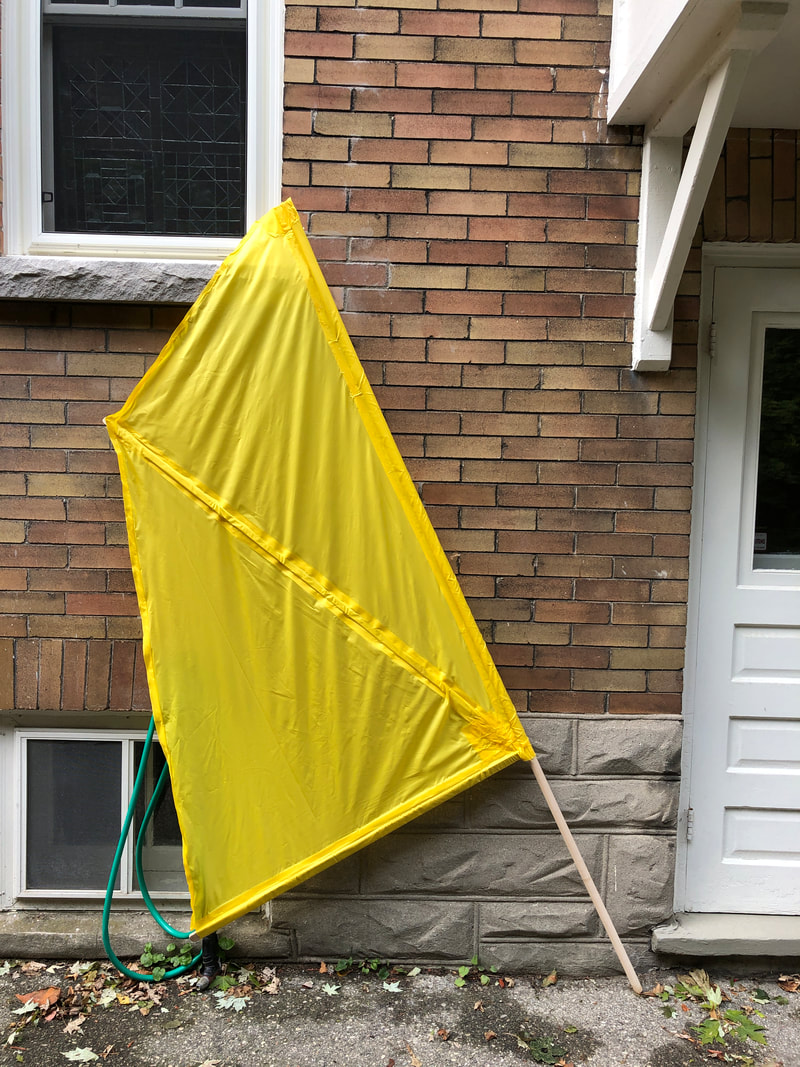
I was searching how to make a better sail and came across a great video by Brian Schultz of Cape Falcon Kayak. He had created a small sail for use in his SOF canoes that was completely collapsible . I decided to develop a similar solution for my boat and you can see the result here. As I built it with Heat'n Bond, my iron got too hot and I ended up burning a nice 4" hole in the sail. So I crafted a patch and carefully ironed it on. You can see the patch at the bottom of the sail by the mast.
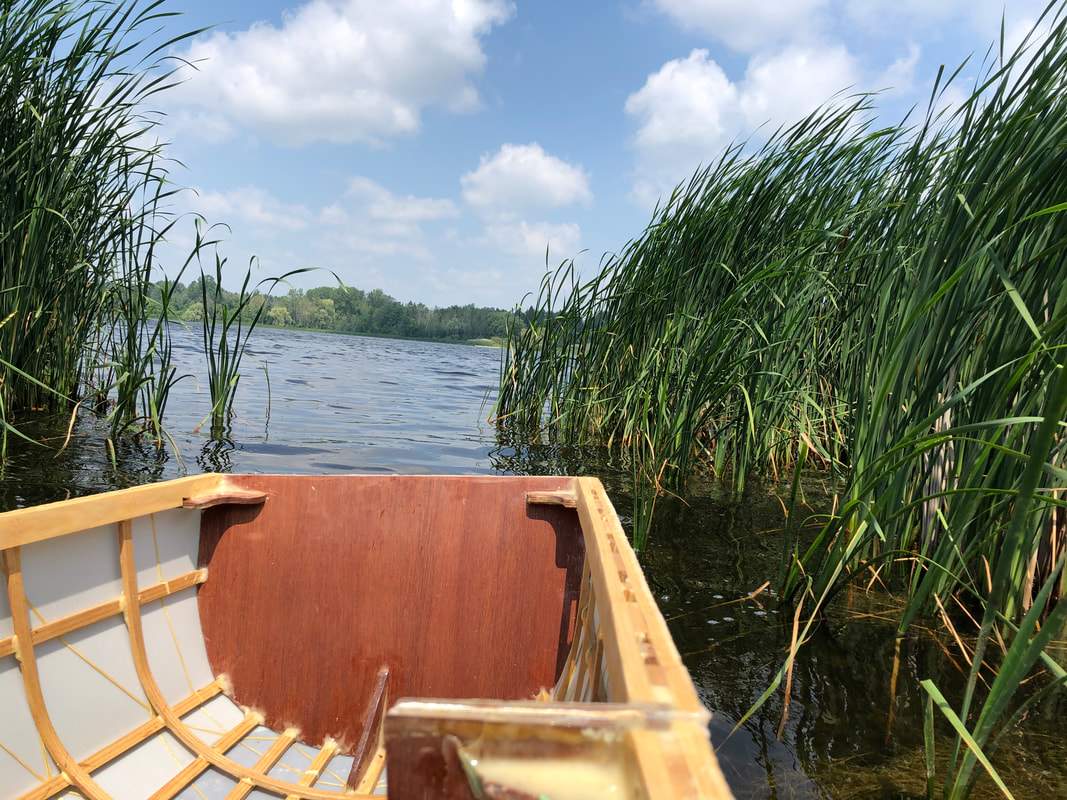
I picked a day after a lot of rainy days for the test and started riding down the bike trail, towing my boat, to the urban lake in Kitchener, Ontario. Further down you can read about my centerboard that I had made for the test.
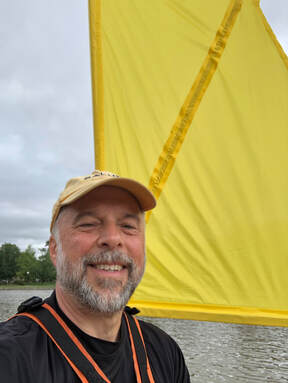
I put the boat together and looked at the ominous sky. Eventually I decided to go for it and out I went. I rowed to the center of the lake and raised the sail. It almost immediately grabbed the wind well and I knew it was an improvement! The integrated boom made for a very simply install and this time I remembered to attach a rope to the end of the boom! Success!
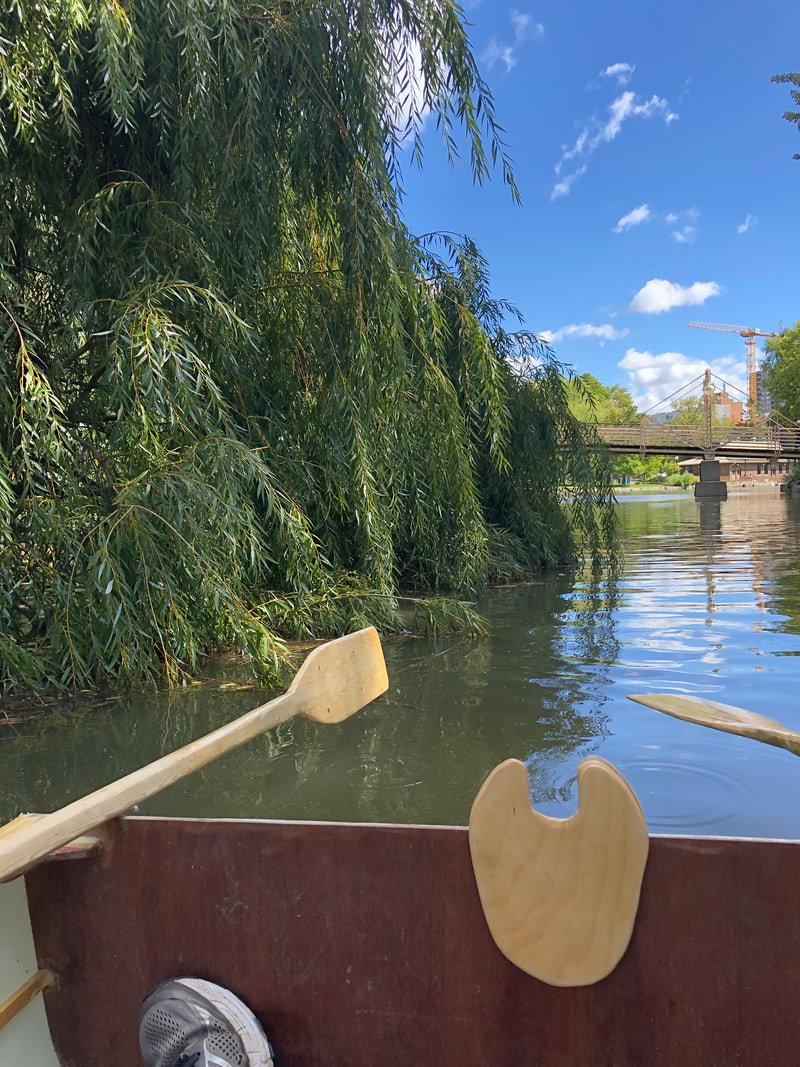
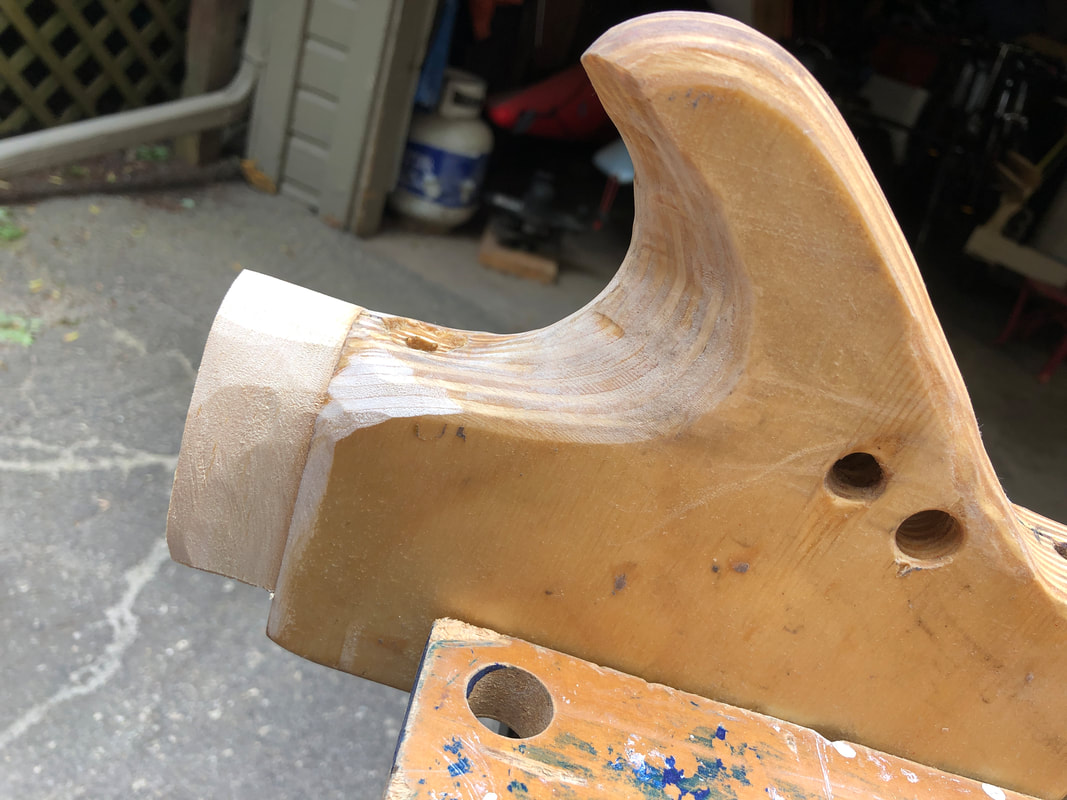
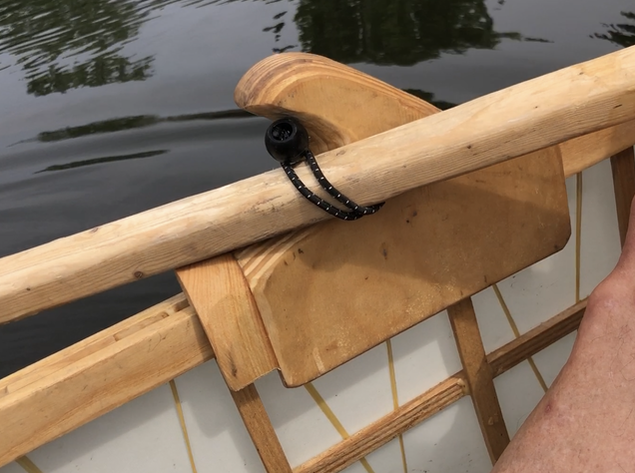
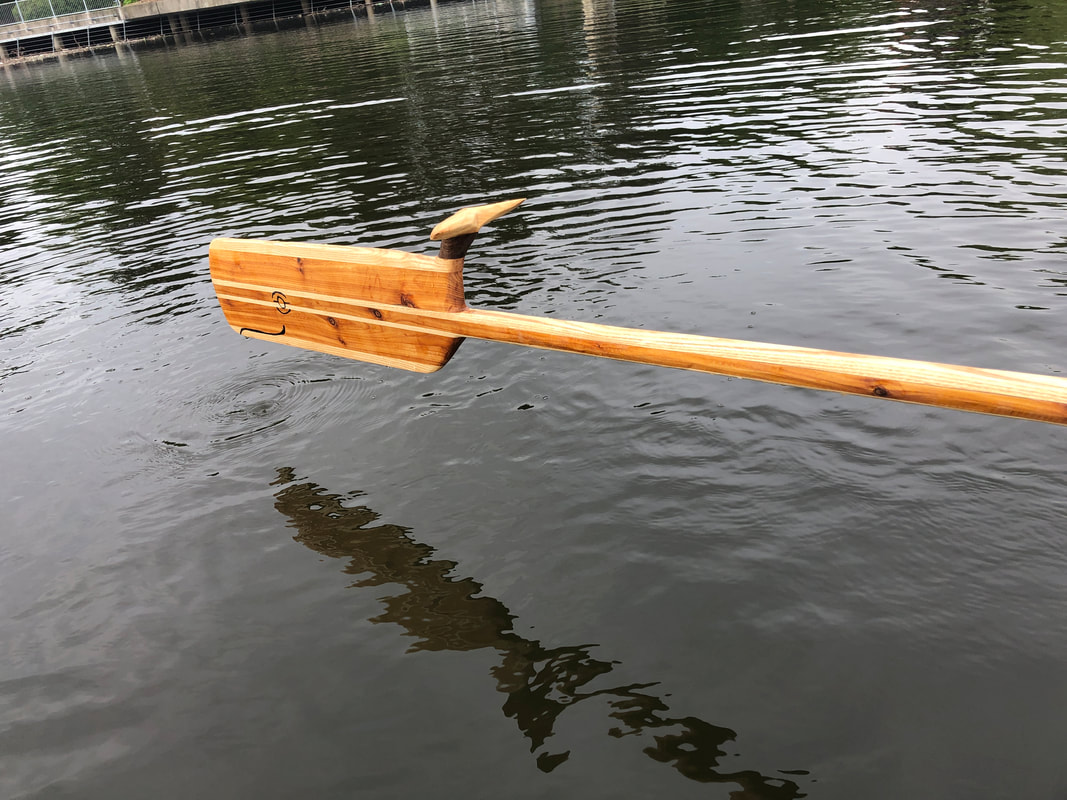
You might wonder what my plan for steering was. I decided to avoid a complicated rudder system and instead use what I alread had--an oar! So I created a little removeable receiver on the stern where one oar could be slotted and allow some steering control. So far I think it will be a winner.
I picked a day after a lot of rainy days for the test and started riding down the bike trail, towing my boat, to the urban lake in Kitchener, Ontario. Further down you can read about my centerboard that I had made for the test.
I put the boat together and looked at the ominous sky. Eventually I decided to go for it and out I went. I rowed to the center of the lake and raised the sail. It almost immediately grabbed the wind well and I knew it was an improvement! The integrated boom made for a very simply install and this time I remembered to attach a rope to the end of the boom! Success!
You might wonder what my plan for steering was. I decided to avoid a complicated rudder system and instead use what I alread had--an oar! So I created a little removeable receiver on the stern where one oar could be slotted and allow some steering control. So far I think it will be a winner.
|
|
|
25. Centerboard
Here is a quick summary for now.
I built a centerboard contraption which some would call a leeboard.
It was ineffective however because it was too small.
I've just created a bigger board and plan to attach it soon. Today is May 10, 2022.
I built a centerboard contraption which some would call a leeboard.
It was ineffective however because it was too small.
I've just created a bigger board and plan to attach it soon. Today is May 10, 2022.
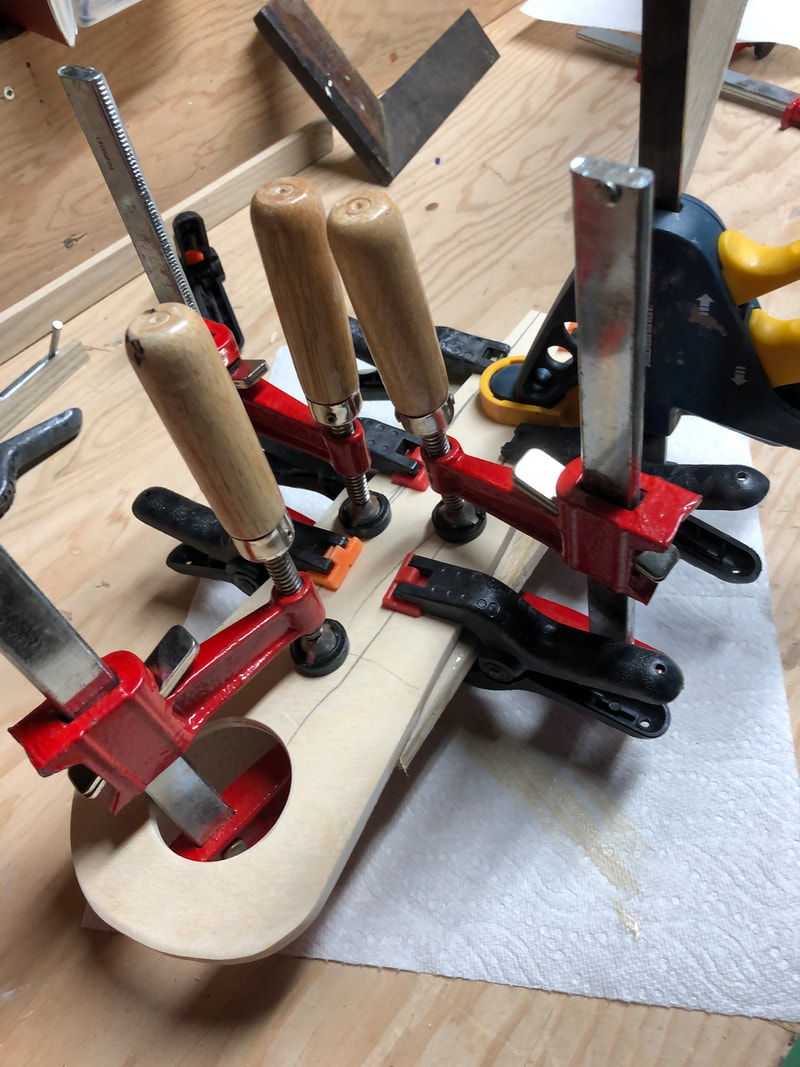
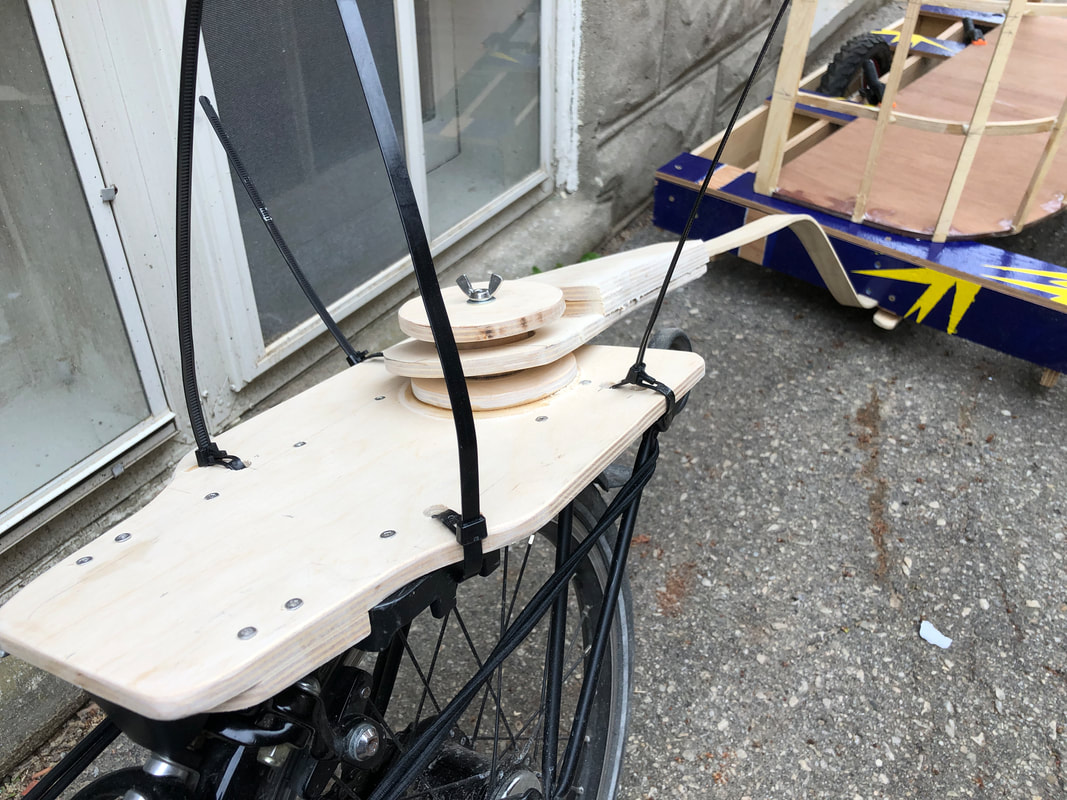
26. Bicycle hitch #3
|
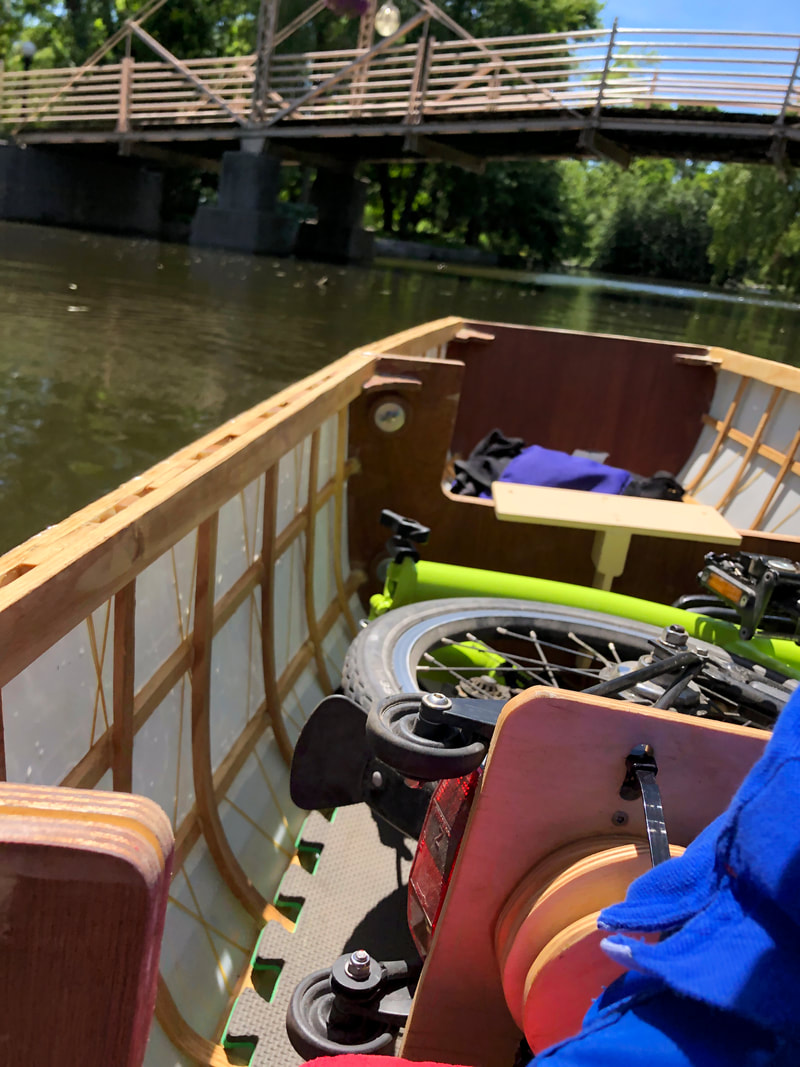
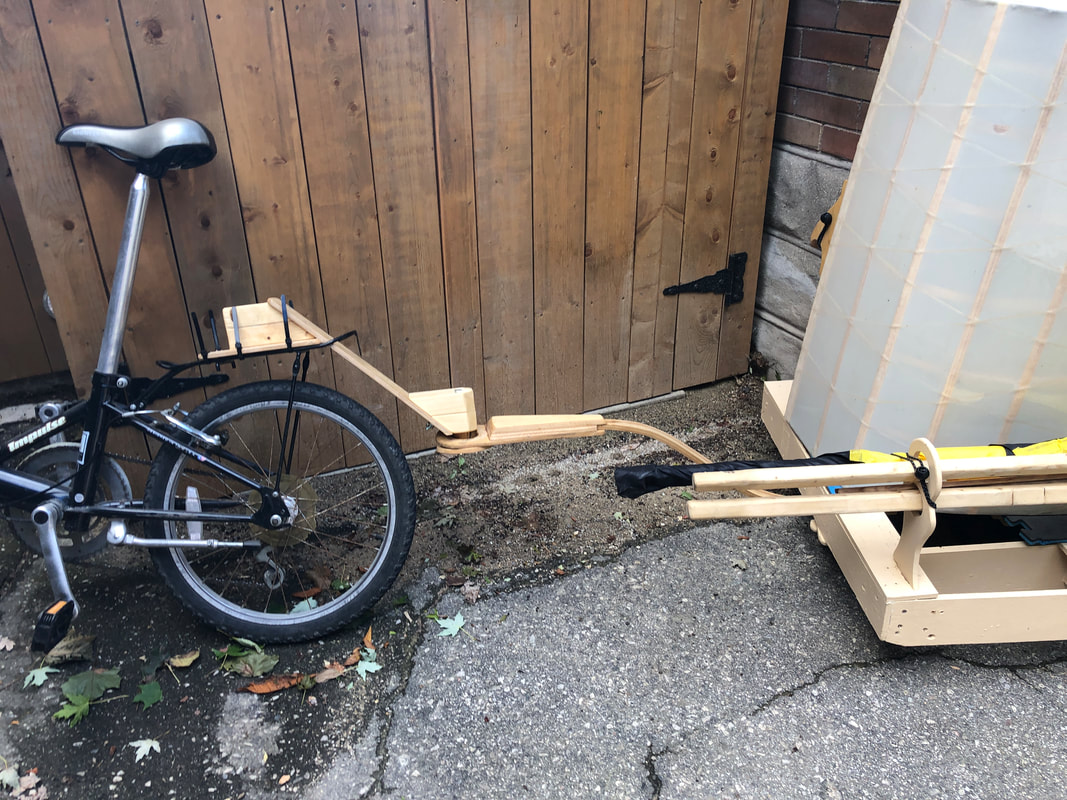
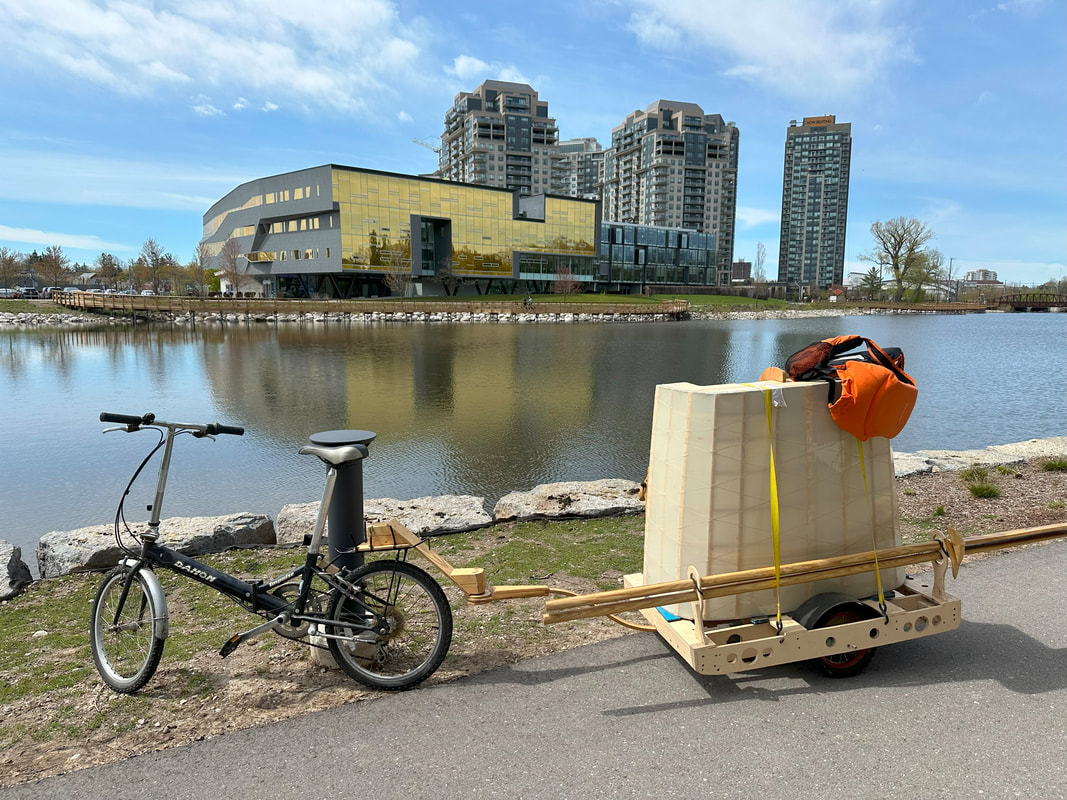
I decided to use an older folding bike and lock it onshore with the trailer while I rowed. This would save time in not having to fold it up and put it in the boat. It would also keep the boat light.
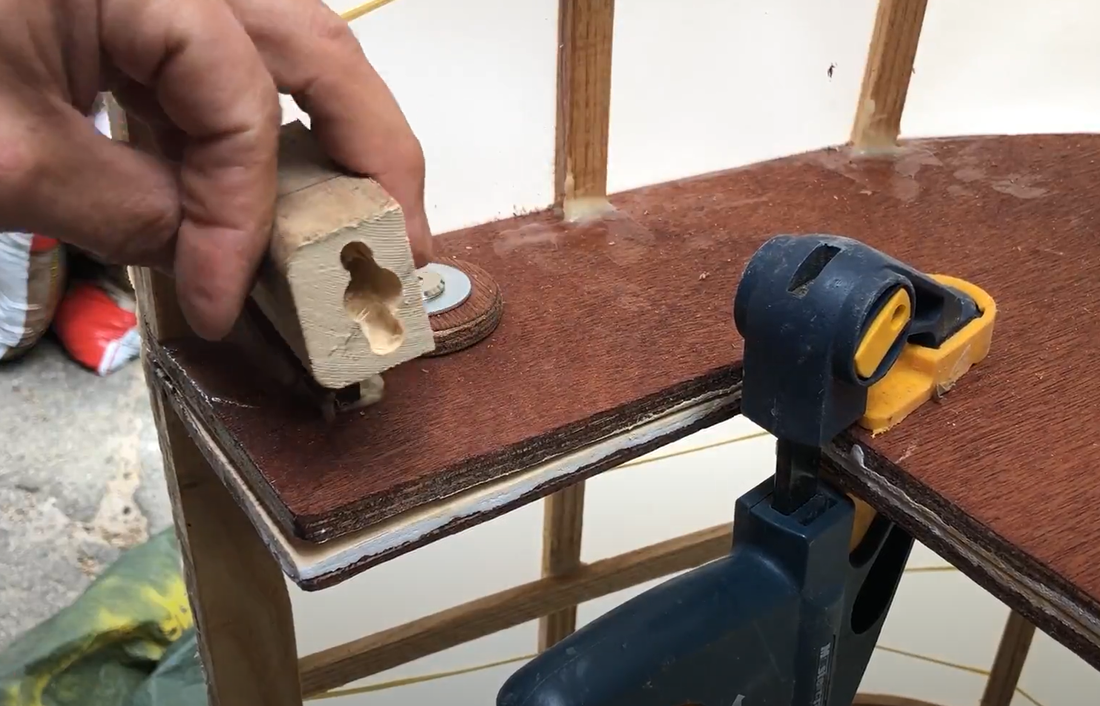
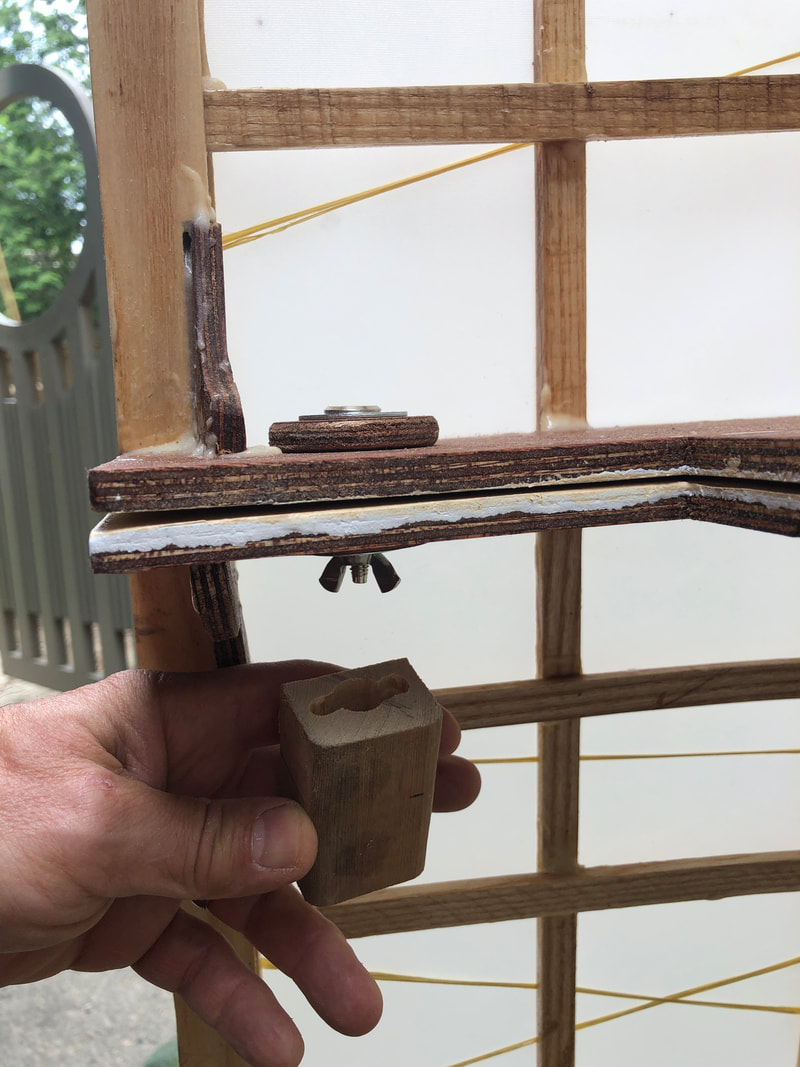
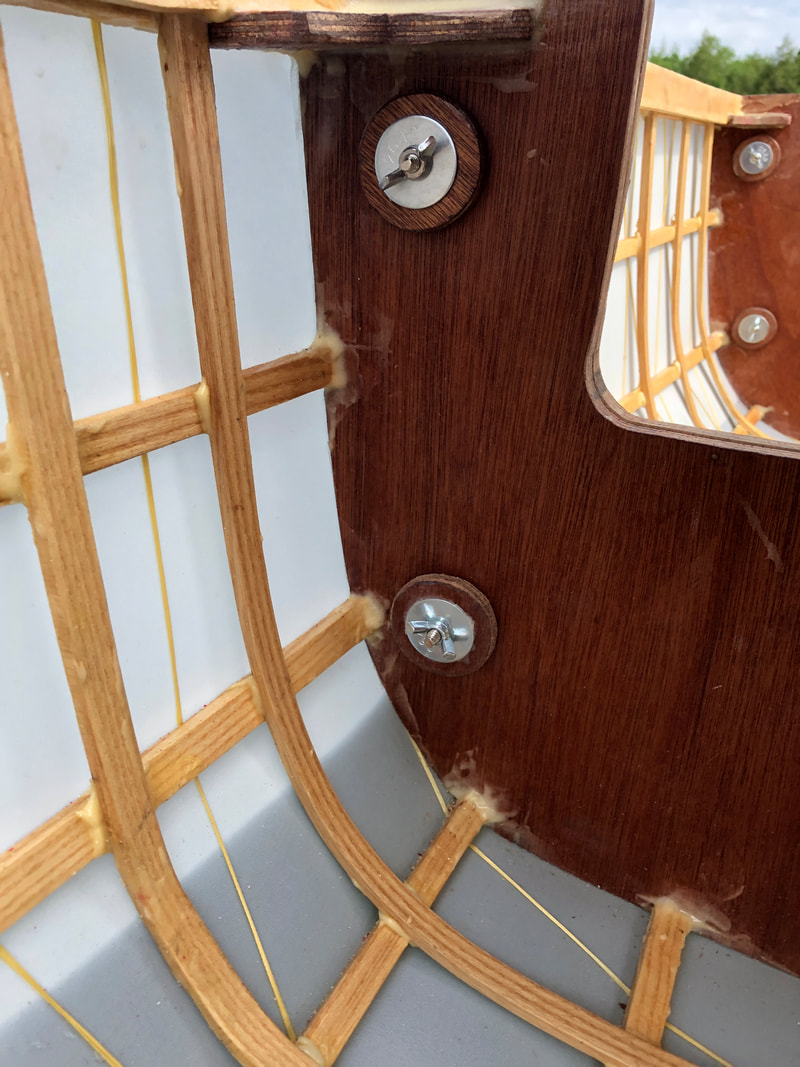
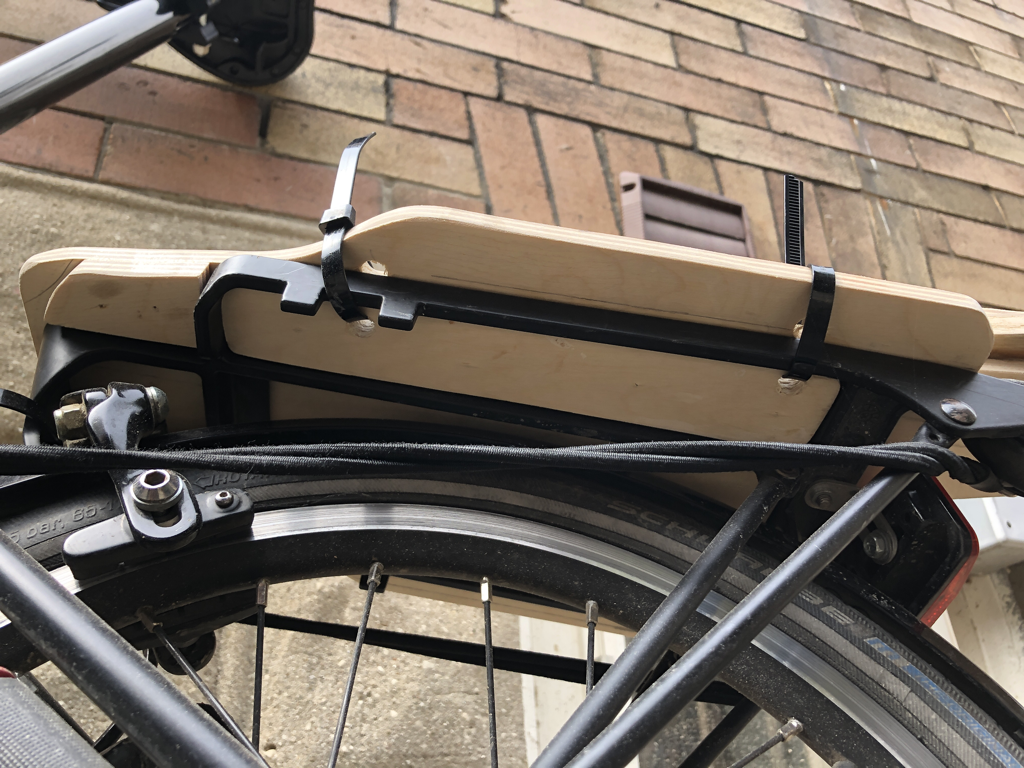
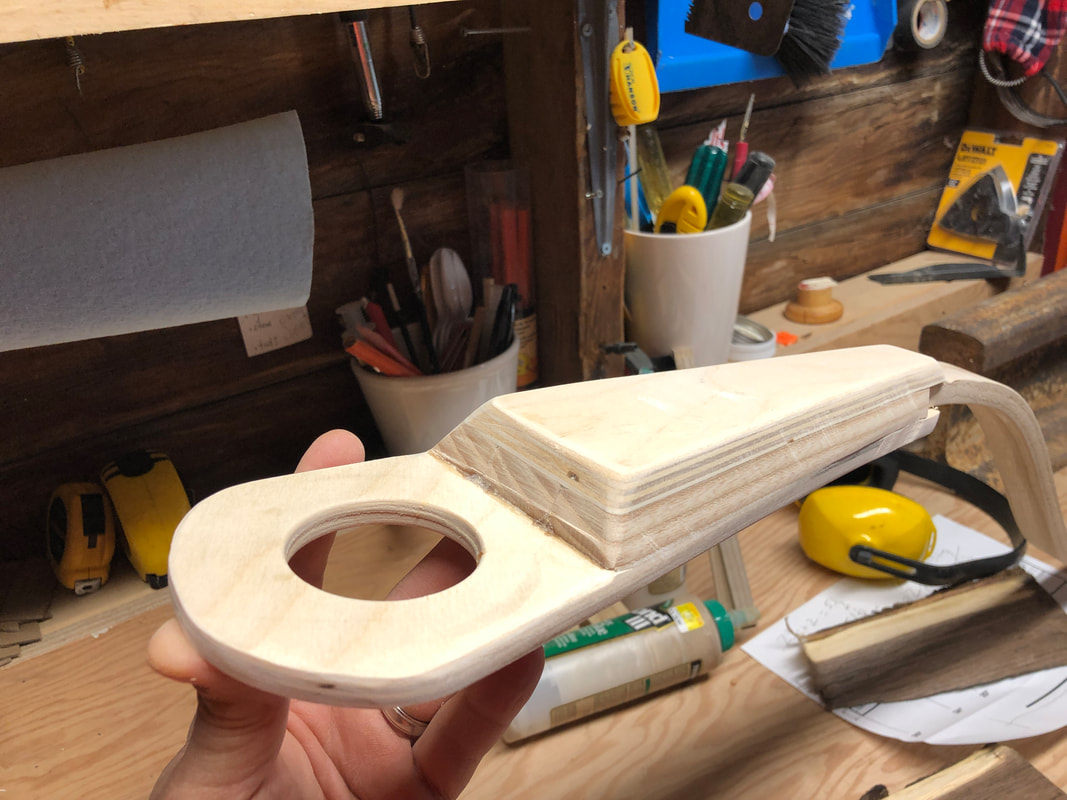
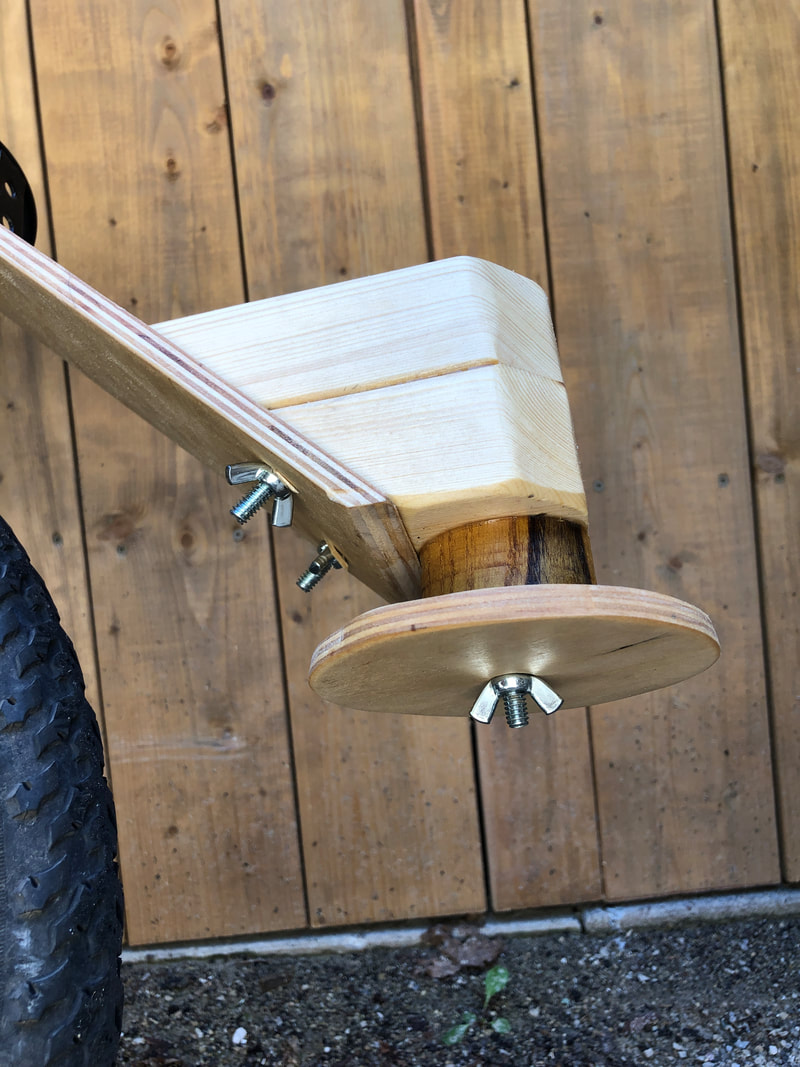
This necessitated designing a new hitch. My solution was to create a receiver where the trailer tongue would be lifted up onto the pin and then a small circle of baltic birch would hold it in place. In the picture shown, the wingnut gets spun off allowing the circular disk to fall off. Then the trailer is lifted up onto the round cylinder, the wooden circle is placed onto the thread and then the wingnut is put back on. It worked! The other two wingnuts shown are designed for quick removal at the end of the season when I want to take off the hitch receiver for the winter. They release the block of wood that holds the pin so that the rest of the hitch can be pulled through the small hole in the bike rack. The entire hitch is attached to the black bike rack using 6 releaseable zip ties. |
|
27. Fenders for boat trailer
|
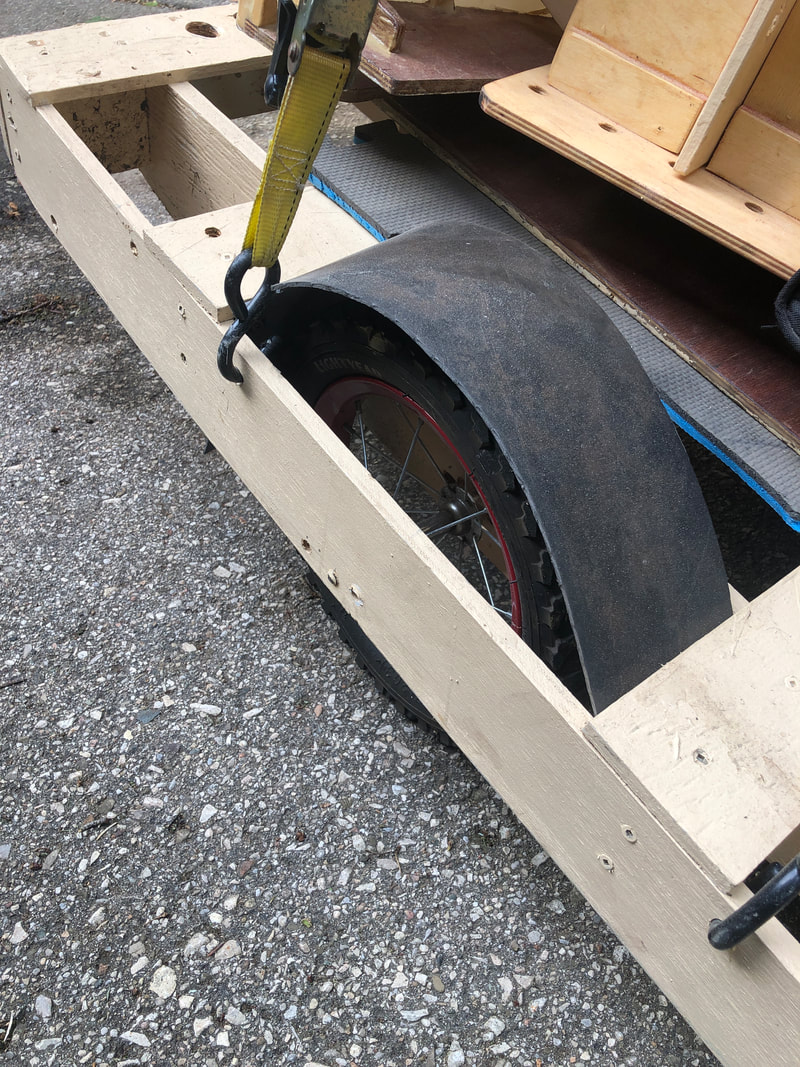
I rode in some rain and the water flew up onto the trailer and made a mess. In May of 2022 I decided it was time to refine the trailer. I scrounged some plastic from the garbage down the street--it was an old lid of a large storage bin. I cut it up and screwed it over the wheels. Problem solved. I was a bit surprised at how it improved the look of the trailer. Not that it's aesthetics are of concern.
|
|
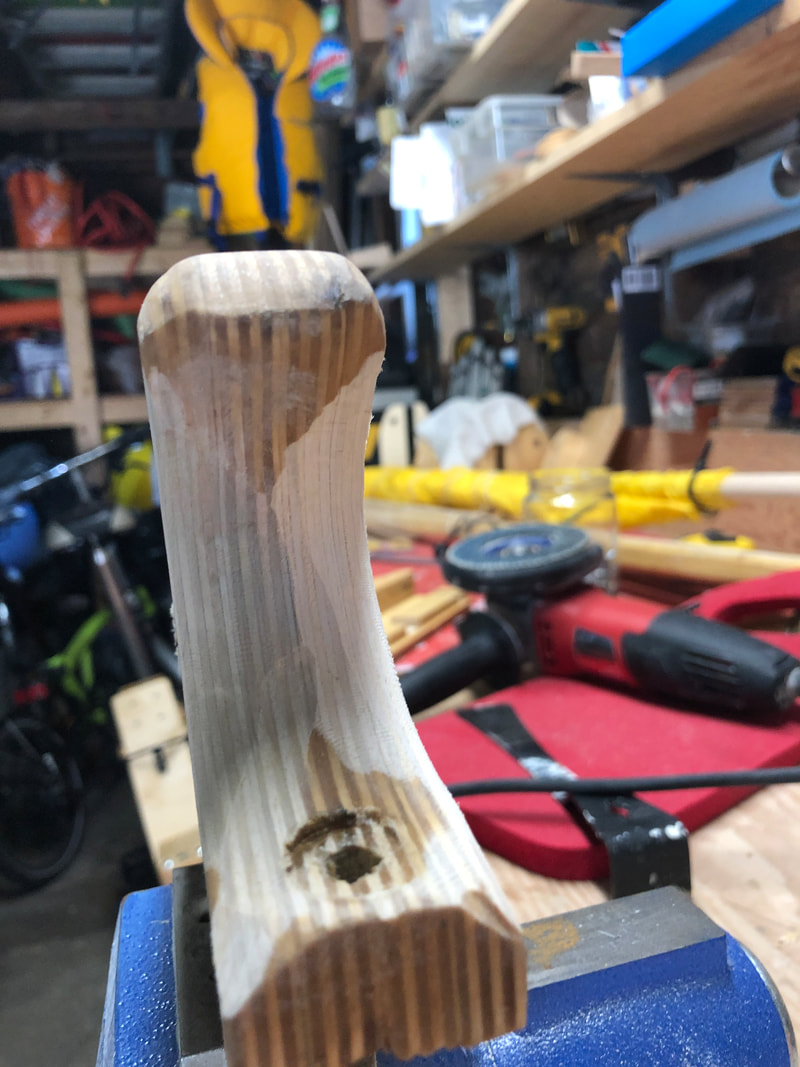
28. Oar lock adjustments
|
Each time I rowed a stroke, I would hear an annoying click as the oar rolled over the edge of the oarlock. It was time for an upgrade so in May of 2022 I glued extensions on the oar outlet part of the oarlock. It was a simple little project and the result was smooth oar action.
The two holes you see in the oarlock are the result of adjusting where the ball bungee was threaded through. The second hole made for a more appropriate tension on the oar. 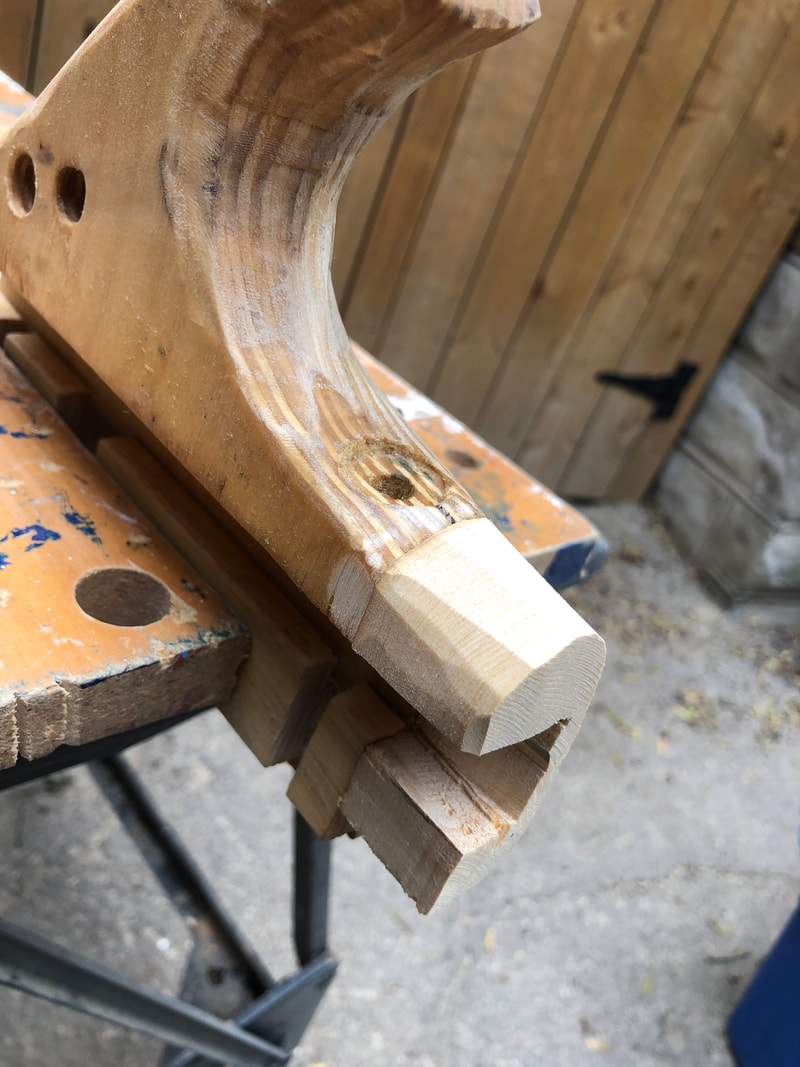
|
Smooth action at the end of the pull. It use to 'fall off' the end.
|
29. Second set of oars
|
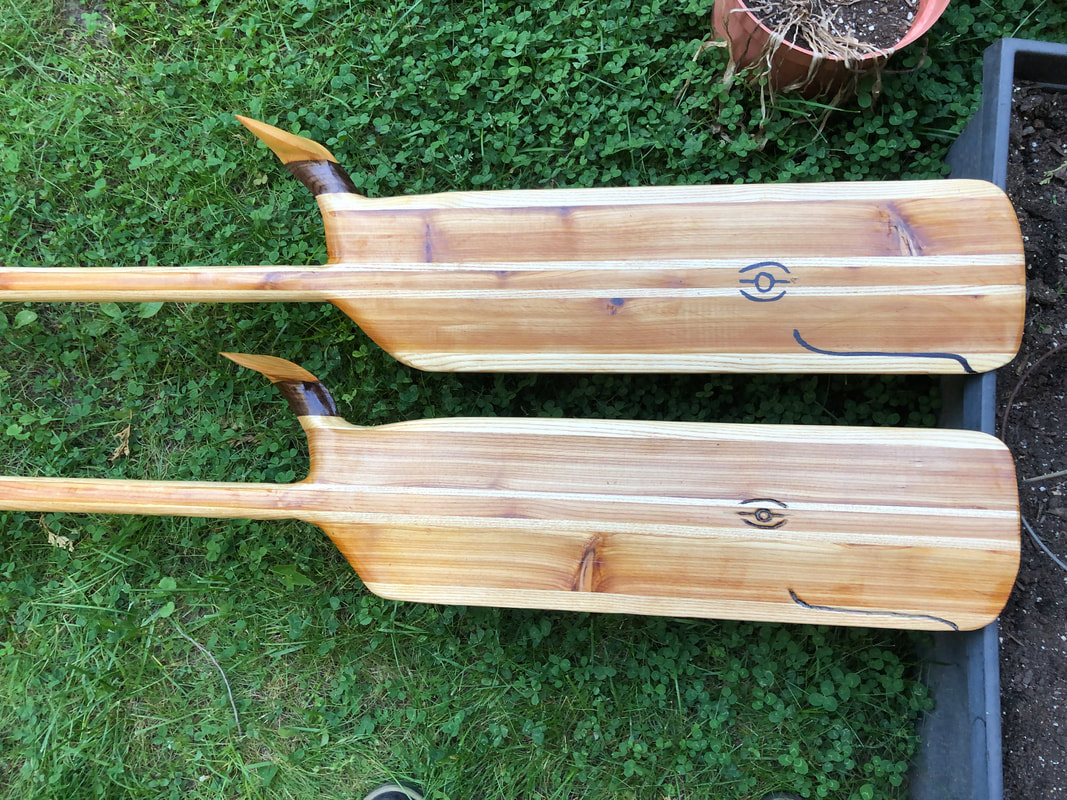
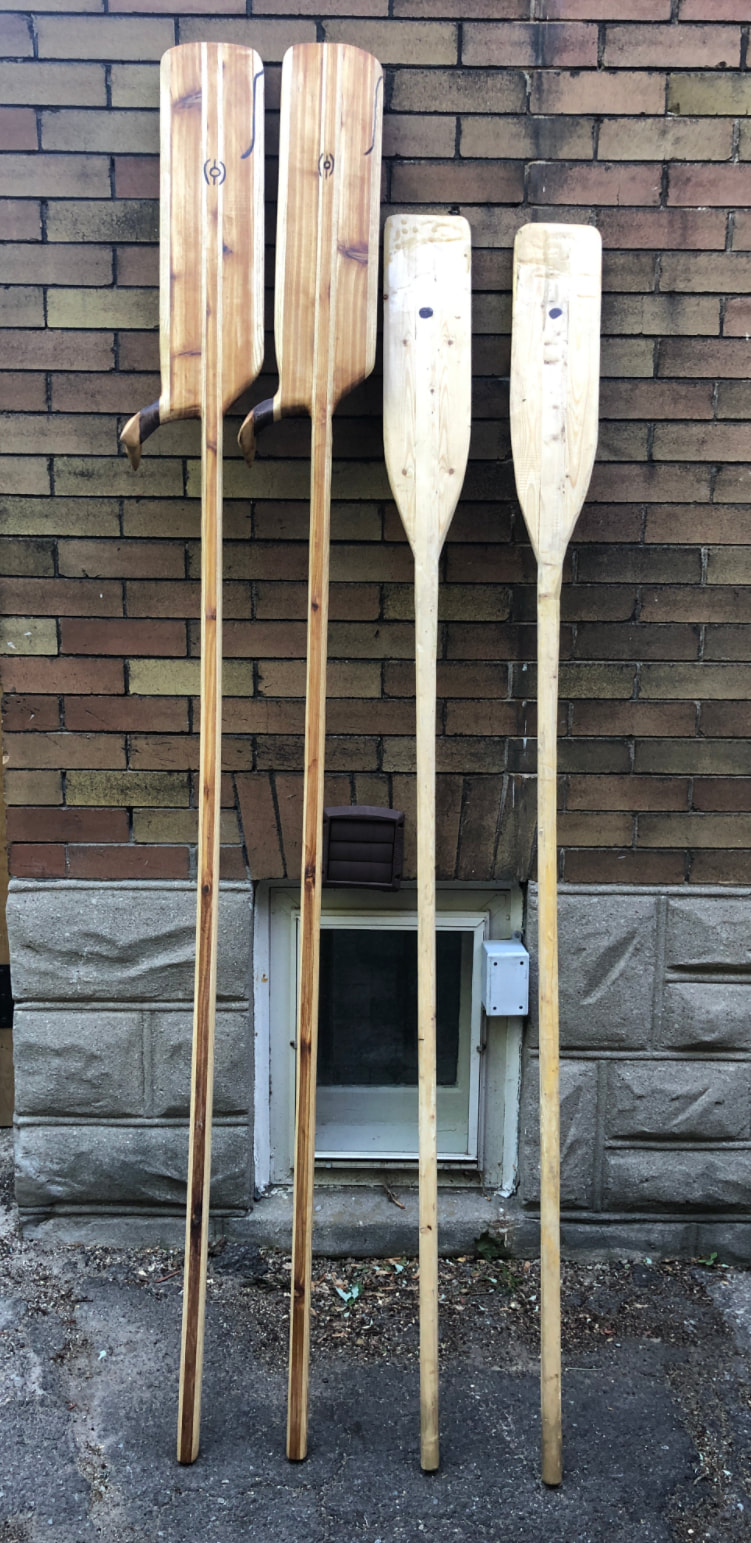
My first set of oars was made out of an old (split) 2 x 4. It was time to upgrade. I had recently had fun making two canoe paddles for my son and daughter-in-law and decided to use my new skills on a set of oars.
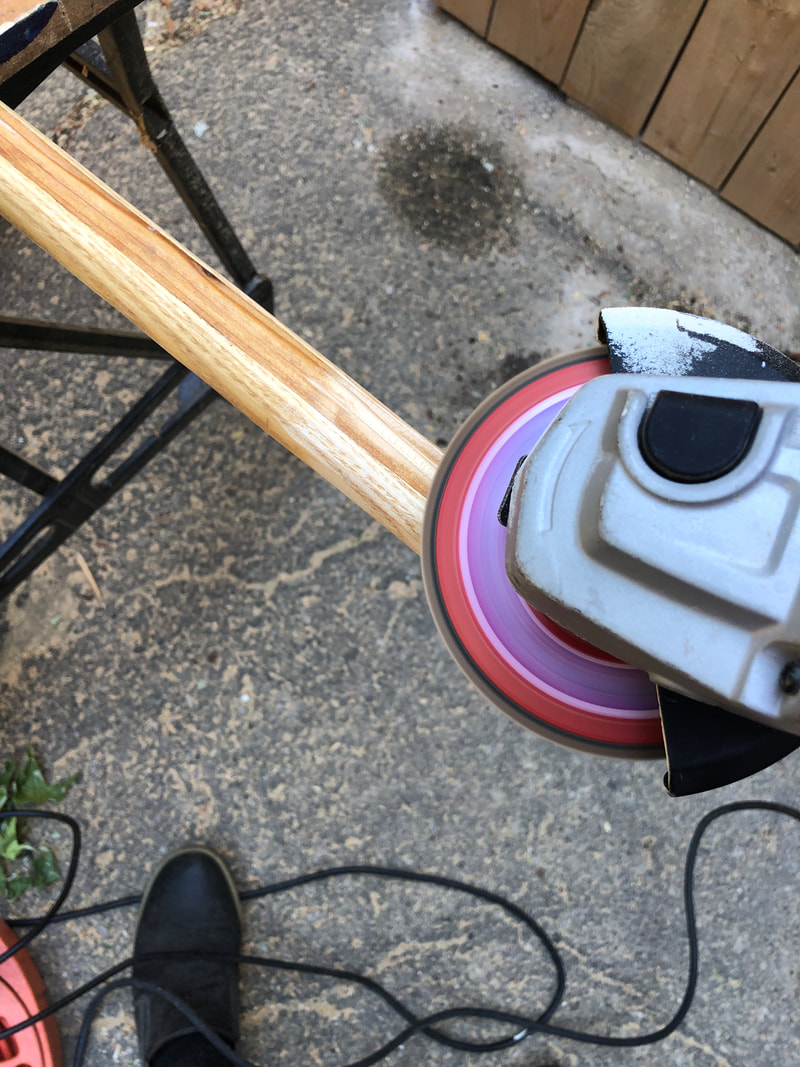
I decided to make them look like sperm whales. I'm not sure where I got the idea, and it certainly seems a bit weird now, but why not! The wood had a (light weight) piece of cedar down the middle, hugged by (strong) ash. The blades added more cedar and an outer strip of ash again. The tail highlighted a piece of black walnut that had fallen down at my son and daughter-in-laws home and a piece of pine for the actual tail. The pine was harvested from a porch renovation of a home down the street where Supertramp used to stay when they were performing in town. So I can say that this famous group walked on the wood in my oars. I coated them with 3 or 4 coats of Tung Oil, and then Corey's Mighty Bull's Wax. When I tried them out (June 20, 2022) they were 'heavy' and 'fast'. So my plan is to shave them down to reduce weight. The grip is also a bit big. Update: June 23/24. I took a sanding grinder to the power side of each oar making them more scoop-like. This increased the pull power and reduced weight. I also had to reattach one of the whale fins! It had broken off during the last bike/boat trip to the water. Another biker gave me the bad news which made me hit the brakes and then a runner on the trail ran up with the fin. Thank you! I glued it back on as part of this work effort. I also reduced the size of the grips--see caption on related picture. After more Tung oil and Bull's Wax, it was back to Victoria Park. In the end, I had great grips, two fins in place, reduced weight and lots of power. See below (#32) for another change I made during this iteration involving the transom. |
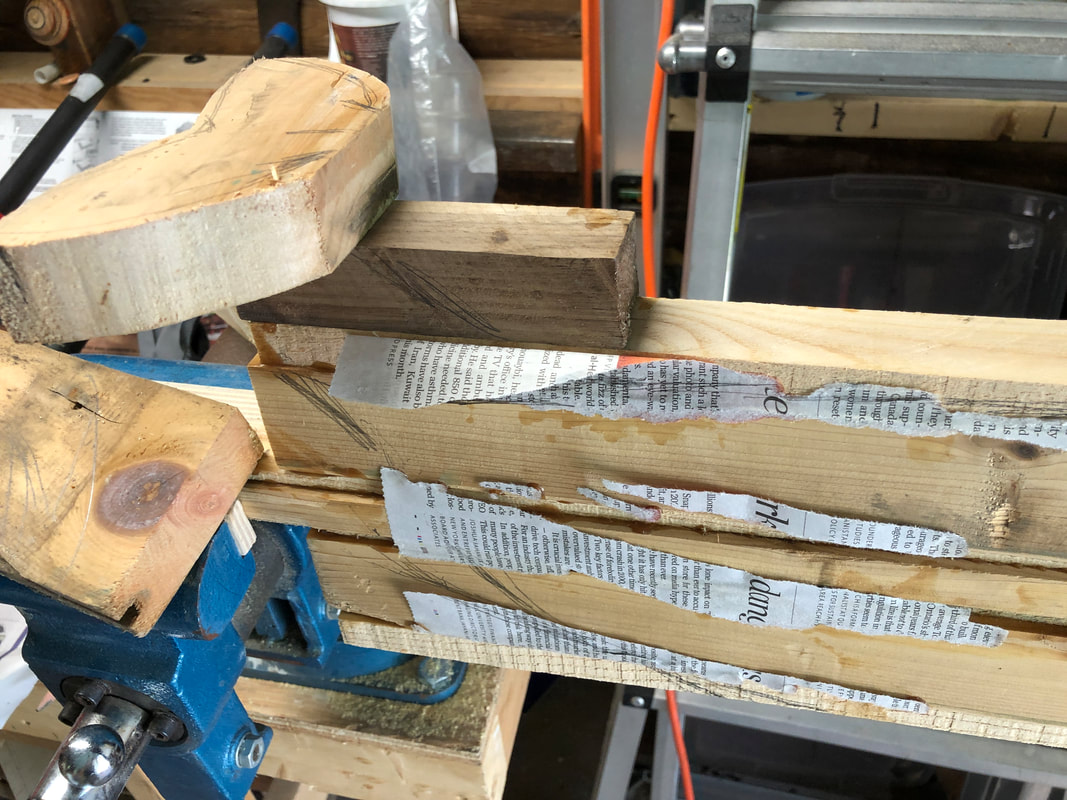
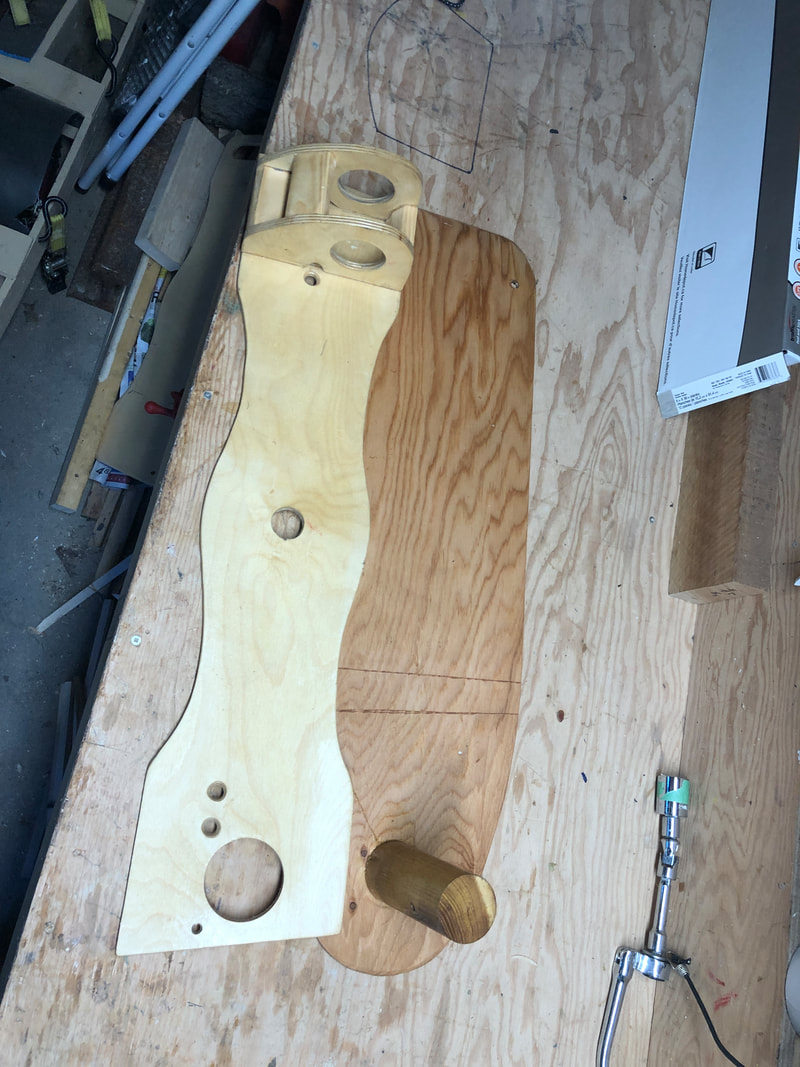
Here is the initial glue up of the blade. Note the initial blocky look of the whale fin. I had placed newspaper under the glueup to protect my workbench. I began the shaping process using a power hand planer.
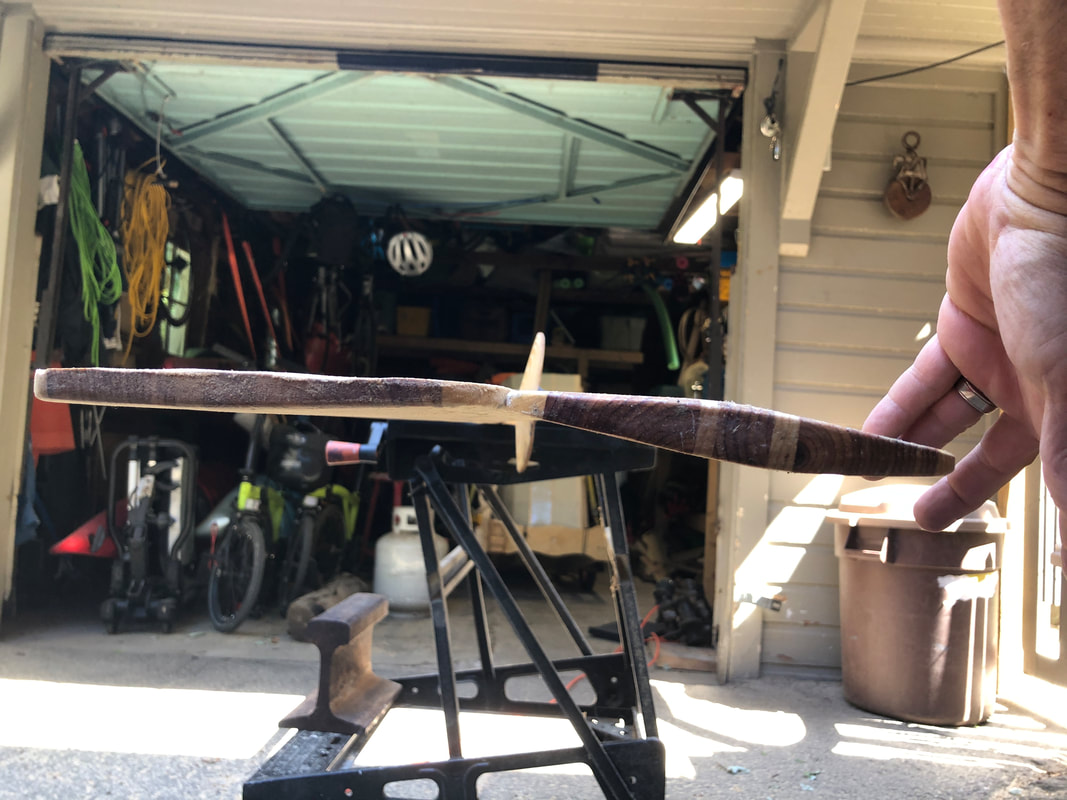
Here is a picture of the ends of the oars. The left one has been taken down. Soon I would deal with the right oar. In the end, the flex was still good and the weight was lower.
|
The fin stayed attached to the 'whale'!
|
|
30. Improved Leeboard
|
My boat has no slot for a centerboard, so we are stuck with only the leeboard option for stability during sailing. My first leeboard was a failure.
My new plan was to make it bigger. Before I use it, I think I want to have a better rudder solution. I also have to make sure it can pop up when it hits something on the bottom! In these pictures (June 20, 2022) I show the newer (larger) leeboard. The lighter (baltic birch) wood has a new large hole drilled into it to allow the axle of the leeboard to fit through. This nesting of the two parts during travel ensures it doesn't drag on the ground as it hangs off the back end of the trailer. I still need to resolve how to keep it in the correct position while being able to pop up if something hits it. 
|
|
31. Boat name
|
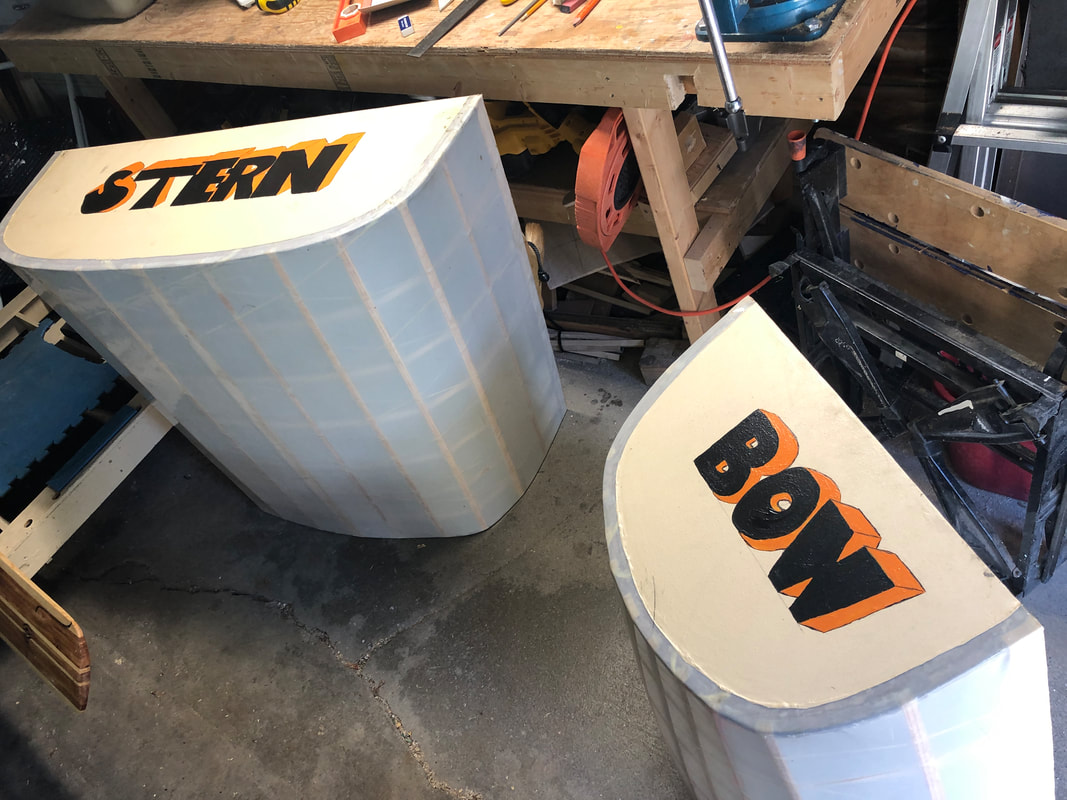
It was time to have a name appear on the boat. I've called it the UB1000 (reasons described elsewhere) but that seemed boring for the actual boat.
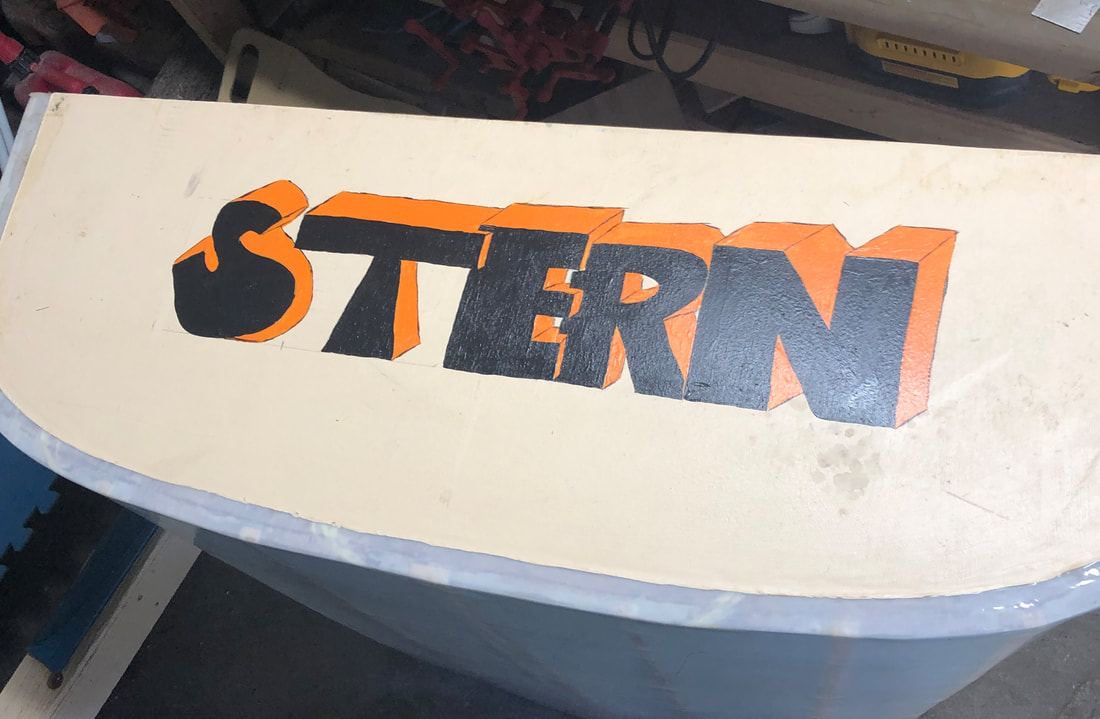
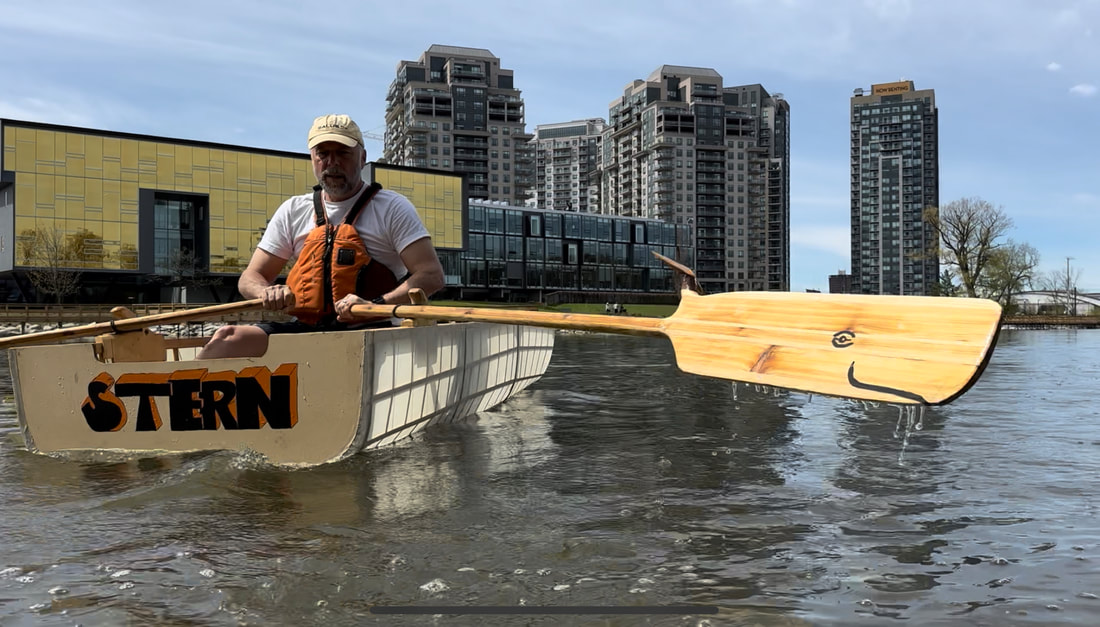
My wife came up with a cool idea: B-OA-T which is what it is. The dashes help highlight the three part nature of the boat. I started tracing this idea on the stern of the boat (June 21, 2022) and it didn't look right. Then it hit me--call it STERN! And then I could call the front BOW! Being a teacher for a lot of my working career, I'm forever looking for educational opportunities and this would be fun. I usually have a couple of very interesting conversations each time I go out for a row in Victoria Park. Now everyone who observes my boat will get a lesson in what we call the front and back ends of the boat! I can't wait to put it in the water! I would later fix the W. LOL |
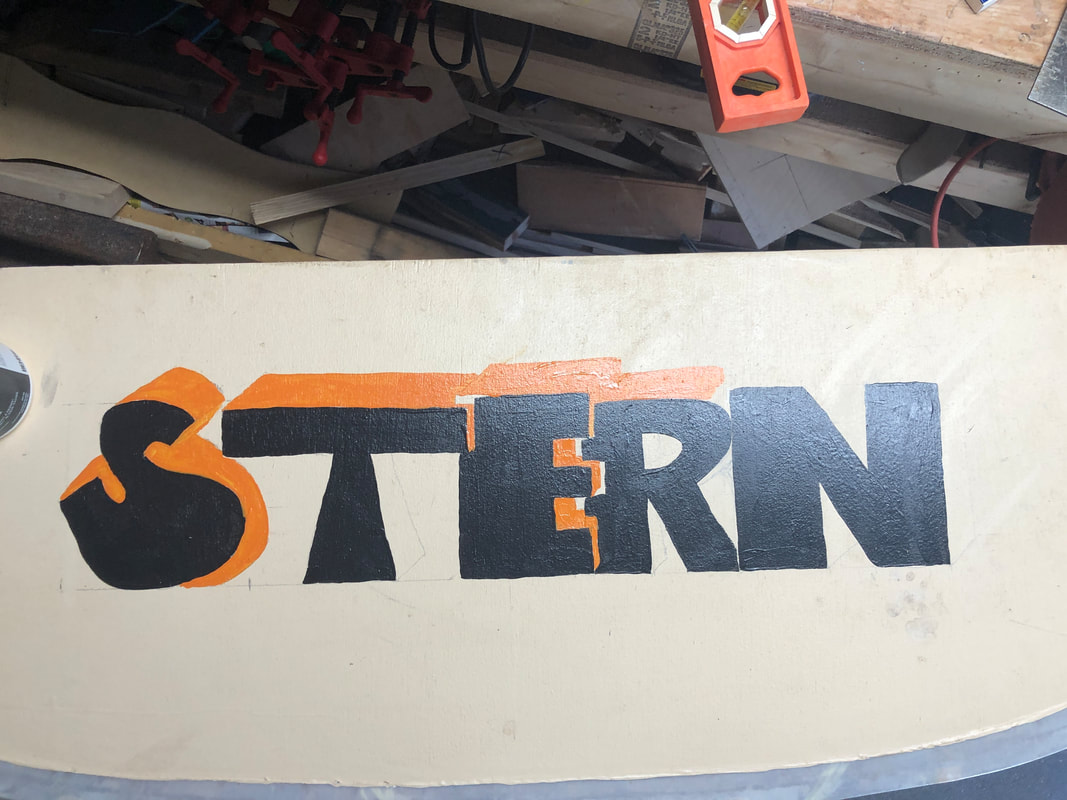
In process picture. Not sure I like what I did with the E/R combo.
|
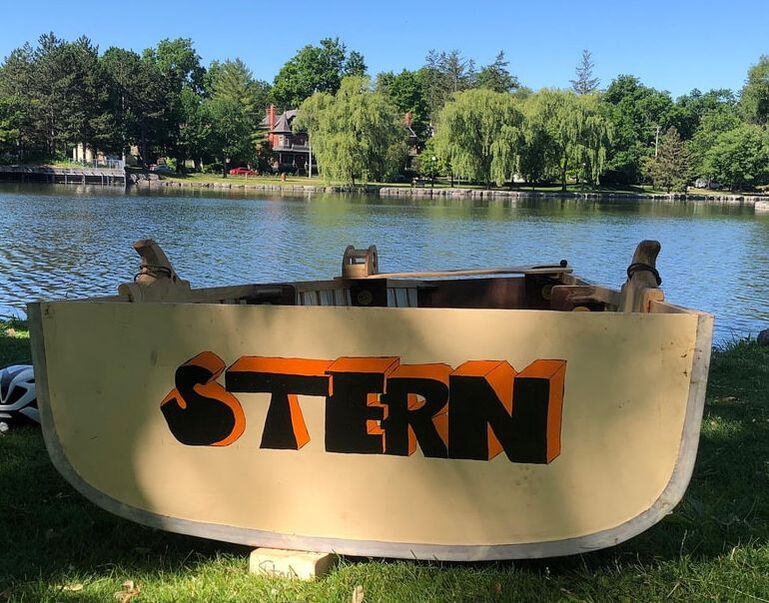
32. Transom adjustment
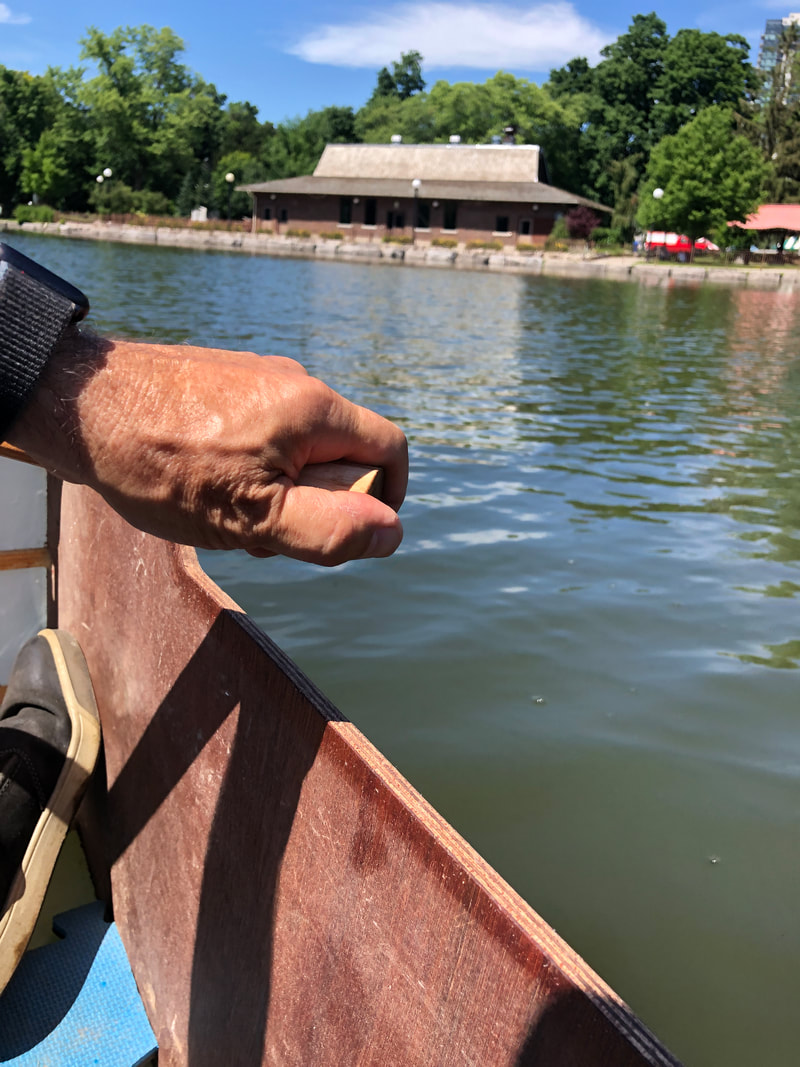
I noticed that as I rowed my fists gripping the oars would hit the transom.
If I could lower the top edge of the transom a little I would avoid the annoyance.
But I had just painted on the word 'STERN' on the transom so I had to be careful not to take off too much. I had no concerns with structural integrity and went ahead with the cuts.
If I could lower the top edge of the transom a little I would avoid the annoyance.
But I had just painted on the word 'STERN' on the transom so I had to be careful not to take off too much. I had no concerns with structural integrity and went ahead with the cuts.
Before the cut.
|
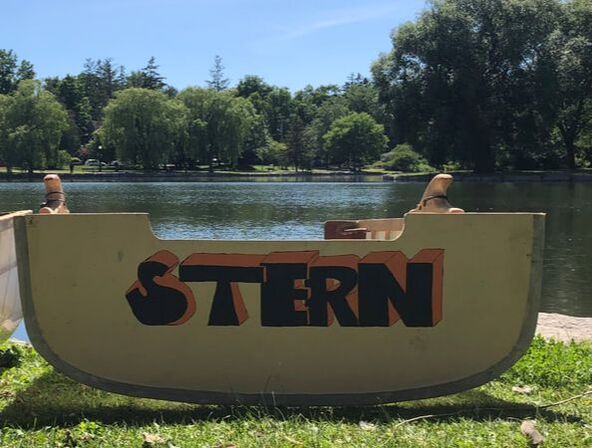
After the cut.
|
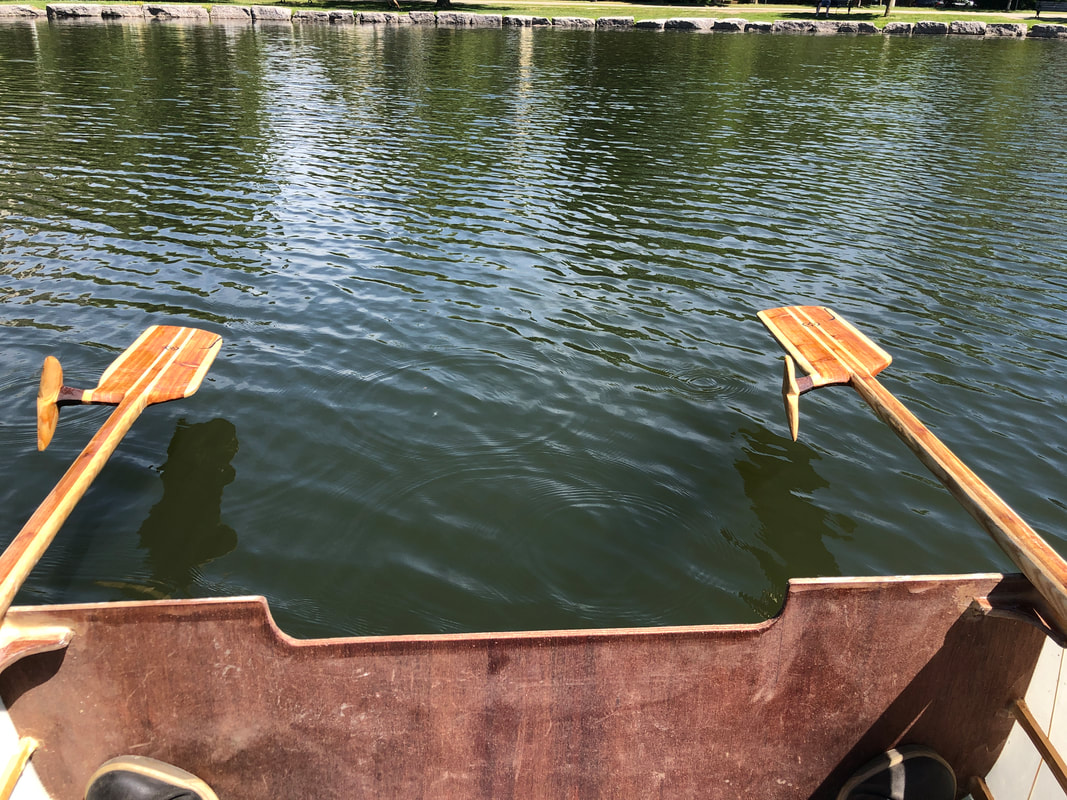
The cutout view from the rowing position in the boat.
|
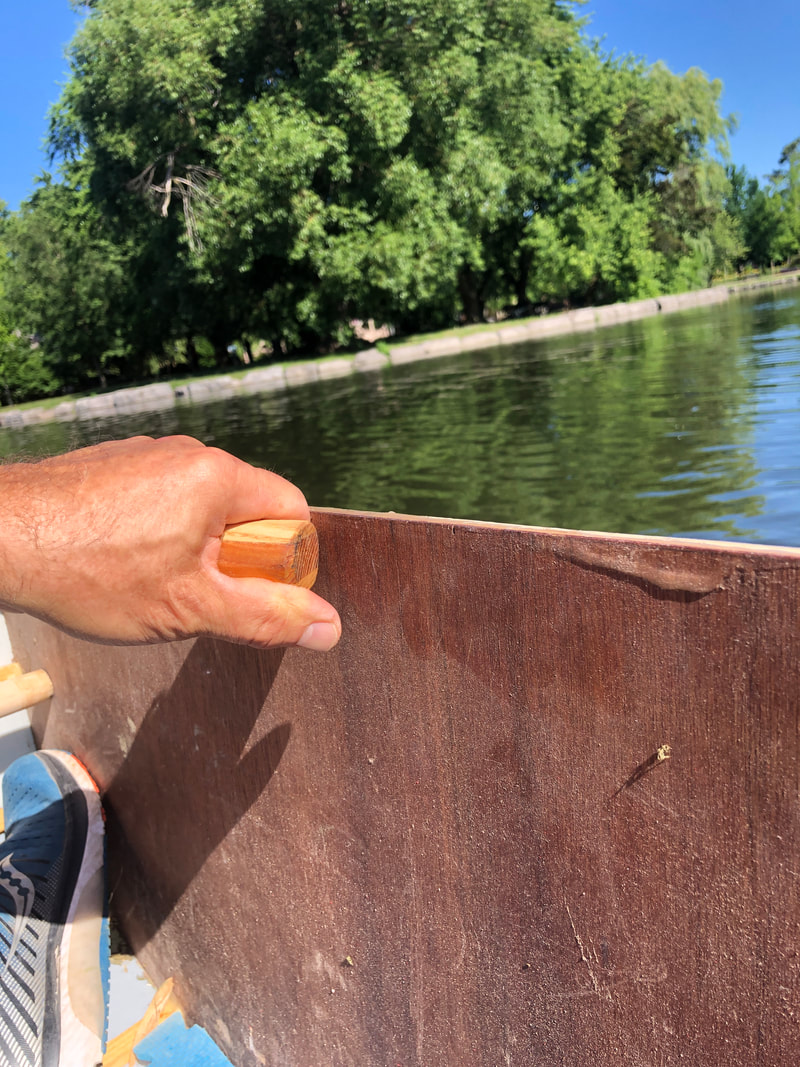
The transom was just a bit high.
|
Lots of room for my hand after the cut.
|
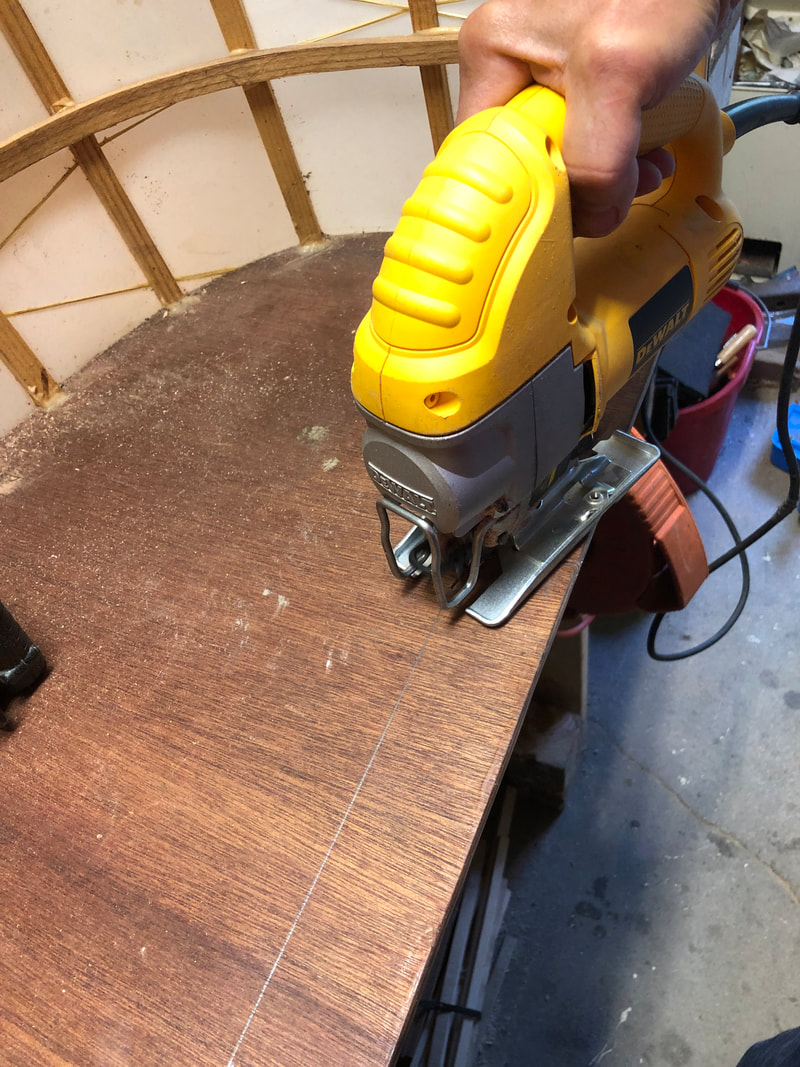
Jigsaw for the curves.
|
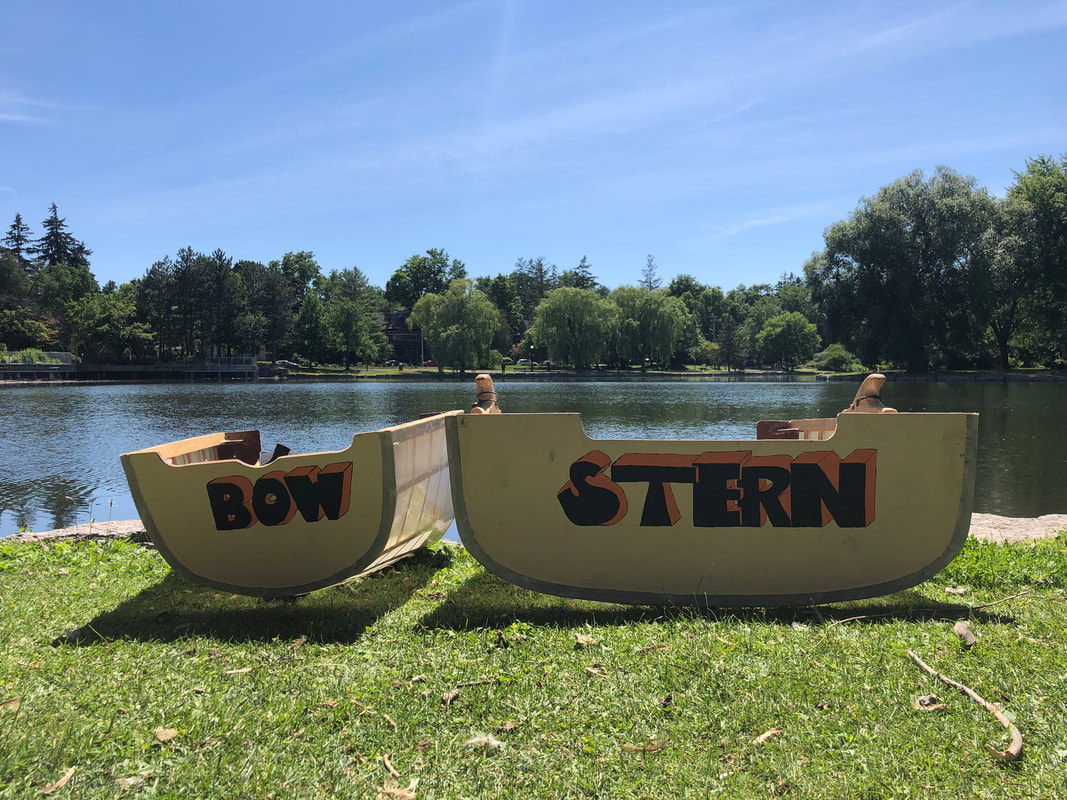
And just for fun, I cut a bit out of the BOW too. (And fixed the W compared to the original paint application). LOL
|
33. Trailer adjustment
The front of the trailer would sometimes bottom out when I came down off a cut curb as I crossed streets on the Iron Horse Trail. I decided to trim a little off to both reduce this possibility and make the impact more of a slide vs a hit if and when it did happen.
I made the quick cut and have not experienced a bottom out since.
In a separate work session I drilled a number of holes in the trailer. I think it improved its appearance and reduced weight.
I made the quick cut and have not experienced a bottom out since.
In a separate work session I drilled a number of holes in the trailer. I think it improved its appearance and reduced weight.

Trailer before. Note the front edge that might have caught on a curb.
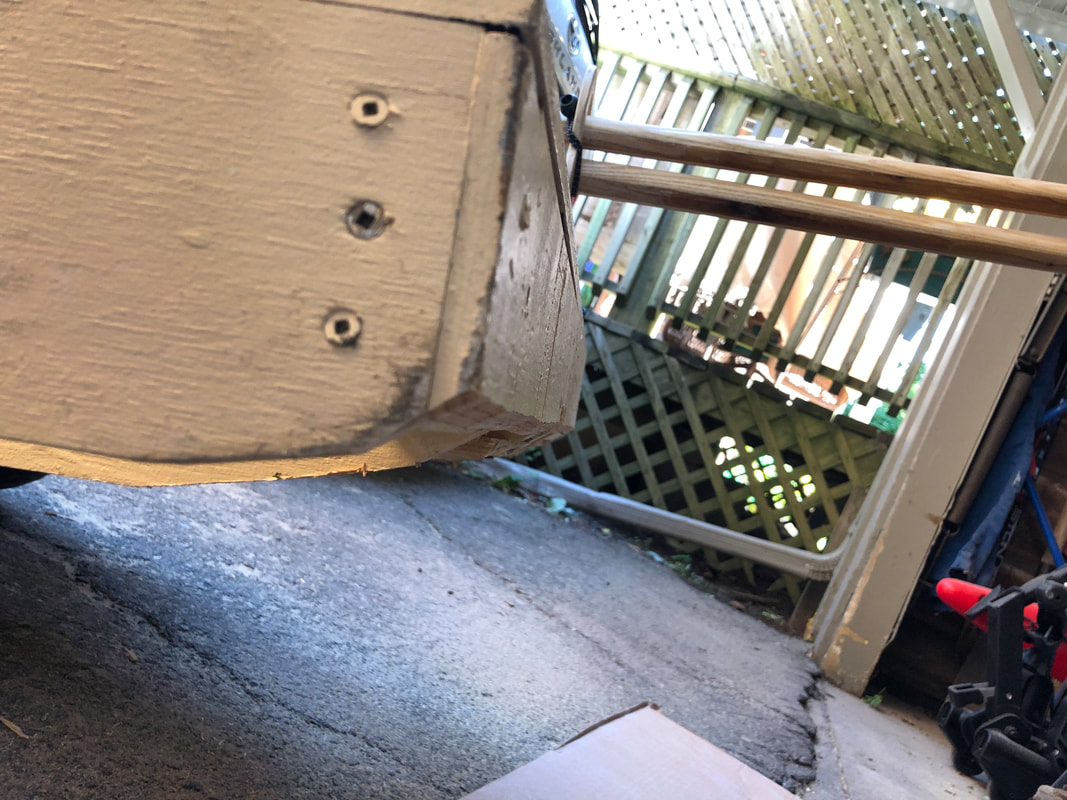
After. A subtle change that eliminated all bottoming out.
|
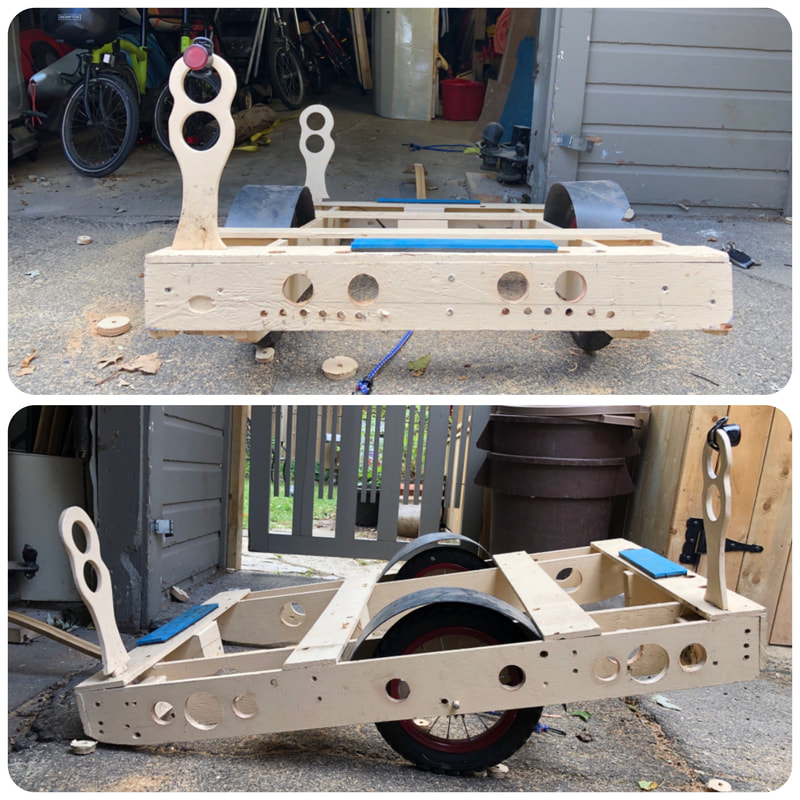
Drilling holes reduced the weight made the appearance more funky. Perhaps I had too much time on my hands. The hole placement could have been more refined as well.
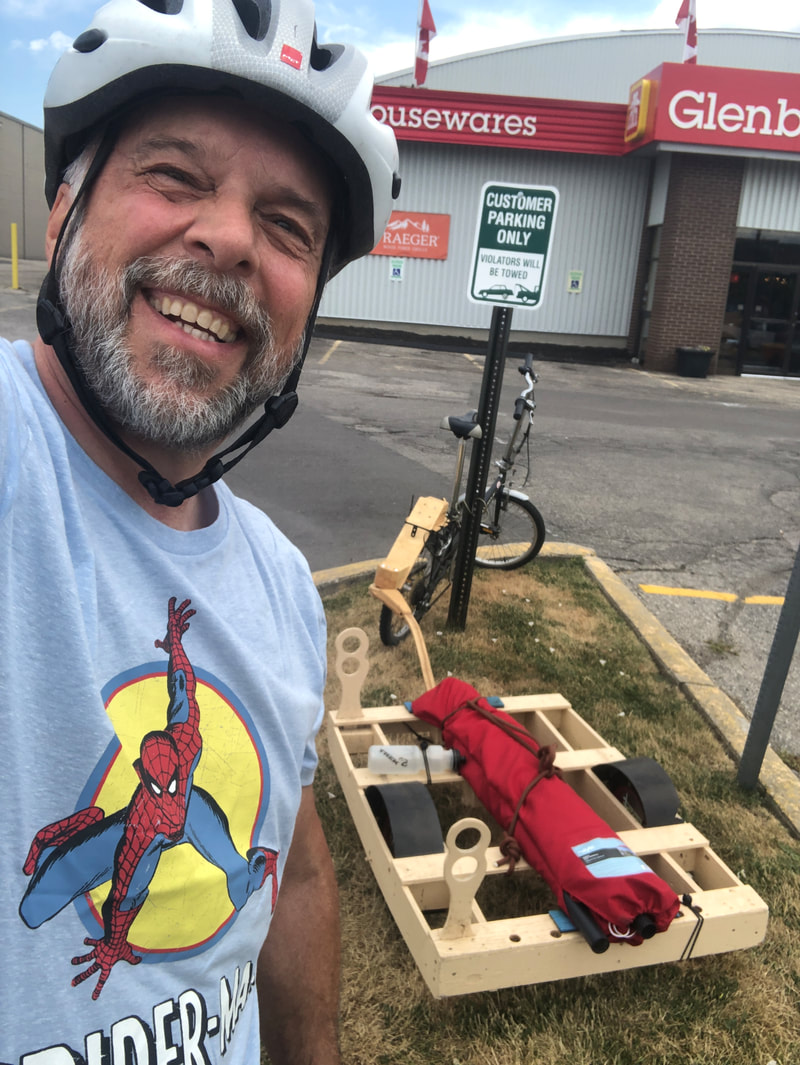
Bonus: the trailer also works well for other important tasks like riding to the hardware store to get a patio umbrella on sale.
|
34. Launch in Silver Lake, Waterloo!
May 8, 2023.
It happened!
I biked down to Silver Lake in Waterloo, put my little 36lb boat together and went for a row. Over two years ago, this was my ultimate plan and it worked!
The ride took about 5 minutes and the spot I had scouted out to launch my boat worked well.
It happened!
I biked down to Silver Lake in Waterloo, put my little 36lb boat together and went for a row. Over two years ago, this was my ultimate plan and it worked!
The ride took about 5 minutes and the spot I had scouted out to launch my boat worked well.
|
|
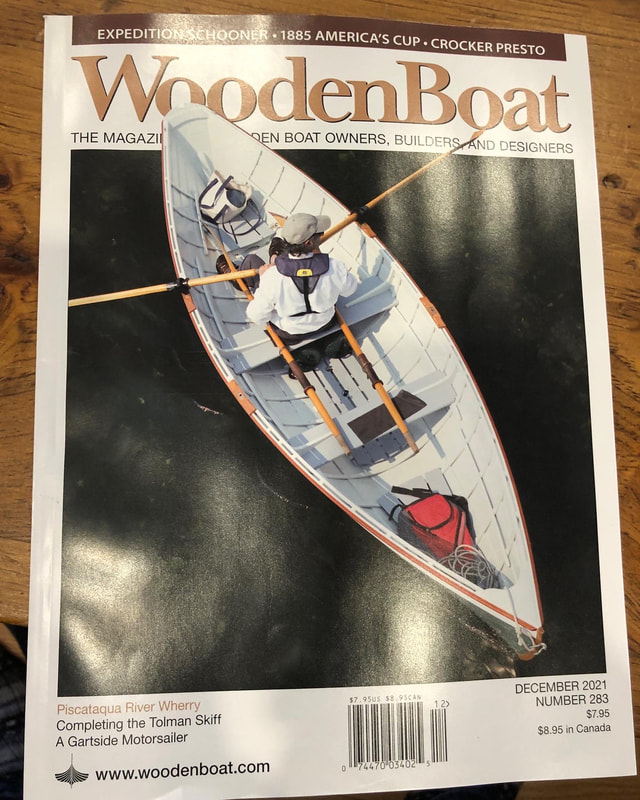
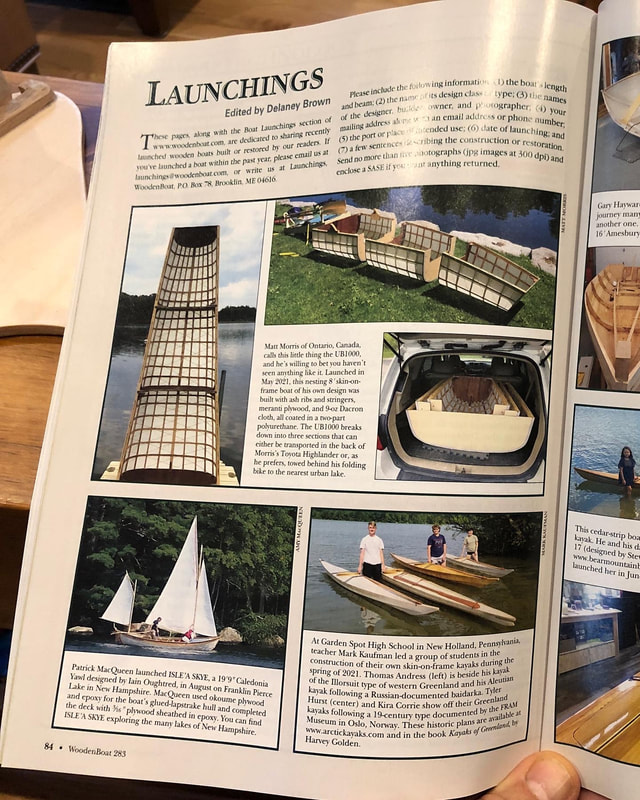
Sharing my story in publication:
|
It was great fun getting written up in the LAUNCHINGS section of Wooden Boat Magazine and it's sister publication Small Boat Magazine!
Click here to read the article in Small Boat Magazine. 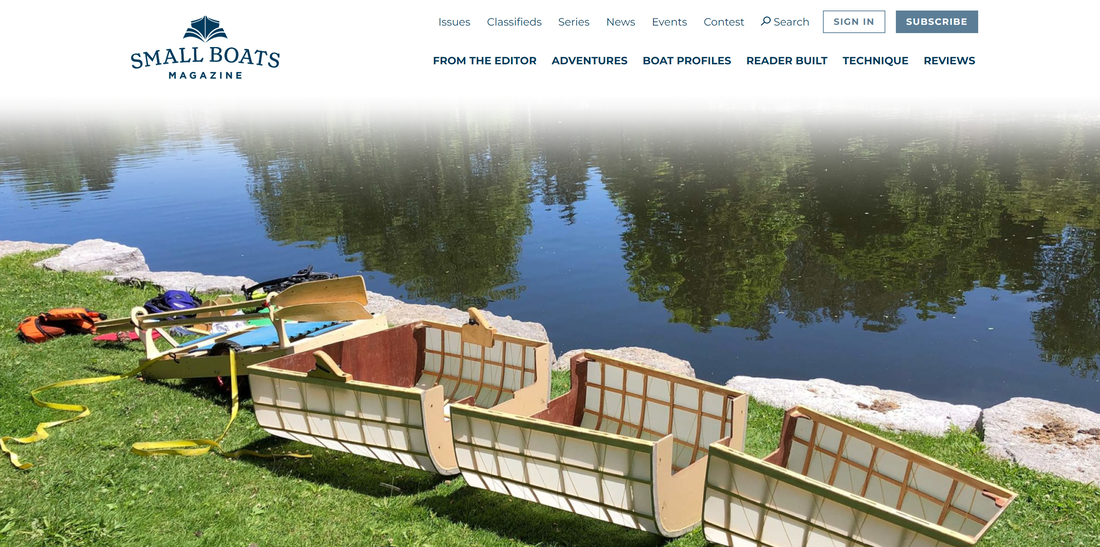
|
|
|
Update June, 2023. I wrote a little article for Our Canada (Readers Digest) magazine June/July 2023 edition. Here I am opening my mail on our front porch to see it in print. |

|
Frequently Asked Questions: FAQ
As I row around Kitchener's urban waterway in Victoria Park, there are a few common questions that I thought I should answer here. I hope it is helpful should you be curious to learn more.
1. What is the skin made of?
The skin is 9oz Dacron which is basically polyester.
3.7oz dacron has been used for years within the home built airplane community for wing coverings. This 9oz material sounds tougher so that is what I chose. Some feel it's harder to work with--specifically, harder to iron (shrink) but I found it wonderful to work with. It's then coated with a 2 part urethane that is carefully mixed and applied with a roller. 3 or 4 coats should do it.
People in this community often use Nylon as well.
2. What does it weigh?
36 pounds.
3. Did you design that boat?
Yes! I believe it to be the world's first three part, nesting, skin-on-frame boat.
4. How many hours did it take you to build?
Good question. If I logged each hour, maybe 60?
I would guess that most estimates of build time should be doubled.
Designing and building this boat was a passion projectd during the pandemic spring of 2021. The hours passed by and I had no interest in logging them. There is an infinite number of hours that can be added over time as new ideas and challenges surface.
I see any project as having 3 phases:
1. Planning and buying/gathering materials
2. Executing the task.
3. Clean up and reorganising work areas.
5. What question do you have for me?
Feel free to use the form below.
